
How to Make a Chocolate Cup – It’s Shockingly Simple
Making chocolate cups is so easy that even a toddler can do it! Learn how to make these pretty treat cups with your favorite chocolate. It’s a fun activity for both kids and adults!
You can’t bake in chocolate cups, but once you learn how to make a chocolate cup, you’ll find yourself filling them with many different foods:
- peanut butter
- candy
- ice cream (like my key lime ice cream)
- chocolate mousse
- berries and cream (or maybe simply strawberry whipped cream)
- edible cookie dough
Ingredients and Equipment
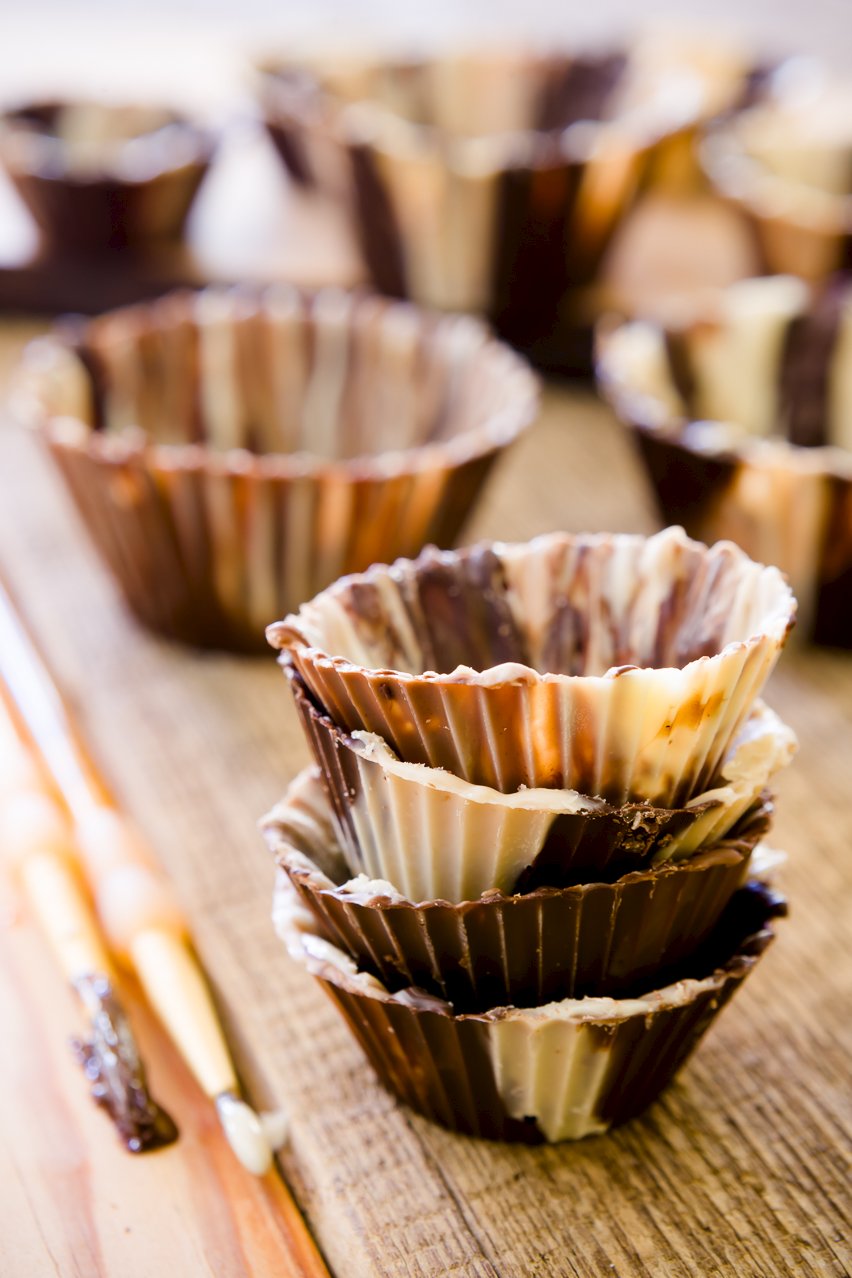
To make this recipe, you’ll need six ounces of semisweet chocolate and six ounces of white chocolate. I like to use both kinds to create a striped and marbled look.
Tip: Chocolate discs or a chopped block of chocolate are better for melting than chocolate chips. Chocolate chips are designed to hold their chip shape and don’t melt as well. Some chips, like Nestle white chocolate chips, won’t melt at all. Also, because you want the cup to be nice and shiny, you should start with tempered chocolate; very few chocolate chips are tempered.
You’re going to need silicone cupcake liners [paid link]. They are much easier to work with than paper ones as you can easily pull the chocolate cup away from the silicone. Some people have said that they have had success with thicker paper cups; your mileage may vary.
A paintbrush is also essential – any cheap, small paintbrush will work well.
Tip: Reserve a special paintbrush for baking tasks. You don’t want to use a brush that has ever had paint on it. Remember, this might go in someone’s mouth (see above).
How It’s Made
To make chocolate cups, start by tempering your chocolate. This doesn’t take long to do if you follow my method of tempering using a microwave and it will yield a shiny end result.
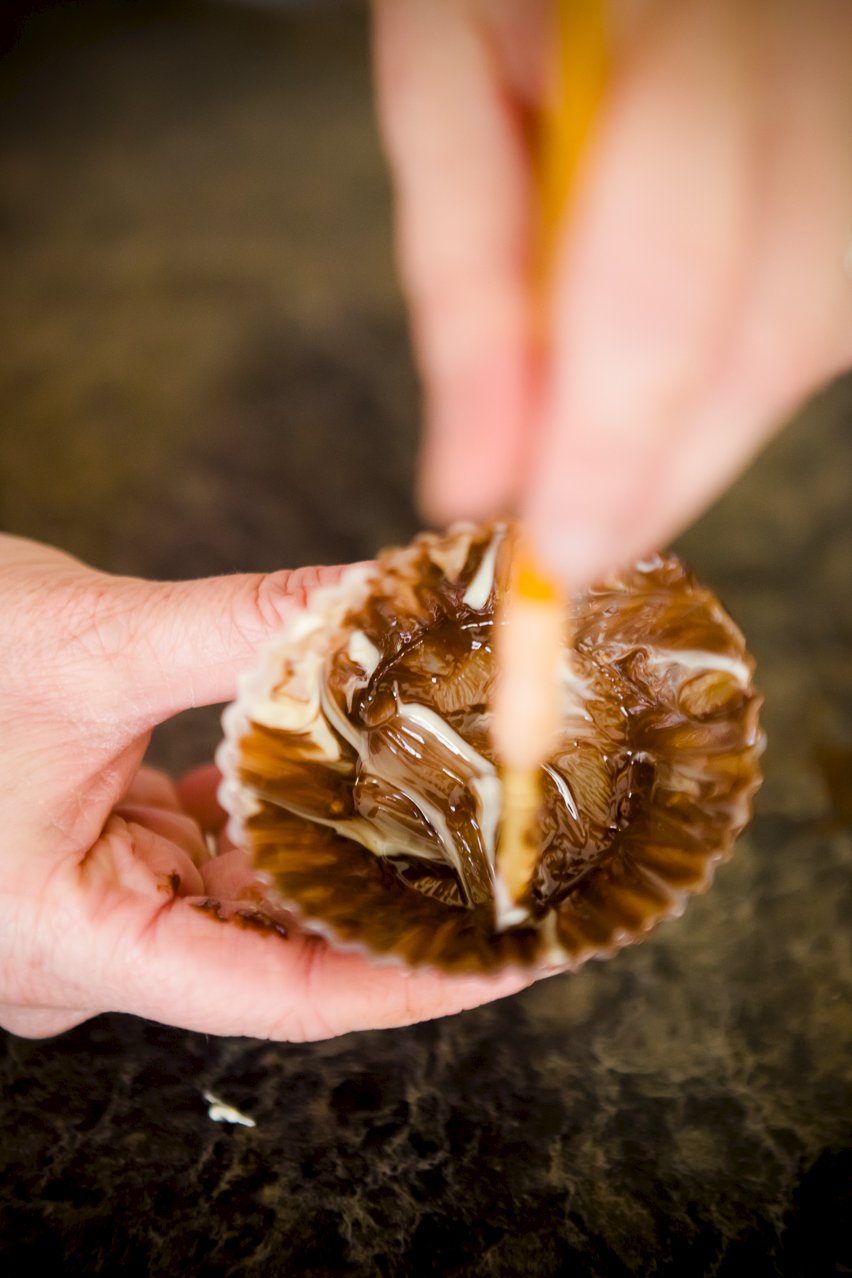
Next, paint the insides of silicone cupcake liners with melted chocolate.
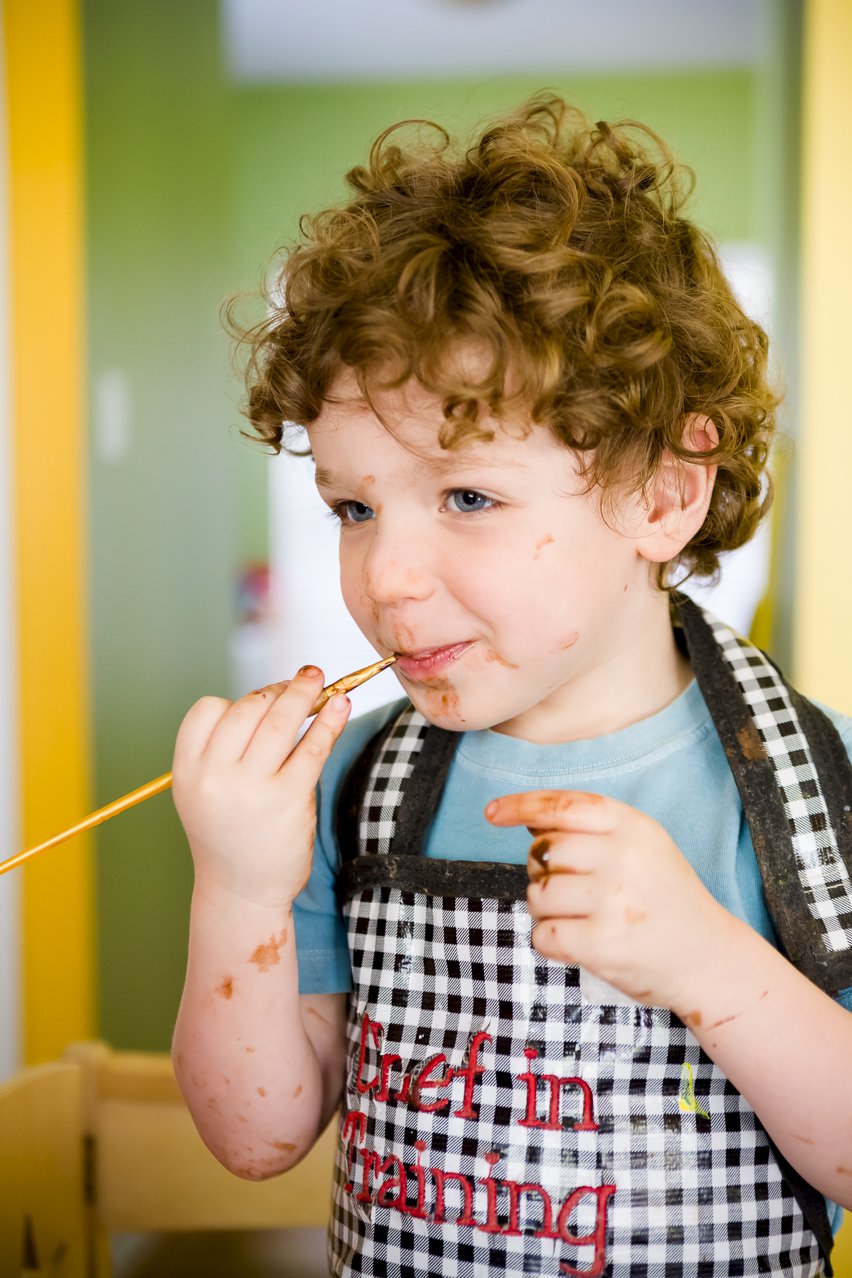
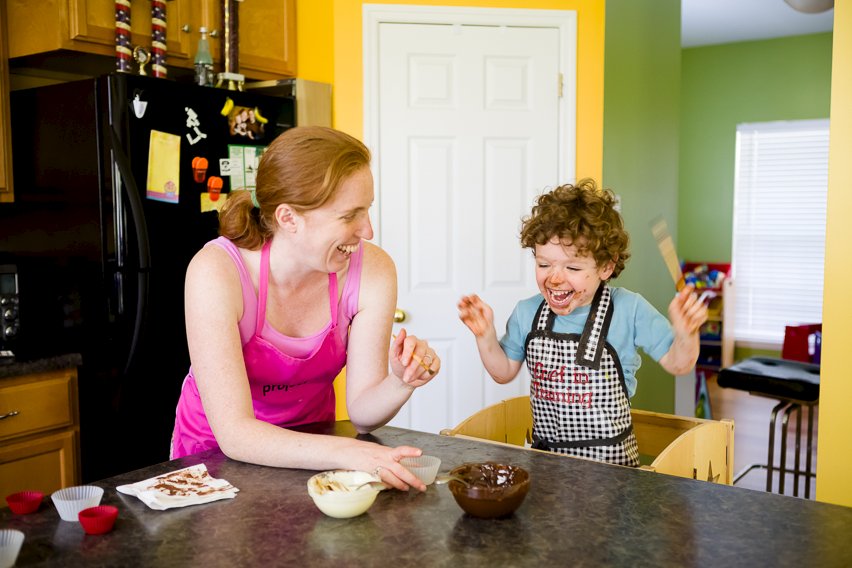
Tip: This is a really fun task for little kids. What toddler is going to say, “No,” to paint that you can eat? As a toddler, Myles was clearly jazzed about the task.
His excitement didn’t show any signs of declining as we moved through the project.

We were eventually able to focus and get down to business to get the job done.
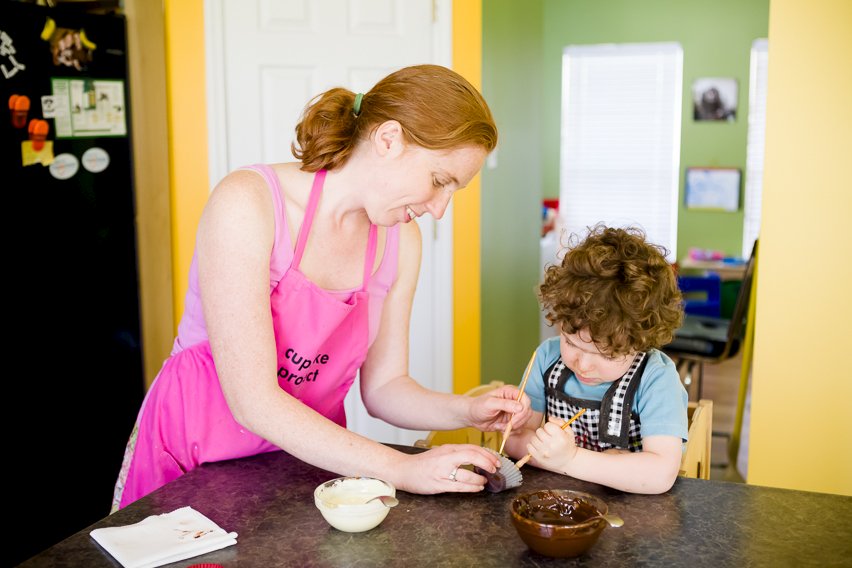
Once the chocolate is painted all over the silicone liners, refrigerate the liners for at least 10 minutes.
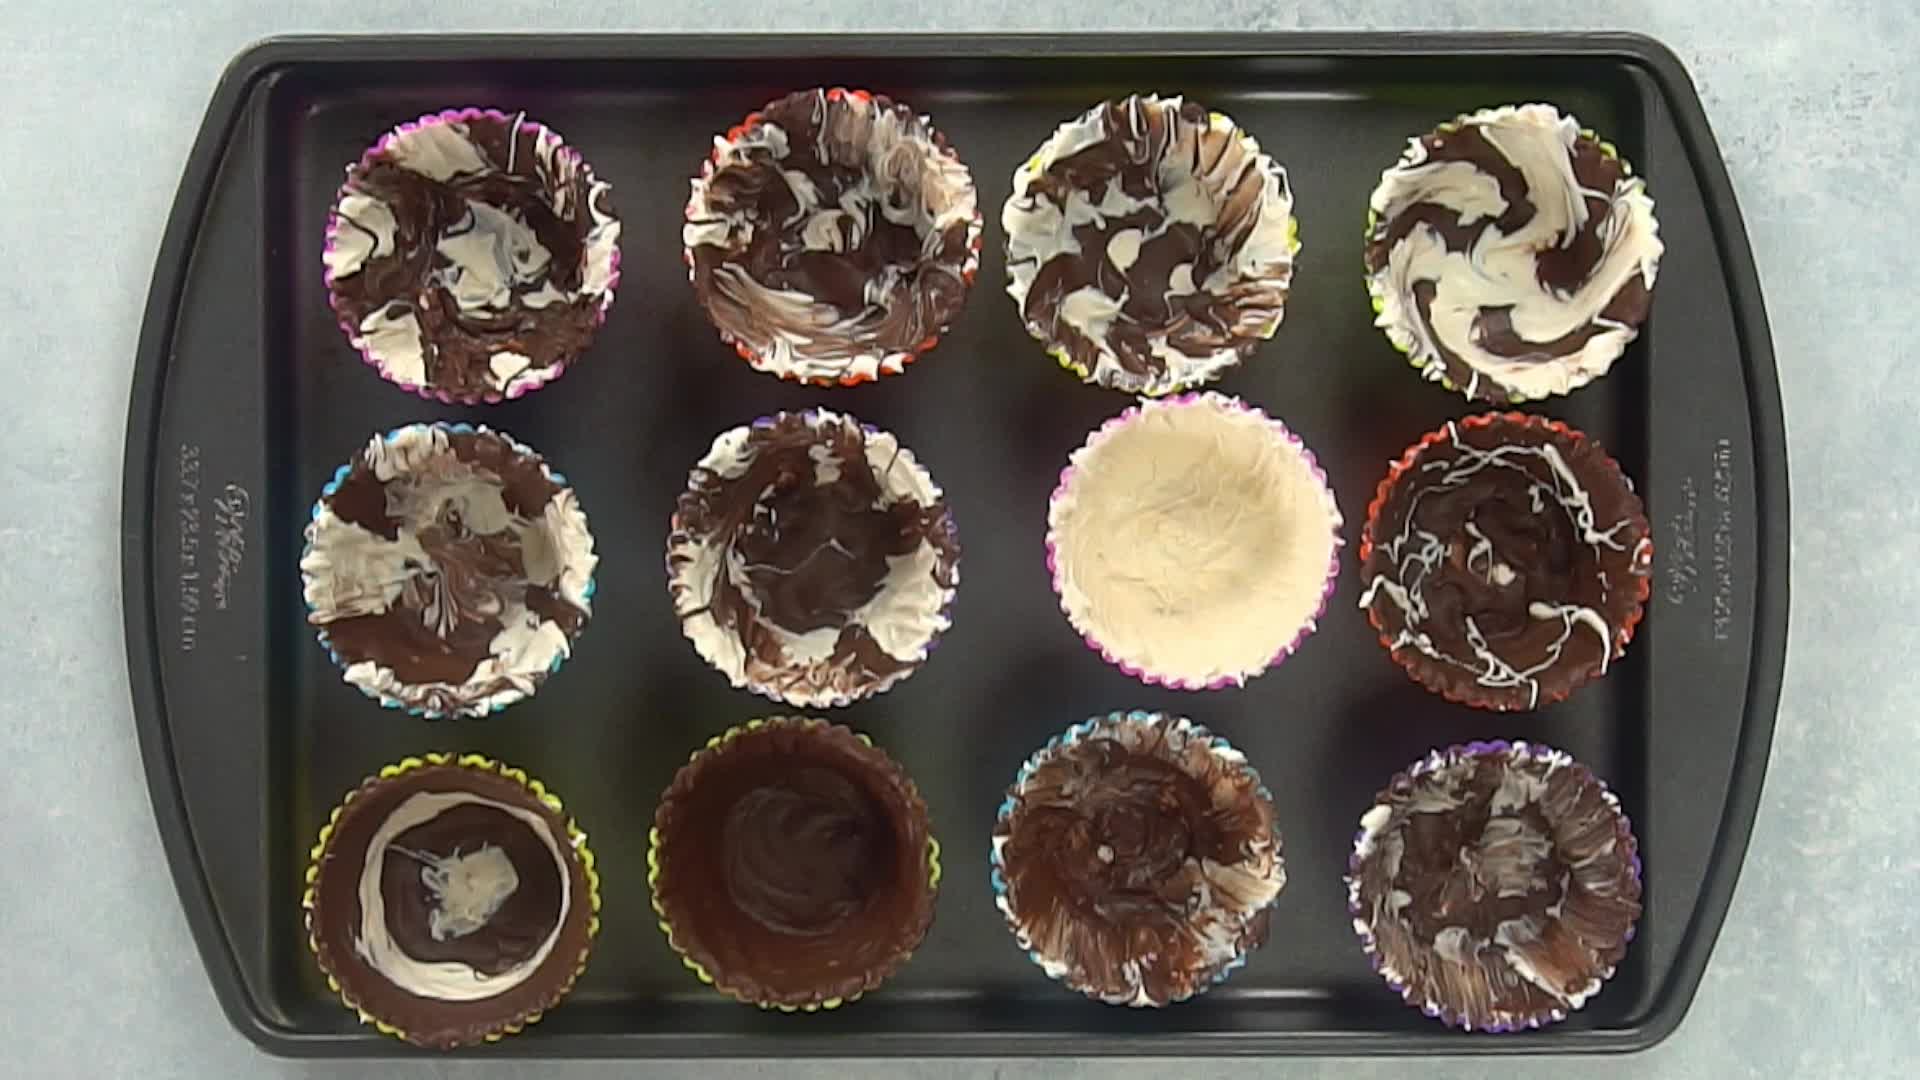
Then, repeat the process and add a second layer of chocolate. The thicker the chocolate is in the end, the less fragile the cups will be and the easier it will be to work with them.
Expert Tips and FAQs
As you can see from the photos, I chose to use a mix of white and dark chocolate for my cups. You, however, can use whatever kind of chocolate you like.
In order for the chocolate cups to come out properly, you must temper the chocolate first. Tempering is a special way of melting chocolate that makes it look shiny when it dries. When chocolate isn’t properly tempered, it can look dull and gray when it dries.
There are many ways to temper chocolate. You’ll see in my post on bonbons
that when a pro tempers chocolate, they often do so on a marble slab.
I like to use the microwave method where you melt almost all of your chocolate, but leave just a little unmelted to stir in at the end. You’re going to have to start off with tempered chocolate to use this method. I go into far more detail in my post on tempered chocolate.
Chocolate cups can be stored at room temperature just like you would store a bar of chocolate. Keep them in a covered container (it doesn’t have to be airtight).
They will last a really long time. I’ve kept them as long as one month, but they would likely last far longer.
Yes; the melted chocolate hardens into the shape of whatever you are painting it onto. This is the same technique that people use to make chocolate bowls using blown up balloons.
I encourage you to experiment with different sizes and shapes of silicone cupcakes like triangles [paid link] or squares [paid link]. You can also make smaller chocolate cups using silicone ice cube trays!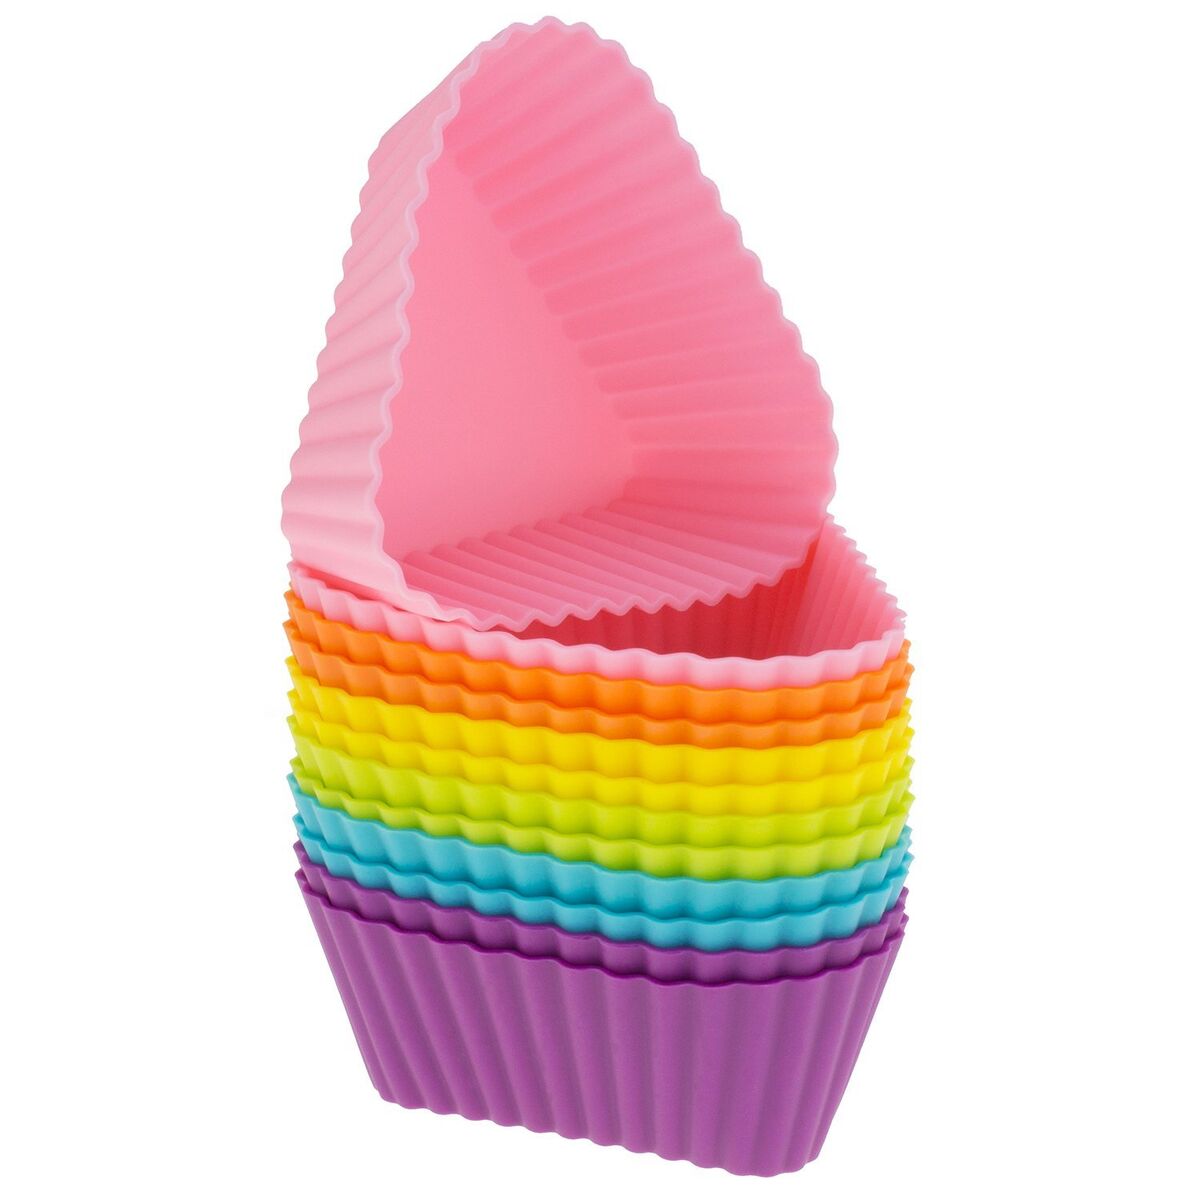
When you make them, be sure to cover the whole surface area of each silicone cup, including the sides, so there aren’t any holes. But, if you find that there are holes after they harden, you can always add another layer or two of chocolate in those spots.
Related Recipes
How to Make a Chocolate Cup
Ingredients
- 6 ounces semisweet chocolate tempered
- 6 ounces white chocolate tempered
Instructions
- Paint a thin layer of chocolate onto the insides of 12 silicone cupcake liners.
- Refrigerate the liners for ten minutes.
- Paint a second thin layer of chocolate on top of the first layer.
- Refrigerate the liners for another ten minutes.
- Carefully pop the chocolate cups out of the liners and fill with fruit, ice cream, pudding, or anything you like!
Video
Notes
- Be sure to cover the whole surface area of the silicone cups, including the sides, so there aren’t any holes.
- Chocolate discs or chopped block of chocolate are better for melting than chocolate chips. Chocolate chips are designed to hold their chip shape and don’t melt as well. Some chips, like Nestle white chocolate chips won’t melt at all.
- Use tempered chocolate to prevent the chocolate cups from looking dull and gray when they cool. I like to use the microwave method where you melt almost all of your chocolate, but leave just a little unmelted to stir in at the end. I go into this method in detail in my post on tempering chocolate.
- Experiment with different sizes and shapes of silicone cupcakes like triangles [paid link] or squares [paid link].
Loading comments...