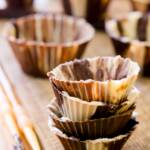
How to Make a Chocolate Cup
Chocolate cups just made for filling with the likes of peanut butter, candy, or ice cream
Servings: 12 servings
Calories: 158kcal
Ingredients
- 6 ounces semisweet chocolate tempered
- 6 ounces white chocolate tempered
Instructions
- Paint a thin layer of chocolate onto the insides of 12 silicone cupcake liners.
- Refrigerate the liners for ten minutes.
- Paint a second thin layer of chocolate on top of the first layer.
- Refrigerate the liners for another ten minutes.
- Carefully pop the chocolate cups out of the liners and fill with fruit, ice cream, pudding, or anything you like!
Video
Notes
- Be sure to cover the whole surface area of the silicone cups, including the sides, so there aren't any holes.
- Chocolate discs or chopped block of chocolate are better for melting than chocolate chips. Chocolate chips are designed to hold their chip shape and don't melt as well. Some chips, like Nestle white chocolate chips won't melt at all.
- Use tempered chocolate to prevent the chocolate cups from looking dull and gray when they cool. I like to use the microwave method where you melt almost all of your chocolate, but leave just a little unmelted to stir in at the end. I go into this method in detail in my post on tempering chocolate.
- Experiment with different sizes and shapes of silicone cupcakes like triangles or squares.
Nutrition
Calories: 158kcal | Carbohydrates: 15g | Protein: 1g | Fat: 9g | Saturated Fat: 5g | Cholesterol: 3mg | Sodium: 14mg | Potassium: 120mg | Fiber: 1g | Sugar: 13g | Vitamin A: 10IU | Vitamin C: 0.1mg | Calcium: 37mg | Iron: 0.9mg