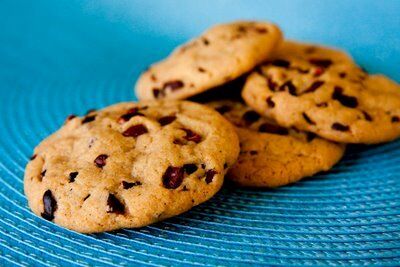
Tuesday, March 31, 2009

peekfrostings

Grand Marnier Syrup Recipe


Grand Marnier syrup is an extra special treat! I love maple, but some days you just have to switch it up.

You could pour straight-up Grand Marnier directly over anything and I would be happy, but this syrup recipe gave the orangey booze the perfect consistency to slather on my blue cornmeal and orange pancakes.

I also had just enough Grand Marnier syrup left over to make a Grand Marnier whipped cream for my upcoming cupcakes. You'll see both the Grand Marnier whipped cream and the cupcakes soon!

Grand Marnier Syrup Recipe

The Grand Marnier syrup recipe came from a recipe for Grand Marnier cake found in The Cake Bible by Rose Levy Beranbaum. You can find the complete cake recipe online.
  • 1/2 C sugar
  • 1/4 C orange juice, freshly squeezed
  • 1/3 C Grand Marnier
  1. Heat the sugar, orange juice, and Grand Marnier until the sugar is dissolved. Do not boil.
  2. Lower heat and let the mixture reduce for about five minutes.

Sunday, March 29, 2009

peekfrostings

Pancake Recipe Using Blue Cornmeal and Orange - Different and Delicious


Pancake recipes have been high on my tasting list recently. I haven't been posting all of the pancake recipes I've tried because this isn't a pancake blog; it's a cupcake blog. Besides that, I'm not always up for a food photo shoot at breakfast time. However, this pancake recipe for blue cornmeal pancakes made the cut!

Why Did This Pancake Recipe Make It on Cupcake Project?
  • I made this pancake recipe for Taste & Create, the monthly event where food bloggers get paired with other food bloggers to try each others' recipes.
  • The pancake recipe was exceptional. Don't make this recipe expecting a smooth, light, and fluffy pancake. This recipe is for the pancake lover who appreciates a dense pancake with a textured inside and a sweet, complex flavor.
  • Of course, I am going to use this pancake recipe as a cupcake inspiration. You can look forward to a blue cornmeal orange cupcake.
About the Pancake Recipe

My partner for this month's Taste & Create was Grace from A Southern Grace. This is actually the second time I've been paired with Grace. The first time I made her breakfast quinoa and subsequently made quinoa cupcakes. She's got all kinds of recipes on her blog, but I suppose I'm drawn to her breakfast ones. This time, I spotted her blue cornmeal pancakes and had to give them a try. Oddly enough, she got the recipe from Katie at One Little Corner of the World during a previous Taste & Create. Katie found the recipe in the cookbook "With a Measure of Grace: The Story and Recipes of a Small Town Restaurant". Was that a mouthful of pancakes, or what?

The Pancake Recipe and Cooking Notes


Makes 20 medium-sized pancakes. Cut the pancake recipe in in half or even quarter it if you are making them for just a couple of people, or make the whole thing and put some in the freezer for a lazy Sunday morning.
  • 3 C flour
  • 1 C sugar
  • 1 T baking powder
  • 1 t salt
  • 1 C blue cornmeal (You can use regular yellow cornmeal if that's all you've got.)
  • 4 eggs
  • 3 C milk
  • 1/2 C oil (Any vegetable oil will do. I used my favorite not-too-olivey baking olive oil - Jovia Groves' 2007 Arbequina, but any olive oil will do. You can order Jovia from Extra Virgin.)
  • 1 tsp vanilla extract (I used 1/2 t vanilla extract and 1/2 t orange extract to give the pancakes an orange flavor. I highly recommend it! If you don't have orange extract, you could use some orange zest instead.)
  • More oil for greasing griddle (I prefer to use butter to grease, but either would work.)
  1. In a large mixing bowl, combine flour, sugar, baking powder, salt, and cornmeal.
  2. In another bowl, lightly mix eggs, milk, oil, and extracts.
  3. Add the wet ingredients to dry ingredients and combine well.
  4. Preheat griddle to medium-hot. A drop of water will dance over the griddle when it is ready. Grease by spreading 2 tbsp oil on it and spread around with a folded paper towel. Keep the towel around to use for the next batch of cakes. (I used a cast iron skillet since I don't own a griddle. I just dropped some butter on the skillet and swirled it around until the whole skillet was covered. I did not need to use a towel.)
  5. Pour from a pitcher or use a ladle to make standard round cakes. Turn cakes when edges are set and small bubbles form and pop on the surface.
  6. After a minute or so, peek underneath. If they look golden and pancake-like, turn out to a plate.
  7. Eat right away or keep warm in the oven until you are ready to enjoy them!
What to Put on Your Pancakes

You can't go wrong with maple syrup on your pancakes (as long as you use the real stuff and not maple flavored crap). For an extra special treat, you might want to try making a homemade Grand Marnier syrup.

Friday, March 27, 2009

peekfrostings

Cookie Dough Cupcakes Topped with Cookie Dough Frosting


Cookie dough cupcakes have a surprise inside - cookie dough!!
But, cookie dough cupcakes also have cookie dough on the outside; I topped these cookie dough cupcakes with cookie dough frosting - literally cookie dough thinned out with a bit of heavy cream to make it spreadable. For an added bonus, there is a raw cookie sitting on top of the cupcake.

You could use the cookie dough filling and cookie dough frosting idea on any cupcakes.

Cookie Dough Filling

If you are going to be serving raw cookie dough, I recommend that you use this eggless cookie dough recipe that is safe to eat.

Cookie Dough Frosting


To make the cookie dough frosting, mix one cup of raw cookie dough with one half cup of heavy cream. It tastes just like cookie dough, but spreads perfectly!


Brown Butter Cupcake Recipe

Update 8/21/11: I recently developed my own brown butter cupcake recipe.  I'd recommend trying that one out instead of the one in this post.

While any cake recipe would work (which one would you use?), I decided to make brown butter (or burnt butter depending on who you are talking to) cupcakes. The cake was rich and a fitting complement to the cookie dough. It might have been even better had I actually followed instructions.

The recipe clearly stated that I should use self-rising cake flour and not all-purpose flour. Since I didn't have any self-rising cake flour sitting around, I just ignored that instruction. While I can't say for sure how that affected the recipe, I will say that my rendition of the recipe made only six cupcakes while the recipe said that it made twelve. I suppose if I had used the correct flour, I would have ended up with twelve fluffy cupcakes vs. six dense cupcakes.

The burnt butter cupcake recipe came from the blog, Create! and I am reprinting it below with my notes.

Made 6 cupcakes for me with the all-purpose flour, but the recipe with the self-rising cake flour says it should make 12.

  • 1/2 C plus 2 T unsalted butter
  • 3/4 C self-rising cake flour (NOT all-purpose; you can do it with all-purpose but - as I discovered - it cut the number of cupcakes in half!)
  • 3 T sugar
  • 5 T brown sugar
  • 2 large eggs
  • 1 t vanilla extract
  • 1 t baking powder
  • 2-3 T milk
  1. First, you must burn the butter. There are some photos of these steps below the cupcake recipe.
    • Place butter in a small saucepan over medium heat, stirring constantly until it turns a dark golden color (3-5 minutes).
    • Take the pan off the heat and strain into a bowl (to separate from the sediment).
    • Let the butter sit until it solidifies, but is still a little soft. (This took almost 30 minutes because it’s hot here; if hot out, put in the fridge for about 10 minutes).
  2. When the butter is solid yet soft, place in a food processor along with ALL cupcake ingredients except milk. Blitz! (I don't own a food processor big enough to put everything in so I just used my Kitchen Aid.)
  3. Add milk slowly and pulse till well-mixed.
  4. Fill six cupcake liners to the top if you used all-purpose flour, or twelve cupcake liners halfway if you used self-rising cake flour.
  5. Bake at 400 F for for 15-20 minutes.
  6. When the cupcakes cool, use a paring knife to cut a hole in them and plop in a ball of cookie dough. See the photo at the top of this post.
Burnt Butter Photos

Here's what the strained stuff looks like from the burnt butter. Beautiful, right?

And here's the burnt butter. Mmmm. There is a recipe on Create! for burnt butter frosting which I may have to try some time.

This photo has nothing to do with burnt butter. It is an expression of the joy that spring is finally here and cupcakes can be eaten outdoors!

Wednesday, March 25, 2009

peekfrostings

The Saint Louis Beacon Features Cupcakes - Including Mine


I don't love this photo of me (did you happen to notice my bra strap?). However, I do love this article about me and Cupcake Project in the Saint Louis Beacon! To say that reporter Kristen Hare did a great job would be an understatement. She truly did her homework. In addition to interviewing me on the phone and in my kitchen, she phone interviewed Groom 1.0, and to my surprise, she even called Kitchen Conservatory where I have taught some cupcake classes.

The cupcake article featuring this blog was part of a series of articles on cupcakes in St. Louis. If you live in the area, I recommend that you read them all. The series includes:
About the St. Louis Beacon

I do still subscribe to St. Louis's printed paper, the St. Louis Post-Dispatch, because I enjoy holding newsprint in my hand while I eat my Cheerios in the morning. However, I'm forever frustrated with the deteriorating quality of our paper.

The St. Louis Beacon consists largely of people who used to work at the Post, but were laid off when it was bought out. As evidenced by professionalism displayed by Kristen in writing even these feature stories on cupcakes, The Beacon's staff takes journalism seriously.

The Beacon is a tremendous and underutilized resource for local St. Louis news coverage. I encourage my St. Louis readers to check it out.

Coming Up Next

Your regularly scheduled cupcakes will return soon. Cookie dough cupcakes are up next!

Tuesday, March 24, 2009

peekfrostings

Cookie Dough That's Safe to Eat


Cookie dough makes me feel like a messy girl with pigtails, beaters, and a big grin - all over again! I love cupcake batter, but cookie dough is in a class of its own. Sadly, it's probably not the safest idea for me to down gobs of raw cookie dough containing raw egg in my pregnant state (although - there is some debate about the dangers of raw egg).

The good news is that making cookie dough that is egg-free and totally safe to eat is incredibly easy. Because you aren't going to be baking the cookie dough, you don't need to worry at all about getting proportions just right, sifting, or the order of incorporating ingredients into the dough. You just dump all the ingredients in a bowl, mix, and you're done.

What to Do With Raw Cookie Dough

There are countless things to do with raw cookie dough. Some ideas are:
  • Mix it with vanilla ice cream for your own homemade cookie dough ice cream.
  • Swirl it in with fudge for some cookie dough fudge.
  • Spread a layer of it in between two cakes instead of frosting. This would be awesome with cheesecake.
  • Just leave it sitting around with a spoon and eat some periodically.
  • Make cookie dough cupcakes.
Raw Cookie Dough Recipe

I used the recipe for my cacao nib cookies as a base for the raw cookie dough recipe. To make it egg-less, I used milk to replace the moisture from the eggs. It worked perfectly!
  • 2 C all-purpose flour
  • 1/2 t salt
  • 3/4 C unsalted butter, melted
  • 1 C packed brown sugar
  • 1/2 C white sugar
  • 1 T vanilla extract
  • 4 T milk
  • Any amount of any mix-in you'd like - I used cacao nibs, but chocolate chips, nuts, or fruit would all work.
  1. Mix all ingredients in a big bowl. That's it!
Want More?


Check out my peanut butter cookie dough recipe!

Wednesday, March 18, 2009

peekfrostings

Cacao Nib Cookies - For the Chocolate Lover Who Wants Something Different


Cacao nib cookies are to chocolate chip cookies as vanilla bean ice cream is to French vanilla ice cream - each has its place.

Some of you will question why I would want to remove a sweet, melty chocolate chip and replace it with a hard, bitter, nut-like thing. I see your point.

You may be surprised to find that the bitter nibs are the perfect complement to a sweet cookie and allow you to truly enjoy the essence of the cacao in your cookie bites. While they are not a replacement for the chocolate chip cookie, cacao nib cookies are a nice change and will be treasured by chocolate lovers.


These cacao nib cookies were brought on by more Fancy Food Show loot (see my posts on Nutorious and Teeccino for other Fancy Food fun). I'm definitely going to make it back there in future years (though I tend to doubt that I'll be able to pull off my seven hours straight of noshing while carting around a baby).

At the show, Jonathan and I stopped by to say hi to Art Pollard of Amano Artisan Chocolate. While I had interviewed him for my now basically defunct (or should I say on prolonged hiatus) blog, Food Interviews, I had never met him in person.

Art sent me away with four different kinds of cacao nibs to try. I think he meant to give me all five varieties, but accidentally gave me two bags of the Madagascar (as it turns out, that one was my favorite, so that was fine by me!).

Eating the nibs in cookies, salads, or anywhere you would use nuts is a treat, but the best part of the nib experience is opening and smelling the contents of the bags. Taking a big whiff of each open bag makes you feel like you are right in the chocolate factory - and each bag smells different. There is no way you could smell these cacao nibs and leave saying, "chocolate is chocolate."

I baked some cookies with each of the four nib flavors that I had (Accra, Barlovento, Jembrana, and Madagascar), kept them separate, and had a taste-off. Of the four participants, two liked the Accra the best, one liked the Jembrana the best, and I liked the Madagascar the best. I guess you will just have to try them and see what your favorite is!

The Cacao Nib Cookie Recipe

I got the recipe for the cacao nib cookies straight from Allrecipes. They were labeled "Best Big, Fat, Chewy Chocolate Chip Cookies." They were not big, fat, or chewy (could it be that the nibs affected the cookie texture?). These cookies were best right out of the oven when they were chewy, soft, and warm. After cooling, they became hard and crispy. But, if you put a cookie on a paper towel in the microwave for 15 seconds, it's back to its fresh from the oven perfection.

Because these cookies required the trip to the microwave, I wouldn't call this the ideal recipe, but if you don't mind the 15 second wait, these cookies are tops!

If you have a favorite chocolate chip cookie recipe, simply replace the chocolate chips with nibs and enjoy!

Here is my reprinting of the recipe from Allrecipes, with my slight change from chips to nibs:
  • 2 C all-purpose flour
  • 1/2 t baking soda
  • 1/2 t salt
  • 3/4 C unsalted butter, melted
  • 1 C packed brown sugar
  • 1/2 C white sugar
  • 1 T vanilla extract
  • 1 egg
  • 1 egg yolk
  • 2 C cacao nibs, or more, to taste
  1. Preheat the oven to 325 F (165 C). Grease cookie sheets or line them with parchment paper.
  2. Sift together the flour, baking soda and salt; set aside.
  3. In a medium bowl, cream together the melted butter, brown sugar, and white sugar until well blended.
  4. Beat in the vanilla, egg, and egg yolk until light and creamy.
  5. Mix in the sifted ingredients until just blended.
  6. Stir in the cacao nibs by hand using a wooden spoon.
  7. Drop cookie dough 1/4 cup at a time onto the prepared cookie sheets. Cookies should be about 3 inches apart.
  8. Bake for 15 to 17 minutes in the preheated oven, or until the edges are lightly toasted.
  9. Cool on baking sheets for a few minutes before transferring to wire racks to cool completely.
Food History Facts

I thought about entering these cookies into Sugar High Friday's event - The Test of Time. In order to do so, the dish had to be over one hundred years old or a reinvention of a dish that was one hundred years old. "Surely, chocolate chip cookies were invented over one hundred years ago," I thought.

Not so.

According to Kitchen Project (no affiliation with Cupcake Project):
Ruth Wakefield invented chocolate chip cookies in 1930 at the Toll House inn she and her husband Keneth ran near Whitman, Massachusetts. Like a bed and breakfast she made food for her guests. One evening in 1937 she got the idea to make a chocolate butter cookie so she broke up one of the bars of semi-sweet chocolate that Andrew Nestle gave her. She thought that it would mix together with the dough & make all chocolate cookies . Needless to say, it didn't. However the cookies came out decent so she served them. They of course were so good they had to be done again. She published the recipes in several newspapers and the recipe became very popular.
Even then, the cookies were still called chocolate crunch cookies. Apparently, pre-chocolate chip, Nestle tried including small choppers with their bars of chocolate so that people could more easily make the cookies. I wonder if the choppers at all resembled the chocolate chopper I have that is one of my favorite kitchen gadgets.

Before you believe the entirety of the story on Kitchen Project, be sure to also read the Wikipedia page on chocolate chip cookies which stirs up a bit of controversy and is one of those sad big company screwing the little gal stories.

Oh, and...

Be sure to check out the cookie dough cupcakes using cacao nibs!

Monday, March 16, 2009

peekfrostings

Carob Cupcakes with Chicory, Dates, Figs, and Almonds


These carob cupcakes contain none of the key ingredients in carrot cake or zucchini bread and yet, as each taster took a bite, they would question whether carrots or zucchini were involved. The cupcakes actually contained chicory, dates, figs, and almonds, and had an almond butter frosting.

Regardless of the contents, tasters enjoyed the cupcakes. I certainly did! They were moist and very breakfasty - the perfect cupcake to have in the morning (perhaps with some Teeccino - the product that inspired the cupcake).

Who Will Make These Cupcakes?

This carob cupcake recipe is a Cupcake Project original. While I loved it, I would be shocked and thrilled if anyone else makes it since it requires so many unusual ingredients. However, there is one reader who should definitely make these cupcakes:

Fluffyhelen was the only reader who said that she had every unusual ingredient on my list.

A very (as in tonight) recent review of Cupcake Project on Is This Thing On said:
For Thanksgiving this year, I tried out CP’s Sweet Potato Casserole cupcake and it was one of the best cupcakes I have ever made. I love to read about CP’s crazy concoctions, but my budget and location in Maine make my list of wacky ingredients rather short. Because of this drawback, I give Cupcake Project 4 out of 5 sprinkles.
I understand the complaint, but if using wacky ingredients is the one thing to make me lose a sprinkle, I'll take it!

Carob Cupcake Recipe

Makes 18-20 cupcakes
  • 2 C flour
  • 1 1/2 t baking powder
  • 1/2 t baking soda
  • 1 T chicory
  • 2/3 C sugar
  • 3/4 C butter, room temperature
  • 1/2 C sugar
  • 1 C barley wine (if you don't have any, you could just use your favorite beer)
  • 1/2 C carob molasses
  • 2 eggs
  • 2/3 C plain yogurt
  • 1/4 C fig jam
  • 1/4 cup baking dates (dried dates pitted and smashed)
  • 1 C slivered almonds
  1. Whisk flour, baking powder, baking soda, and chicory.
  2. In a separate bowl, beat butter and sugar until light and fluffy.
  3. Beat in eggs and yogurt.
  4. In a small bowl, mix barley wine and carob molasses.
  5. Alternately fold in flour mixture and the barley wine/molasses mixture, ending with the flour.
  6. Stir in the fig jam, dates, and almonds.
  7. Fill cupcake liners 3/4 full.
  8. Bake at 350 F for 25 minutes.
Almond Butter Frosting Recipe

The almond butter frosting recipe was the same one that I used on my apricot cupcakes. You can find the recipe in the apricot cupcake post. I dusted the top of the cupcakes with chicory and some sprinkles for color.

Tuesday, March 10, 2009

peekfrostings

Carob Molasses - What the Heck is It?


I knew I wanted carob in my Teeccino-inspired cupcakes. However, I hadn't decided on which form to use. I knew of carob powder and carob chips, but the grocery I was at only had carob molasses. I figured that would have to do.

Carob molasses smells a bit like regular molasses combined with carob (which essentially tastes/smells like a mild chocolate).

Unripe and ripe carob pods.
Photo from Wikipedia commons.

There is very limited information about carob molasses online. The best source that I found was Slow Food Beirut.
Dibs el kharrub, or carob molasses, is a thick syrup made by soaking milled carob pods in water and reducing the extracted liquid. It is produced in large quantities in the area of Iqleem el kharrub (the district of carob), located in the foothills of the Shuf mountain district south of Beirut.

In Lebanon, carob molasses was traditionally used as an alternative to sugar. Mixed and served with tahina or sesame paste, for example, it is still eaten as a dessert called dibs bi tahina.
I love the idea of mixing a sweet syrup with tahini as a dessert and I will definitely have to give that a try sometime with my homemade tahini!

Apparently, carob molasses is also delicious as a pancake syrup. I love this blurb I found about it on the blog Yum-Oh!:
Ever since discovering Carob Molasses, it has been referred to by our group of friends as the original Secret Ingredient, because we started using it in and on absolutely everything - from pancakes to salad dressing – and people's first reaction is always: "Yum-oh! – what’s that?!"
If you have a Middle Eastern grocery near you, you may be able to find carob molasses stocked. If not, you may need to order it online. Sadly, it looks like you can only buy it online in a three-pack - so you may need to find some friends to share it with.

About the Post Title

At dinner last night, I was reminded of the fact that a good friend of mine did not receive a job offer at a company (which shall remain nameless) because he used h-e-double-hockey-sticks during the interview. He just used the "offensive" term once, but apparently that was enough to do him in. In his honor, I stuck with the far less risque term, heck.
peekfrostings

Chicory - The Plant, The History, Pregnancy, and Mood


Chicory is a family of plants similar to lettuce. According to an article I found on About.com, "Chicories are closely related to lettuces, but heartier and with a bitter edge. Cool weather crops that come into season in late fall (and last in temperate climates through early spring), chicories provide a lot of flavor to seasonal fall and winter meals. They include Belgian endive, curly endive, escarole, and radicchio."

The chicory found in the orange box above, however, is the ground up root of the plant, not the leaves.

While the box advertises chicory as a coffee partner, chicory can actually be used on its own as a coffee substitute. This was done throughout history when coffee was too expensive or unavailable.

Many of you may be familiar with Cafe Du Monde, a popular New Orleans coffee that is enhanced with chicory. According to their website, "The taste for coffee and chicory was developed by the French during their civil war. Coffee was scarce during those times, and they found that chicory added body and flavor to the brew. The Acadians from Nova Scotia brought this taste and many other french customs (heritage) to Louisiana."

I found that chicory added a subtle, mildly bitter, earthy flavor to my Teeccino-inspired carob cupcakes. I used some in the batter and also sprinkled some on top of the frosting.

Chicory and Pregnancy

Since posting my How Many of These Ingredients Do You Have in Your Pantry post, two readers have shared interesting chicory facts.

My twitter pal, LttleSnowflakes, suggested that perhaps I shouldn't be eating chicory at all while pregnant (if the fact that I am pregnant is news to you, check out my pickle and ice cream cupcakes). She said that she had been told to keep away from it by her OB. She also directed me to a discussion thread about chicory and pregnancy on LiveJournal. Interestingly, there is also a discussion thread on the Teeccino site that claims that "the postings on the Internet that chicory root is supposedly not safe to drink during pregnancy are completely erroneous."

I know that many take the "better safe than sorry" approach to pregnancy - if regardless of source, they hear that something could be harmful to their baby, they avoid it. I respect their line of thinking 100%. I, however, take more of an "innocent until proven guilty" approach and an "all things in moderation" approach. That's why I have just a little bit of crack each morning to get the baby going.*

Seriously, there is so much information out there about what pregnant women should and should not consume that I choose to research controversial foods and beverages - looking for proven data and incorporating my OB's opinions. Of course, some (you know who you are) have said that my OB is some kind of a quack because she said it was OK to eat sushi while pregnant. Go ahead, begin the lecture.

Chicory and Personality/Mood

Blog reader Kratzy of Random Thoughts and Stream of Consciousness commented that while she did not have chicory in her pantry, she did have chicory essence. As you can see above, she says that it is known to give "a sense of comfort and security." That may be just the thing that is needed for a pregnant lady.

However, I did some of my own research and found a chicory essence on Amazon. Look at what the product description on Amazon says:
Product Description
Chicory (Cichorium intybus) is a flower essence for individuals who control and manipulate their loved ones; their care is self-centered and manipulative; they are critical, interfering, nagging, talkative, opinionated, argumentative, and dislike being alone. Chicory: This Essence helps you at times where you get too selfishly possessive, you tend to manipulate your loved ones and expect others to conform to your values. You may be too critical, interfering and nagging. Chicory helps you to be less selfish and be able to offer genuine love. You will feel fulfilled and self-assured.
After reading that description, don't you want to buy some and slip it into the drinks of some people you know. Do you have anyone in mind?*

Footnote

If you can't find chicory at at store near you, you can buy chicory online.

For more on chicory, check out its Wikipedia article.

*Cupcake Project does not endorse drug use during pregnancy or slipping anything into anyone's drink.

peekfrostings

How Many of These Ingredients Do You Have in Your Pantry?


I often bake using basic pantry staples. Many of you could replicate those cupcake recipes without taking a trip to the store. My next cupcake, however, will likely require some shopping.

I never would have thought of creating a cupcake with carob, barley, chicory, almonds, dates, and figs were it not for Teeccino. After enjoying the flavor combination in beverage form, I thought, "Why not combine them all in a cupcake!" People often ask me how I get inspiration for cupcakes - well, this is it. I had a list of flavors and headed to the store to find them.

In order to make my Teeccino-inspired carob cupcake, I had to buy every item shown in the picture above except the almonds (almonds are a pantry staple for me). This got me wondering - how stocked are the pantries of my readers?

How many of the following do you have in your pantry? (Bragging rights and public accolades to the person who has the highest number.)
  1. Any brand of barley wine
  2. Dates (whole, pitted, date jam, or baking dates)
  3. Figs (whole or fig jam)
  4. Chicory
  5. Sliced almonds
  6. Carob molasses

Monday, March 9, 2009

peekfrostings

Teeccino - A Coffee Alternative


Teeccino, like Nutorious, is a company I discovered at the Fancy Food Show. From the words of the Teeccino website, "Now you can enjoy a steaming cup of deliciously rich, deep roasted, fresh brewed flavor that delivers all the satisfaction without the caffeine and acidity of coffee!"

Is Teeccino a Good Coffee Alternative?

Teeccino is made up of a combination of ingredients that, with the exception of chicory, don't sound like they would taste like coffee: carob, dates, figs, almonds, and chicory. However, like coffee, it is roasted and you brew it in your coffee machine. The end result tasted shockingly like coffee!

I'm not a coffee connoisseur - and in fact, I had to drag our coffee maker out of the basement in order to test out the Teeccino. So, I decided to give one of my samples (the Mayan flavor) to my mother-in-law (who knows her coffee). She said that it tasted just like decaf coffee but she wished it had a bit more of a coffee smell - the scent is one of her favorite parts of the coffee experience.

She served some of her sample to my Aunt-in-law (is that real term?). Aunt Jo really enjoyed it and would even consider drinking it more regularly since coffee sometimes doesn't agree with her.

If you are trying to kick the coffee habit on your own or are motivated by your doctor's orders, Teeccino may be the way for you to go. If you can't find any near you, you can buy Teeccino online.

For any who were unsure where this post was leading, a Teeccino-inspired cupcake is on its way!

Friday, March 6, 2009

peekfrostings

Hamantashen Cupcakes - Cupcakes for Purim


Hamantashen cupcakes are the perfect Purim dessert for the cupcake fan. Hamantashen cupcakes are not simply a cupcake with a hamantashen stuck on top. The cupcake itself is a triangle (as hamantashen must be), it has a sugar cookie flavor to it, and like the cookie, it has a jam filling. I topped the cupcake with a sweet jam glaze and then put a hamantashen on top for good measure.

Hamantashen cupcakes are the brain child of fellow St. Louis blogger, Susan (of SusanIsk.com). She first suggested that I make gefilte fish cupcakes and when I wasn't so thrilled with the idea, she proposed hamantashen cupcakes. Since they were her idea, I let her be the official taste tester.

There was a debate over whether the cookie should be removed prior to eating or whether the whole thing should be eaten together. Susan, as you can see, opted for putting the whole thing in her mouth. She felt that it all went perfectly together and that the cupcake wasn't quite as good on its own. Credit also goes to Susan for the suggestion of turning the hamantashen on its side to make the cupcake look like a Jewish star. Jonathan and I both loved the idea!

Later tasters, such as my friend Christina, preferred eating the cupcake and the hamantashen separately. Christina claimed that the cake and the cookie together were a bit too dry, but each was good on its own.

Before You Get Started

Before you begin making hamantashen cupcakes, you need two key things (other than the cupcake ingredients):
  1. Triangular cupcake liners. I purchased these locally at a Hobby Lobby. However, you can find them on Amazon if they don't sell them near you. Obviously, you can make the cupcakes in regular circle liners, but it's not as fun.
  2. Hamantashen. You can buy some or use my homemade hamantashen recipe.
Hamantashen Cupcake Recipe

For the hamantashen cupcakes, I used the same sugar cupcake recipe to make the hamantashen cupcakes that I used for my snickerdoodle cupcakes. It is the perfect recipe to use when you want a cupcake to have the flavor of a sugar cookie.

I made the snickerdoodle cupcake recipe by slightly modifying How Stuff Works' caramelized sugar cake. I have reprinted it with my modifications below.

Makes 24 cupcakes

  • 1 1/2 C granulated sugar, divided
  • 1/2 C boiling water
  • 2 eggs, separated
  • 2 1/4 C all-purpose flour
  • 1 T baking powder
  • 1 t salt
  • 1/2 C (1 stick) butter, softened
  • 1 t vanilla
  • 1 C milk
  1. Heat 1/2 C sugar in heavy 8-inch skillet over medium heat, stirring constantly, until sugar is melted and golden brown.
  2. Reduce heat to low.
  3. Gradually add boiling water into sugar mixture; continue cooking until sugar is dissolved, stirring constantly. You need to stir really quickly here to keep the sugar from glomming up.
  4. Beat egg whites in medium bowl at medium speed with electric mixer until soft peaks form.
  5. Gradually add 1/2 C granulated sugar, beating at high speed until stiff peaks form; set aside.
  6. Combine flour, baking powder and salt in medium bowl; set aside.
  7. Beat butter and remaining 1/2 C sugar in large bowl until light and fluffy.
  8. Beat in egg yolks and vanilla extract.
  9. Gradually add sugar syrup, mixing until well blended.
  10. Add dry ingredients to butter mixture alternately with milk, beating well after each addition.
  11. Fold in egg white mixture.
  12. Fill cupcake liners halfway full.
  13. Bake at 375 F for 20 minutes.
The Jam Filling

Like the hamantashen cookies, the hamantashen cupcakes need a jam filling. You can use the same filling that you used in your hamantashen cookies or mix and match flavors. The easiest way to fill the cupcakes is to load the filling into a piping bag, shove the bag into the cupcake while it is still slightly warm, and squeeze. If you don't have a piping bag, you can always use a small paring knife to cut a hole in the cupcake, spoon in some filling, and then replace the cake that you removed.

The Jam Glaze

The jam glaze served as the glue to keep the hamantashen cookie stuck on the hamantashen cupcake. It also added a nice, sweet moist layer to top off each cupcake bite. I would suggest making the jam glaze with the same jam that you used as a filling, but again, you can always mix and match flavors.
  • 1/2 C jam of your choice
  • 2 t water
  • 1 C powdered sugar
  1. Heat jam in a small saucepan on medium-high heat until it resembles a thick syrup.
  2. Add in water and stir.
  3. Remove from heat and strain out bits of fruit and seeds.
  4. Let cool.
  5. Mix in powdered sugar.
  6. Spread on cupcakes.


In the Circle of Cupcakes
It's the wheel of yummies
It's the leap to pick one
Before they're all gone
Till we find our cupcake
On the path unwinding
In the Circle, the Circle of Cupcakes
(In case you totally don't get this)

Tuesday, March 3, 2009

peekfrostings

Hamantashen Recipe - Tips to Make the Perfect Purim Cookie


Hamantashen are a classic Purim dessert. Hamantashen are always triangular and designed to look like the triangular hat that the villain of the Purim story, Haman, wore. I have no idea why we bake cookie shaped like hats; that's just what we do. For those less familiar with the story of Purim, I have a YouTube clip telling the Purim story in rap format at the bottom of this post.

First things first, though. Let's take a step-by-step look at how to make (and how not to make) hamantashen.

Hamantashen Recipe

There is a bit of a rift in the Jewish community as to what the perfect hamantashen texture should be. Some like hamanshen cakey, while others, like myself, prefer the crisp cookie variety. Sadly, there is one bakery in St. Louis (you know which one it is if you live here) that seems to supply the hamantashen for the entire city. Their recipe falls into the cakey variety and I'm not a fan. The recipe below is crispy and crunchy.

As all good Jewish recipes should be, this recipe for hamantashen was passed down from my mom. She got the recipe from the 1955 Peekskill Cookbook (I presume that it was a fund raising cookbook for some organization in her town). The hamantashen recipe was submitted to the cookbook by Dora Levin. Dora, I don't know who you are or if you are still alive, but your recipe is now famous!

The hamantashen recipe did not come with a count of how many cookies that it makes, perhaps because you can make them any size that you like. It does make quite a lot of cookies - plus the dough is really easy to make and requires no refrigeration time - so in a pinch (beware of foreshadowing), you could always quickly whip up some more.
  • 3 C flour
  • 3 t baking powder
  • 1/2 C sugar
  • 1/4 t salt
  • 3/4 C butter, room temperature
  • 3 eggs
  • your choice of filling (jam, jelly, preserves, chocolate chips, nuts). The recipe also included directions for a prune filling: blend raw prunes in a food processor, adding the juice and rind of one lemon and 1/2 C honey for every pound of prunes used.
  1. Sift together flour, baking powder, sugar, and salt.
  2. Mix in butter and eggs.
  3. Roll out dough and form hamantashen (I've got step by step visuals on this below).
  4. Bake on a well-greased cookie sheet or on parchment paper for 12-15 minutes at 400 F.
How to Make Hamantashen

Roll out the dough and use cookie cutters or the rim of a glass to cut into circles. The recipe called for the dough to be 1/4 inch thick. Mine might have been a bit thicker than that. I didn't measure. Don't obsess about it.

You can make the circles any size you like. I made mine with a 3 1/2 inch diameter because that is the perfect size to sit on top of the hamatashen cupcakes that are coming soon.

Next, you'll want to put a dollop of your filling in the middle of the circle. DO NOT put too much filling or it will overflow. Look at the first step's photo to get a sense of the proportion of filling to circle. Follow pictures two through four to fold over the circle, magically turning it into a triangle.

Optional - You may want to moisten the edge of the circle with some water before folding. This will help it to stick shut. It's especially helpful if the dough has gotten at all dry. You also may consider brushing the top of the triangle with egg to give it some extra shine.

We Jews seem to have a thing for pinching. [Insert mental image of a Jewish grandma squeezing a baby's cheeks and saying, "Such a shayna punim (pretty face)."]

When I first attacked the task of turning the circles into triangles, my instinct was simply to pinch in the corners.

The problem, as you can see, was that they all opened up during baking. Moral (and this should apply in all areas of life): Do not pinch! Follow the folding method shown above.

If you do that, you will have pretty hamantashen!

And Now, The Story of Purim Told In Rap

Don't get your hopes up; I spent much time looking for a good video to tell the story of Purim and I somehow ended up with these rapping kids. It's not the best, but it gives you a good idea of the Purim story. It also has the added bonus of reminding me of all the shows my cousins and I used to put on for our families.


Real Time Web Analytics