
Homemade Jelly Beans – You Pick the Flavor
Once I conquered homemade Lucky Charms (a task that was so arduous I will never repeat it), I needed another challenge. I set my sights on homemade jelly beans. While homemade jelly beans are time-consuming to make, I learned that the process isn’t that difficult. I would make homemade jelly beans again and I would encourage you to try preparing them, too.
Seriously, you can do this.

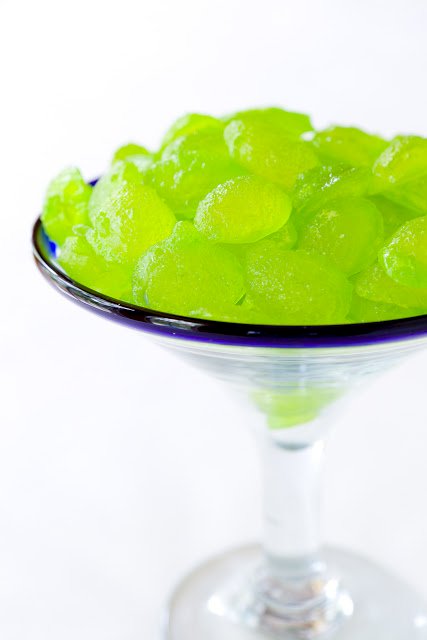
When you create homemade jelly beans, you get the joy of choosing the flavor and color you’d like – any drink you fancy can be turned into a jelly bean flavor. Use juice to flavor jelly beans for a kid’s party, but don’t forget the adults. Grownup flavors made using your favorite cocktails allow you to get really creative. The homemade jelly beans shown above are margarita jelly beans. Serve the margarita jelly beans straight up or use them to top margarita cupcakes. Jello shots are so 2011; homemade jelly beans are where it’s at!
How Do Homemade Jelly Beans Compare to Store-Bought Jelly Beans?

These homemade jelly beans are close to store-bought jelly beans, but not quite the same.
The outside: The outer coating in store-bought jelly beans is harder, smoother, thicker, and has a shinier coating than the homemade jelly beans. The coating on the homemade jelly beans turned out a little bit gritty. The next time that I make them, I might try using super fine sugar for the coating to see if that makes a difference in the grittiness.
The inside: The homemade jelly beans have a much gummier inside than the store-bought jelly beans. I would say that they are truer to the name “jelly” bean.
The flavor: You can flavor your jelly beans however you like. I liked the taste of my margarita jelly beans better than any store-bought jelly bean.
How to Make Homemade Jelly Beans
Jelly beans ready to be coated
I learned how to make homemade jelly beans from Mason Howard. Mason’s recipe is below with my notes, tips, and modifications. One major change that I made was the method for coating and drying the beans.
What You’ll Need To Make Homemade Jelly Beans
 There are two tools that are absolutely required to make homemade jelly beans:
- 6 jelly bean molds (You can buy the jelly bean molds shown above on Amazon [paid link].)
- Candy thermometer (I recommend the Maverick digital thermometer [paid link].)
Homemade Jelly Beans
Equipment
- 6 jelly bean molds (available on Amazon)
- Candy thermometer
Ingredients
Ingredients
- 1 cup water divided
- 2 cups granulated sugar divided
- 1/4 ounce gelatin
- 1/2 cup pulp-free juice or your favorite cocktail Note: If you use a mild juice flavor, you may want to mix it with lemon juice to make it more tangy. I used an actual margarita for mine. If you use a margarita or other cocktail, you’ll probably have some leftover to drink. Oh no! ;)
- 1/4 teaspoon salt
- 2 tablespoons cornstarch
- non-stick cooking spray
- food coloring use any color you like
Instructions
- In a large saucepan on medium heat, combine 3/4 cup water, 1 1/4 cups sugar, and gelatin.
- Bring to a boil, stirring regularly to ensure that no clumps of gelatin form.
- As soon as the temperature reaches 230 F, take the pot off the burner - the syrup should still be quite liquidy. This should not take more than 25 minutes. If your syrup gets any hotter than 230 F, it will make your jelly beans too hard.
- Set the pot in a bowl of ice to stop the temperature from rising. If you don’t have a bowl bigger than your pot, just fill your sink with ice water and put the pot in there.
- Quickly stir in the juice (or booze) and salt.
- Spray the jelly bean molds with non-stick spray and pour the syrup into the molds. I found that it was better to overfill the molds than to underfill them. The beans that I underfilled a little bit were harder to remove from the molds.
- Let the jelly beans sit for four to six hours, or until the gelatin has hardened. It will still be gummy and sticky.
- Pop the jelly beans out of the molds and transfer them to parchment paper. This part is a little bit tricky. I used a small spoon to dig them out. The great thing is that the beans are very forgiving. Don’t worry too much about mangling them when you remove them, as they hold their shapes surprisingly well.
- Lightly dust the beans with cornstarch to help them dry. Let them sit for another few hours.
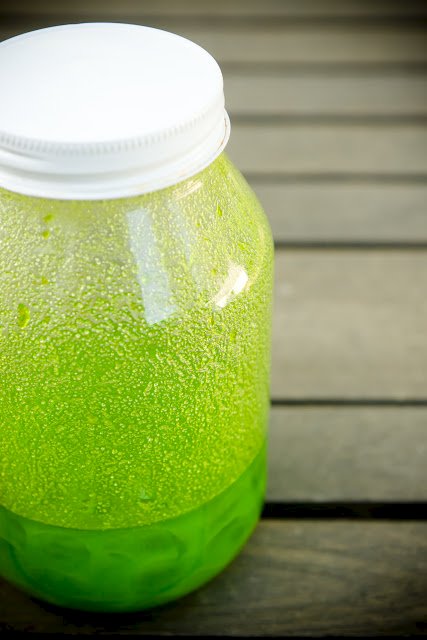
- To make the outer shell, mix 1/4 cup water, 3/4 cup sugar, and whatever food coloring you like.
- Pour the mixture into a jar along with the jelly beans.
- Seal the jar tightly. Tilt the jar at an angle (like a slide) and turn it in your hand (as you would a doorknob), preserving the angle. The goal is to make a mock version of a tumbler (a tool used for coating candy – that at $700 is cost-prohibitive for the average home baker) that allows the sugar to gradually build up and evenly coat the jelly beans. This step is extremely important. If the candy is not well-coated, it will not have a hard outer shell. Tumble for 10-15 minutes. This, my friends, is the workout portion of your candy making experience.
- Fish the coated beans out of the liquid and place them on fresh parchment to dry and harden overnight.
- Once the top side is hard, flip each bean and allow the other side to dry.
- Admire and eat!
Nutrition
Facebook Shout Out

I posted the in-progress photo above of my jelly beans to Facebook and asked everyone to guess what I was making. My favorite guess was from Mallory Evans-Coyne who guessed “cellular mitosis”. That cracked me up. However, two people guessed it right! Congrats to Jenigario M and Kim Campbell! Be sure to join the Cupcake Project Facebook community for future fun previews!
Astute observers will note that this photo was taken in a pot. In the original recipe, the jelly beans were tumbled in a pot. I tried that method and found that the pot was way too heavy to tumble for 15 minutes – the jar was so much easier.
Loading comments...