
How to Make Chocolate Puff Pastry

You can also use chocolate puff pastry to make a Puff Pastry Berry Pie or hand pies with puff pastry instead of pie crust!
I have loved making puff pastry since I first studied it in pastry school, and when I was developing recipes for my new cookbook, The Fearless Baker, I knew I had to have a few killer puff pastry hits!
Puff pastry is made through the process of lamination – where a large block of butter is wrapped in dough, then put through a series of rolls and folds. These folds create a huge amount of fabulous, flaky layers – when the dough hits the heat of the oven, the moisture inside the butter begins to evaporate, creating steam that pushes the pastry upward, creating light, airy, and oh-so-crunchy puff pastry!
The process is a bit laborious, especially when you’re first learning, but it is strangely calming and infinitely satisfying. With a little practice, you really get the hang of it and it goes much faster; until then, it’s a perfect holiday or weekend baking project. Today, I want to share with you one of my favorite variations: chocolate puff pastry (!!!), which I love to bake into crisp, caramelized palmiers. Here’s how to nail the process, step by step:
Puff Pastry Tools
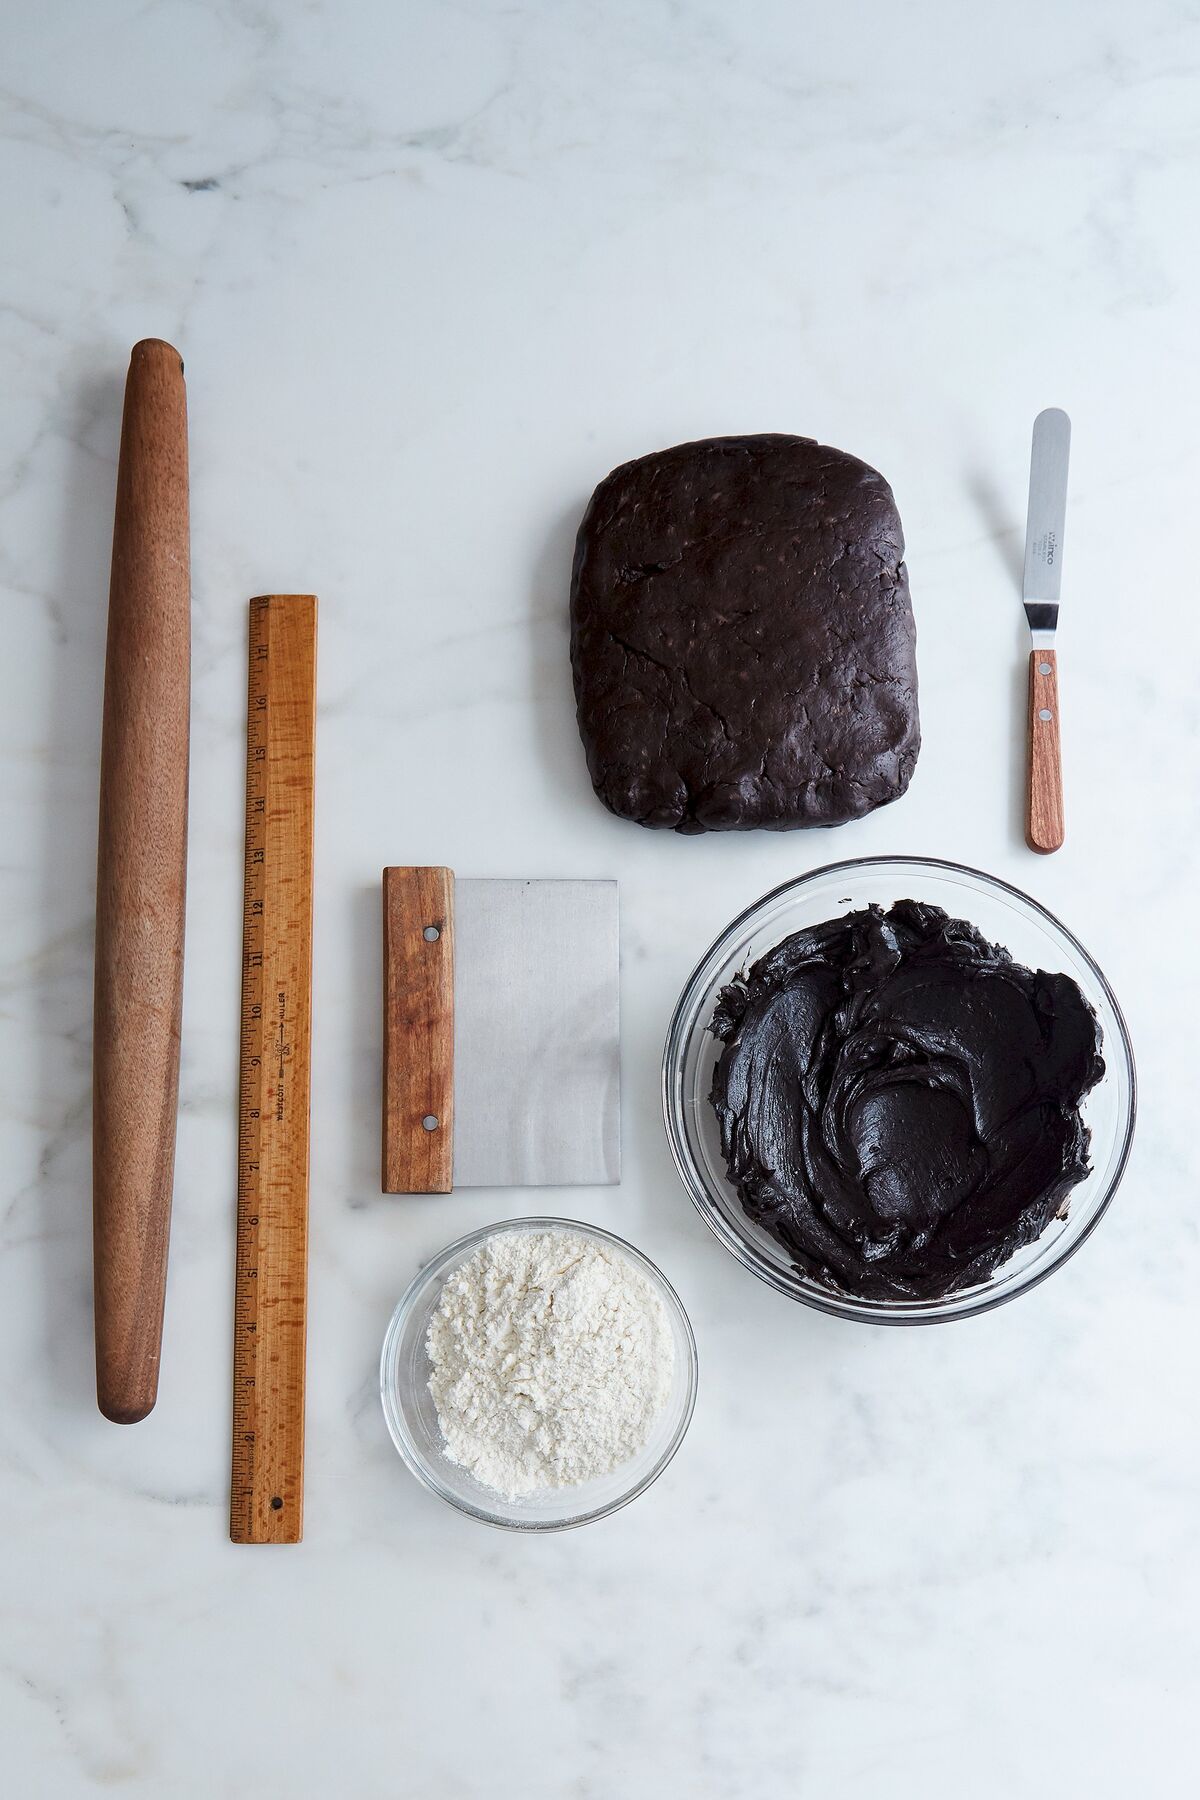
Some of the tools needed to make chocolate puff pastry
You don’t need much to make puff pastry, but a few tools definitely come in handy throughout the process:
- You’ll need a medium bowl and a silicone spatula to prepare the butter block.
- You’ll use an electric mixer fitted with the dough hook attachment to make the dough.
- Keep a few pieces of parchment paper and some plastic wrap handy throughout the process.
- You’ll also need a rolling pin, a pastry brush, a small offset spatula, and a bench knife/dough scraper.
- It can be handy to have a ruler, but you don’t need one.
- I like to use a standard half baking sheet (13 x 18 inches) as a visual guide when I make my recipe – the instructions call for you to roll out the dough to just slightly larger than the size of a baking sheet with each roll. I also store the pastry on a parchment-lined baking sheet in between folds, so you can use it for both!
Chocolate Puff Pastry Ingredients
The ingredient list for chocolate puff pastry isn’t long! You’ll need:
- unsalted butter
- bread flour
- cocoa powder (I love to use Black Cocoa from King Arthur [paid link] for this recipe – it makes the most lusciously-chocolate look and flavor!)
- all-purpose flour
- fine sea salt
- water
To make the palmiers, you’ll also need some granulated sugar for rolling and coating.
Tips for Making the Best Puff Pastry
It’s all About Temperature!
This part can seem tough at the beginning, but gets much, much easier to get right with practice!
It’s really important that both the dough and the butter block be at the correct temperature and consistency for the lock-in step and all of the rolling and folding stages. The dough should be chilled, but not overly firm. If the dough or the butter block is too cold, both are prone to cracking and may not create strong layers. If either is too warm, they may mash together, preventing distinctive layers from forming. Ideally, both the dough and the butter should be 60-70°F (15-21°C). The best way to describe it is “firm but easily pliable” – but you can always use a thermometer to help you double check when you’re just starting out!
Keep Everything as Squared Off at the Edges and Corners as Possible
Straight edges and sharp corners make the cleanest lamination.
I use my bench knife (bench scraper) for this – pushing it up against the sides of the dough (especially at the corners to encourage them to be straight and even.
Rounded edges mean that the edges of your dough won’t match up when you complete the folds. This doesn’t seem like a huge deal when you’re making it, but it means that there’s gaps in the layers you’re working so hard to create! The more effectively you square off the edges, the more closely the dough will match up as you complete the folds and the more perfect your lamination will be!
Brush Away Excess Flour at Every Stage
While you work, feel free to use a light dusting of flour as needed (on the surface, on the dough, on the rolling pin) to prevent the dough from sticking. But when you go to perform a fold, vigorously brush away any excess flour.
As you fold, excess flour will incorporate into the dough. No big deal when it’s a little bit here and there, but if you’re overzealous, you end up with dough that’s overly tough. Too much flour between folds can also make it tougher to roll out the dough again later.
How to Make Chocolate Puff Pastry
Make the Butter Block
Cut a piece of parchment paper about 13 x 18 inches. To make chocolate puff pastry, you not only add cocoa powder to the dough, you also add it to the butter! Adding bread flour to the butter gives it some structure which makes it more flexible and easier to roll. To make it, combine the butter, flour, and cocoa powder in a medium bowl. Mix together with a silicone spatula.
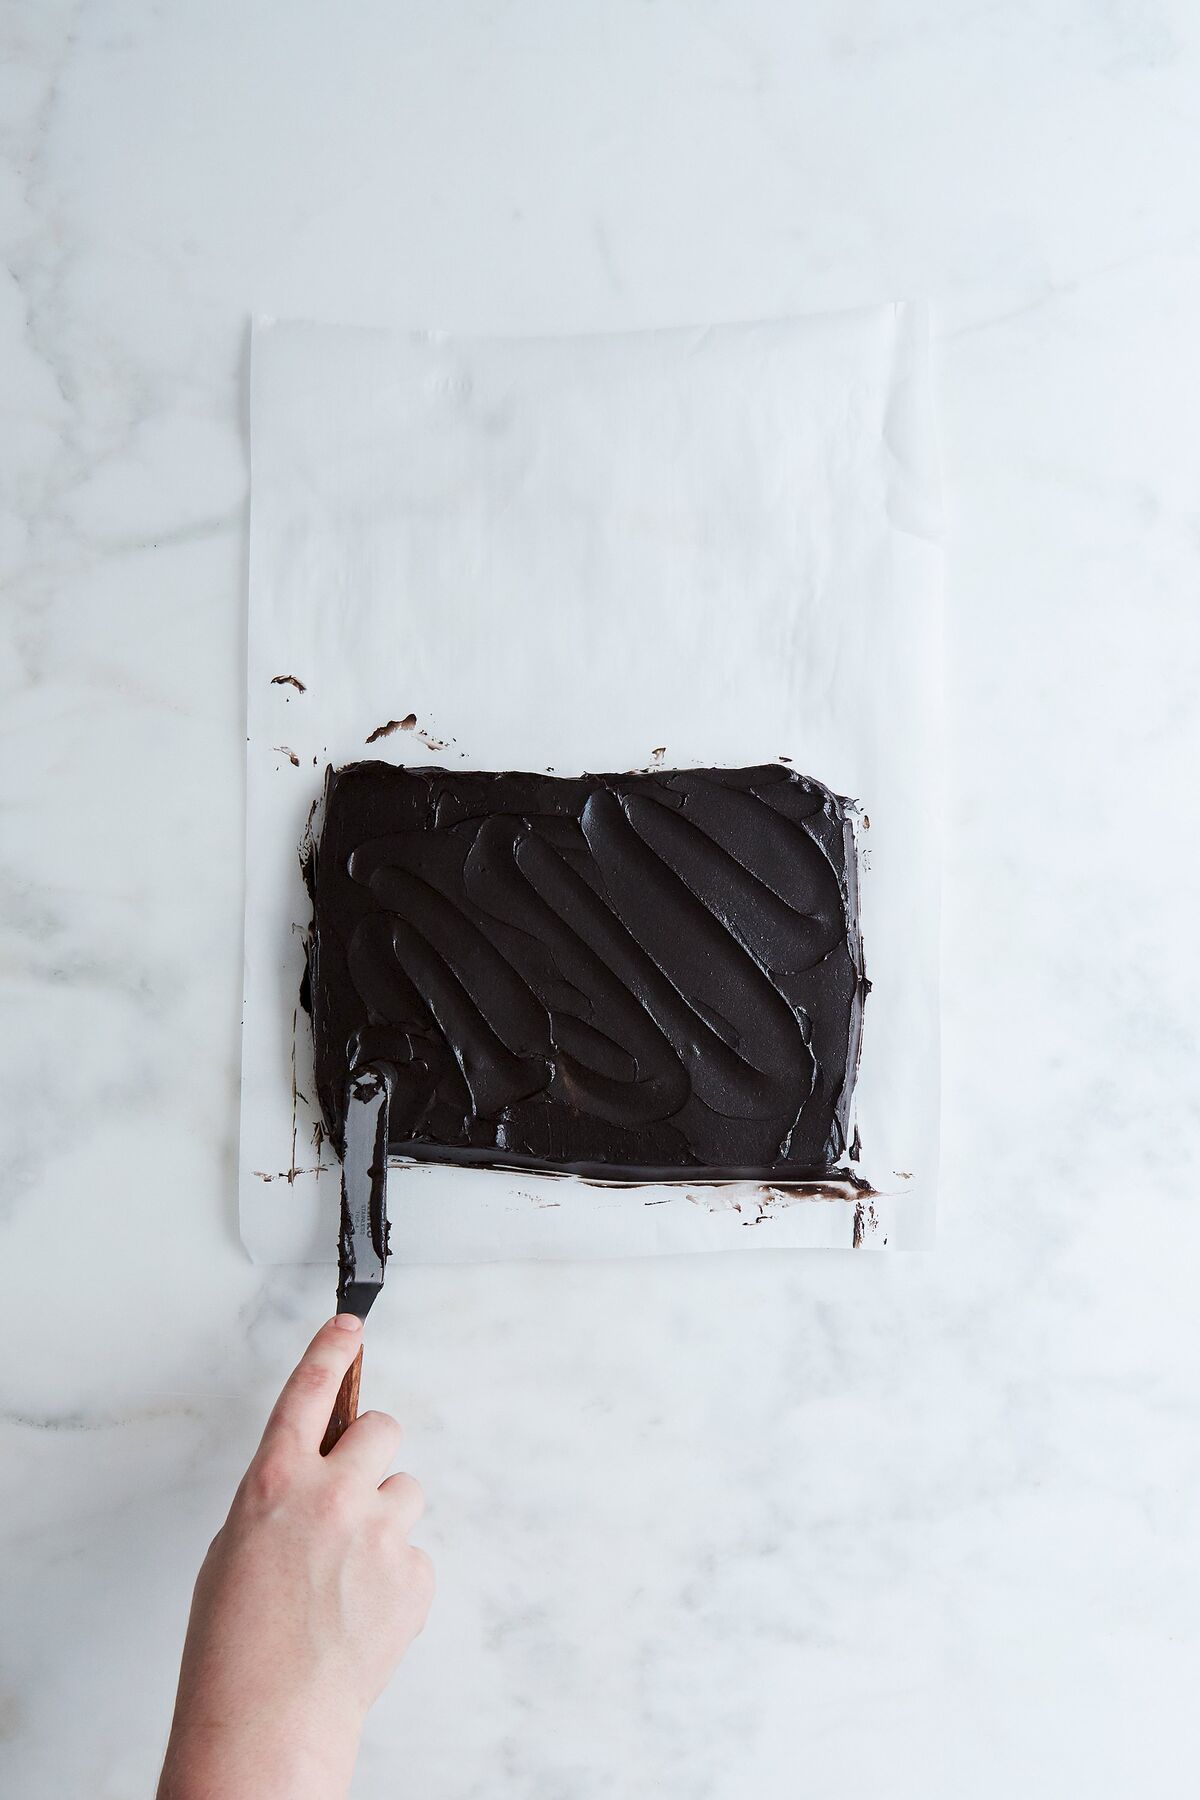
Scoop the mixture onto the lower third of the prepared piece of parchment paper and use an offset spatula to spread it into a rectangle 6 x 9 inches and about ½ inch thick. Use the blade of the spatula to help keep the edges squared off while you work.
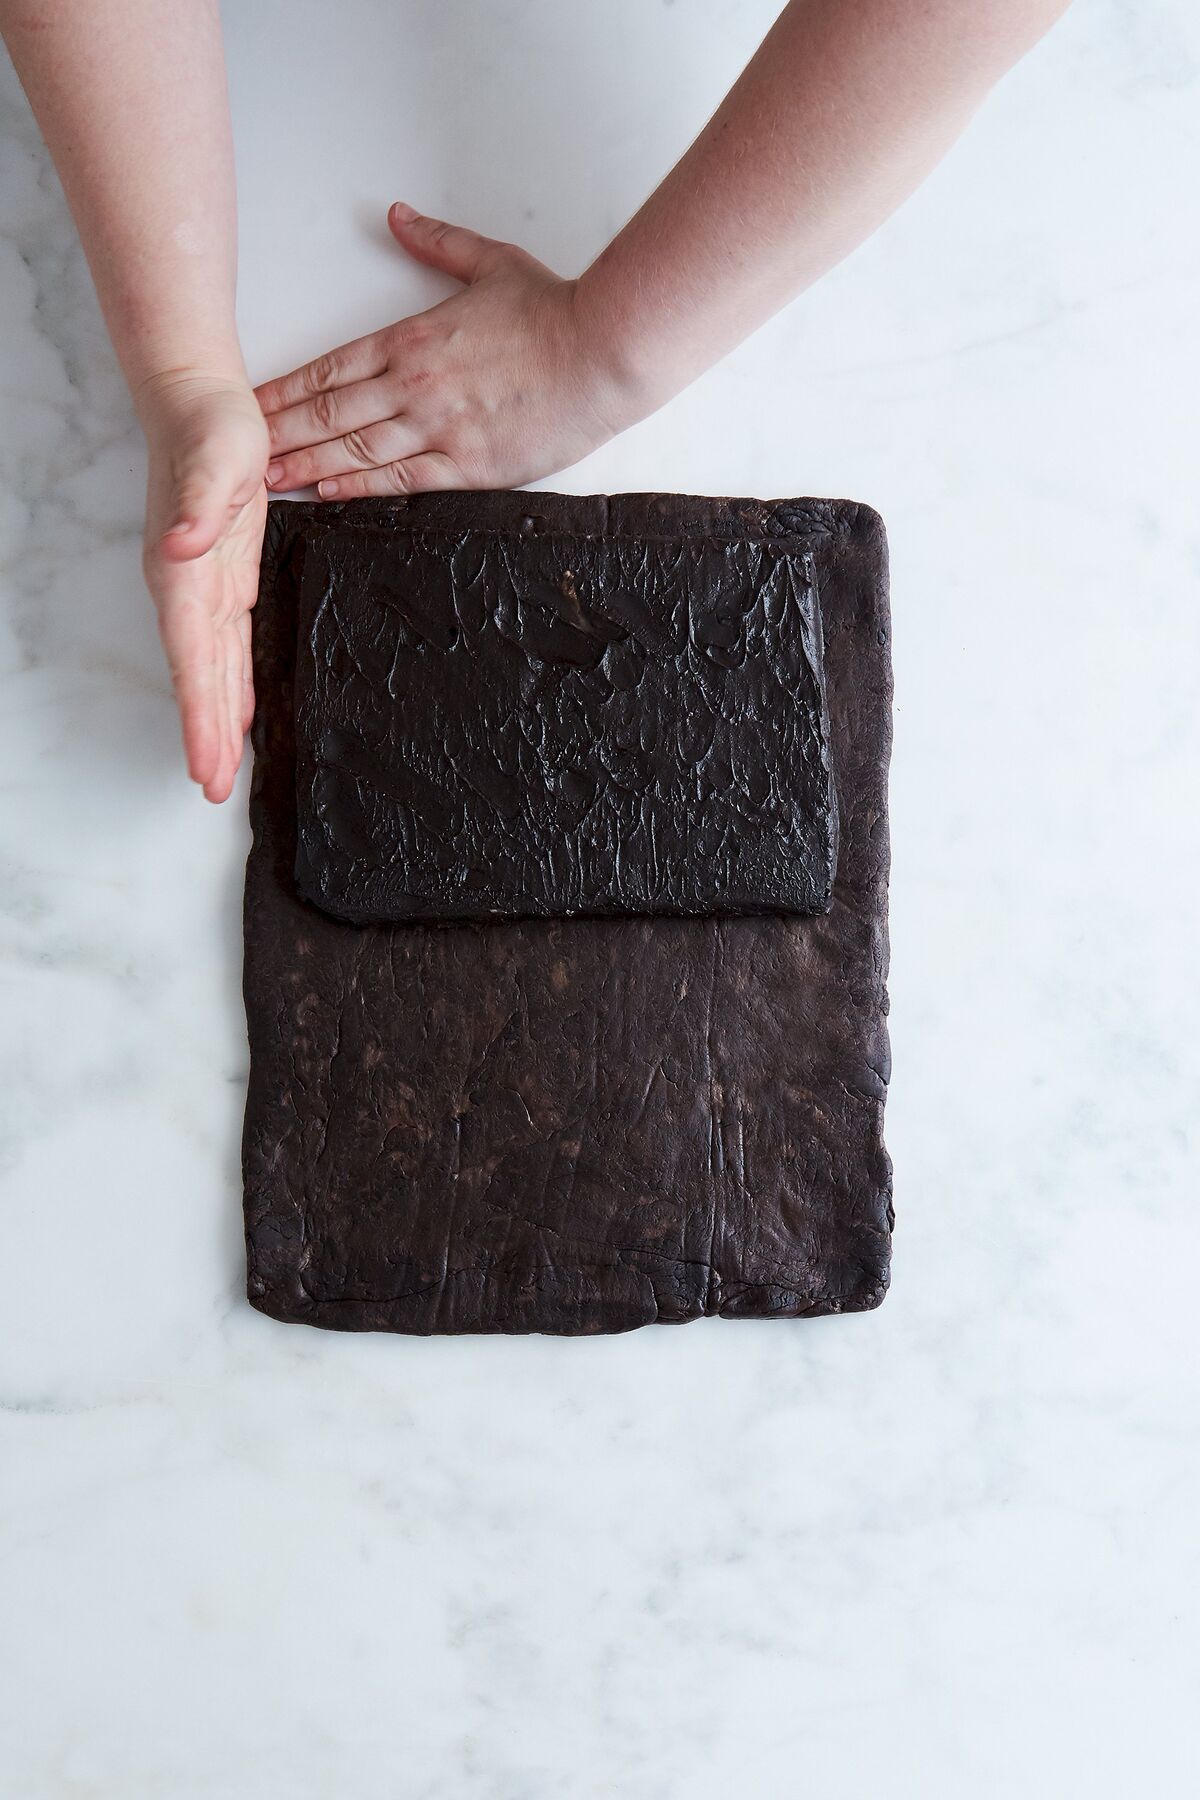
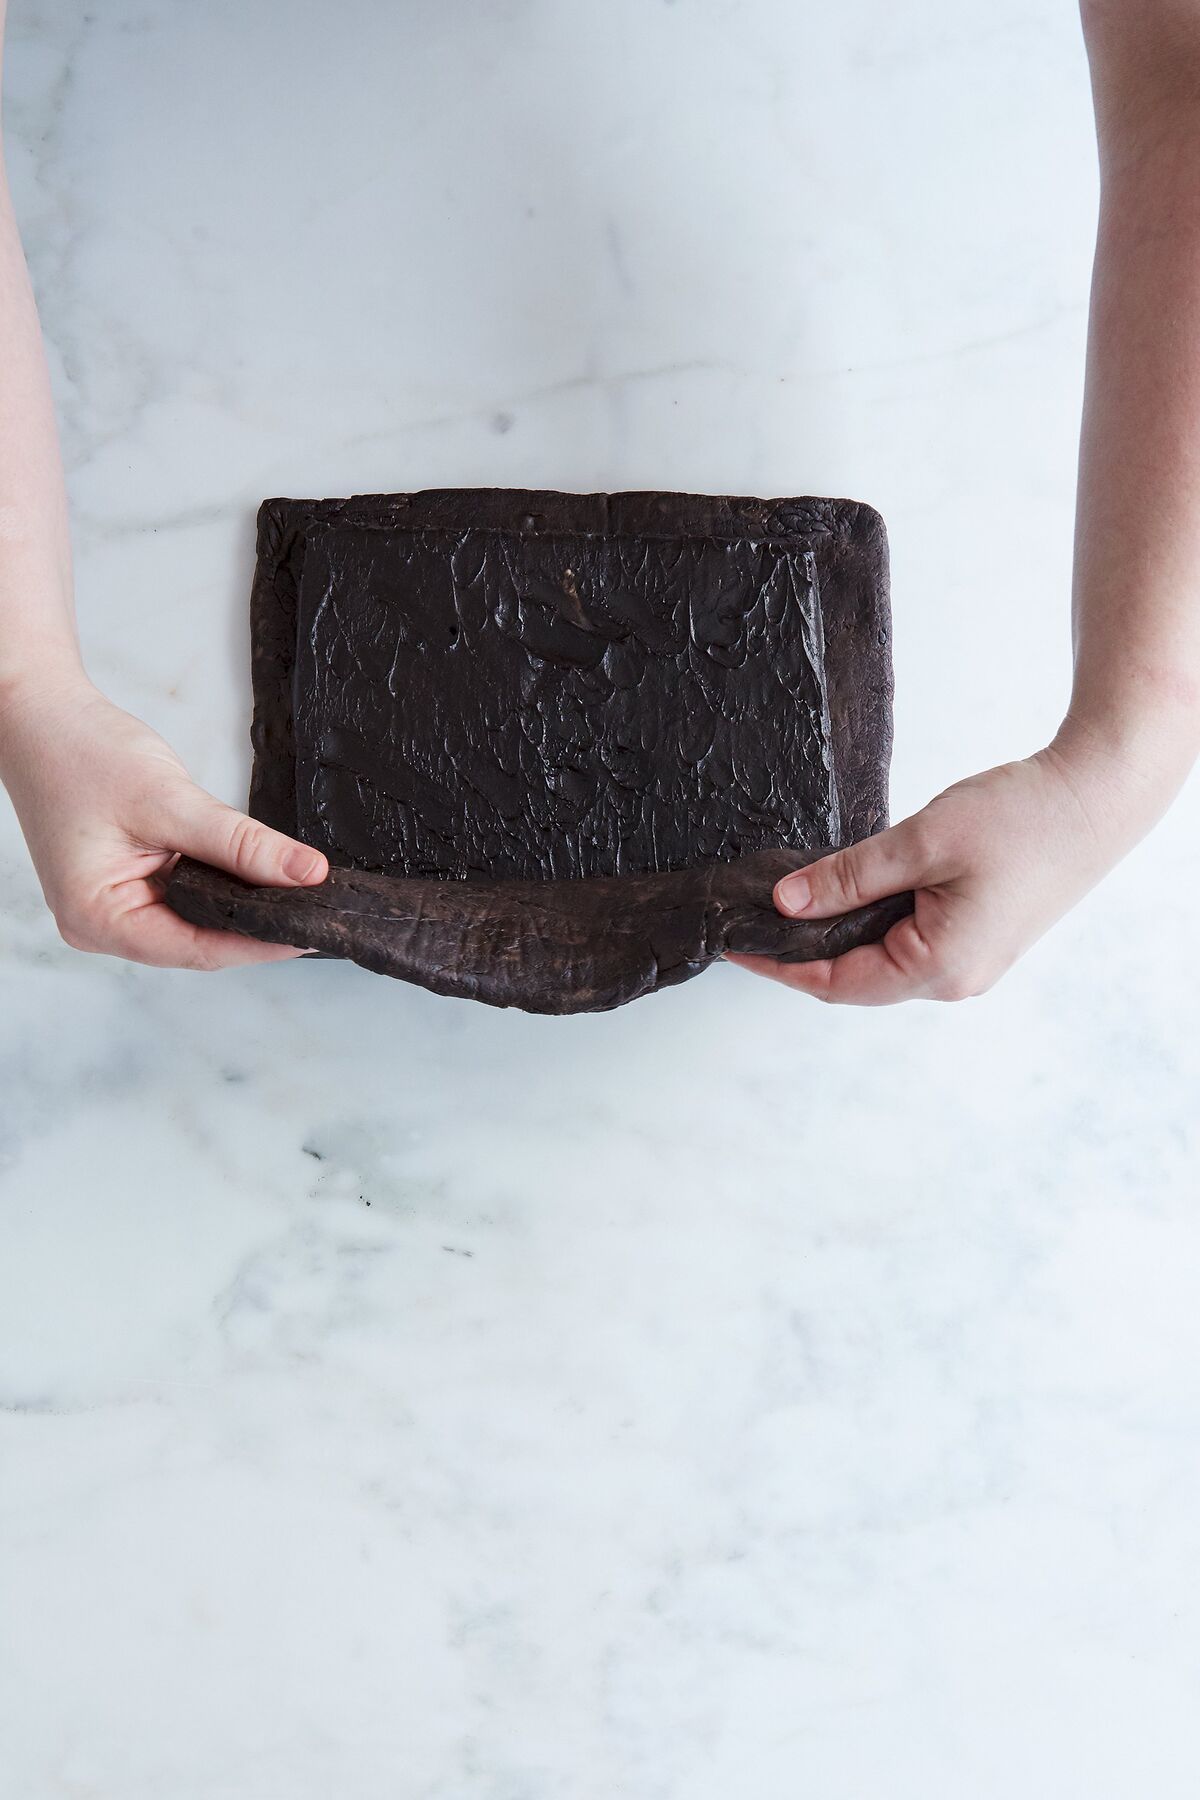
Fold the upper part of the parchment paper down over the butter block – you can use the coverage from the paper to handle the butter a little easier – I like to use my hands or bench knife to square off the edges again once it’s wrapped up like this. Transfer the wrapped butter block to the refrigerator to chill.
Make the Dough
Making the dough is pretty straightforward!
In the bowl of a stand mixer fitted with the dough hook, mix the bread flour, all purpose flour, cocoa powder, and salt to combine.
Add the butter and mix on low speed until it is fully incorporated and the mixture looks a little crumbly, about 1 minute.
Add the water and continue to mix on low speed until the dough comes together, about 4 minutes.
Increase the mixer speed to high and mix for 1-2 minutes more – the dough should be smooth and not overly sticky.
Turn the dough out onto a large piece of plastic wrap and form into a rough rectangular shape.
Wrap tightly and refrigerate for 30-40 minutes – this lets the dough rest and also allows it to come to optimal temperature for the lock-in!
Lock the Butter into the Dough
The first part of lamination is called “the lock-in”.
First, make sure your dough and butter are nicely firm but pliable. It may be necessary to let the butter sit out at room temperature for 10 minutes or so towards the end of the chill time for your dough to help ensure they’re close to the same temperature.
When you’re ready, roll out the dough on a lightly floured surface into a rectangle about 10 x 12 inches and about 2/3 inch thick.
If necessary, turn the rectangle so that one of the shorter ends is facing you. Peel back the paper from the top of the butter block, leaving it attached to the paper at the base to make it easier to guide onto the dough.
Holding the edges of the paper, place the butter block onto the bottom half of the dough, positioning it so there’s a 1/2″-3/4″ margin of dough around the sides and below the butter block.
Fold the top of the dough down over the butter block so that it meets up with the opposite edge of the dough. Press the edges of the dough together firmly all the way around to seal, then fold the excess dough under itself.
You should now have a firm but pliable rectangular package of dough (about 6″x 10″). If the dough or butter appeared overly soft towards the end of the process, wrap tightly in plastic wrap and refrigerate for up to 30 minutes before proceeding.
Fold A: 4-Fold
To perform the first fold, you’ll need to roll out the dough into a rectangle about 13″x19″ (slightly larger than a half baking sheet!) – the dough should be about 1/2″ thick.
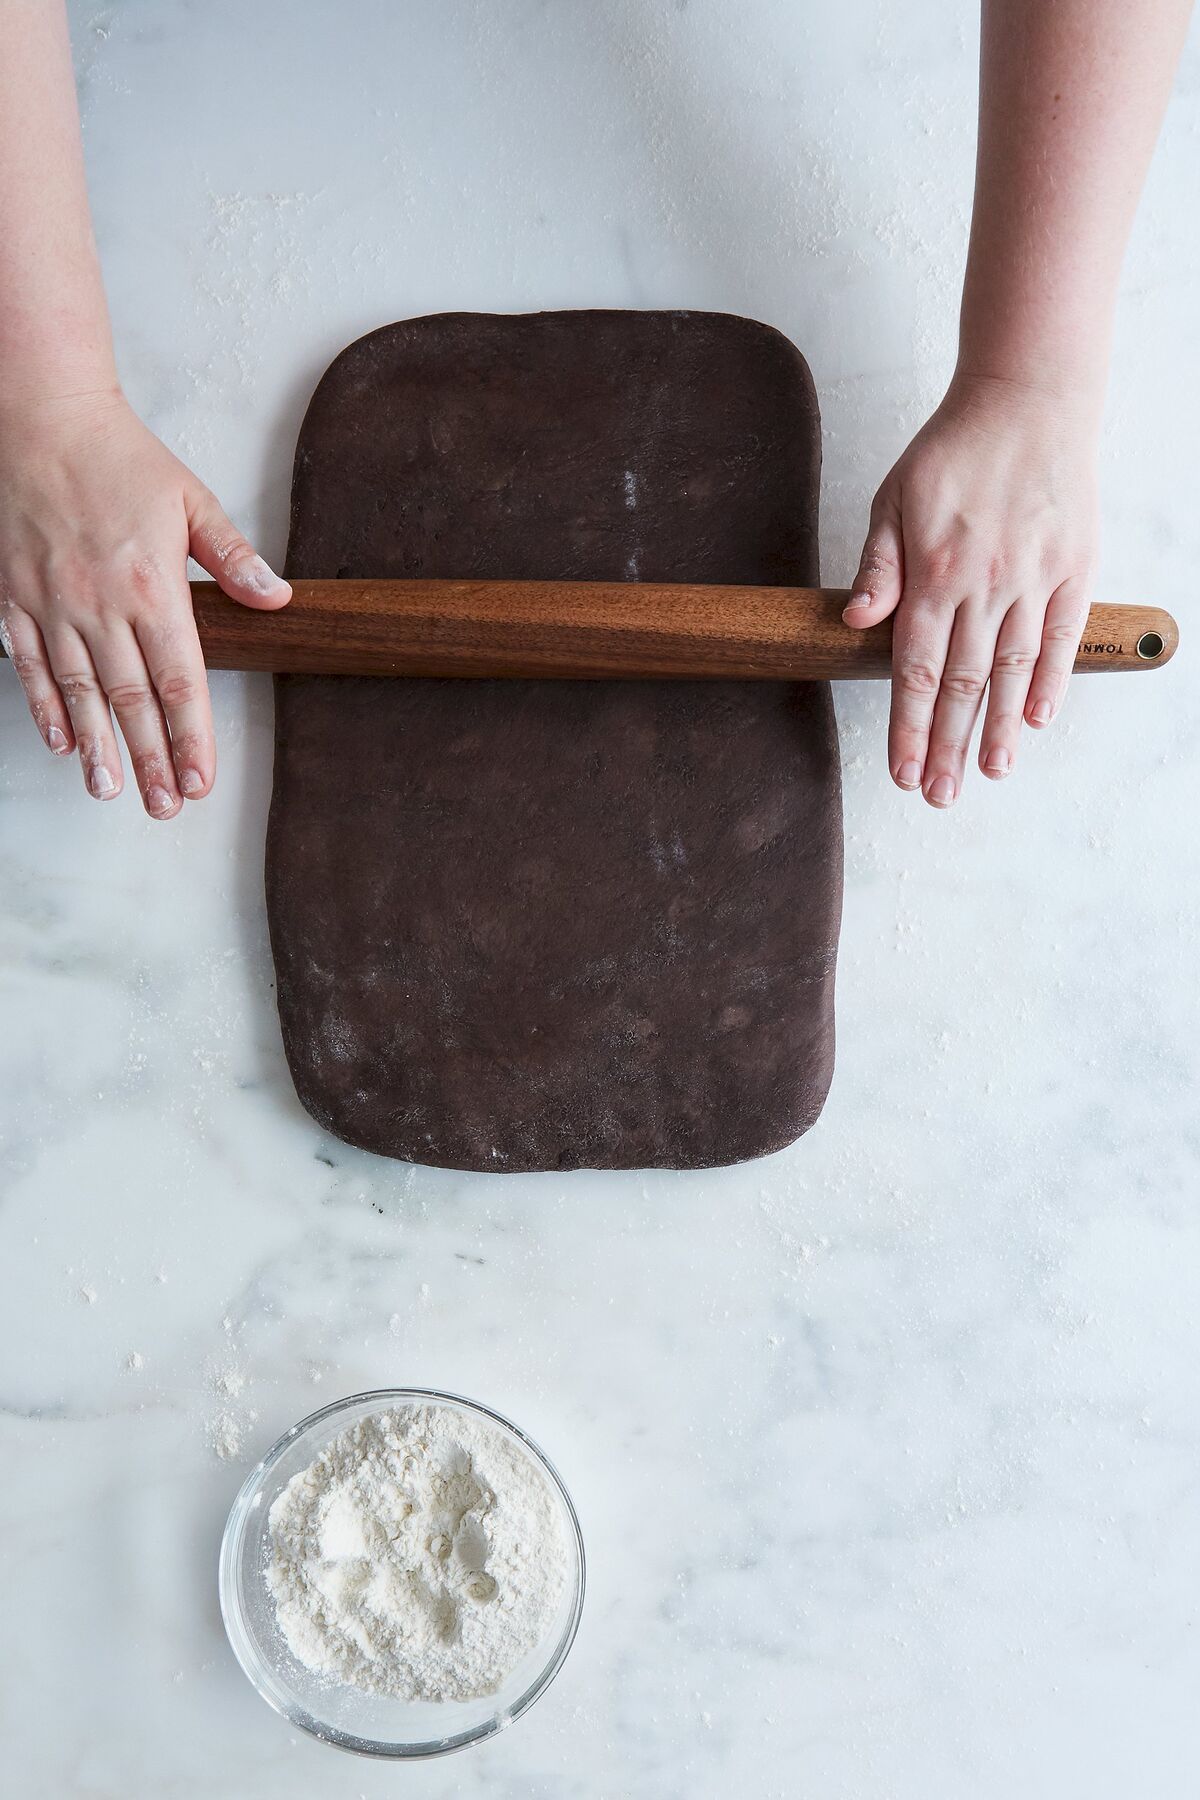
If you’re having a hard time rolling out the dough, it might be too cold – let it stand at room temperature for 10-15 minutes. On the other hand, if bits of soft butter are breaking through the surface of the dough, that means it’s too warm – return it to the refrigerator to firm up. To perform the 4-fold, position the dough so that one of the long sides is facing you. Fold the left edge about three quarters of the way over the dough.
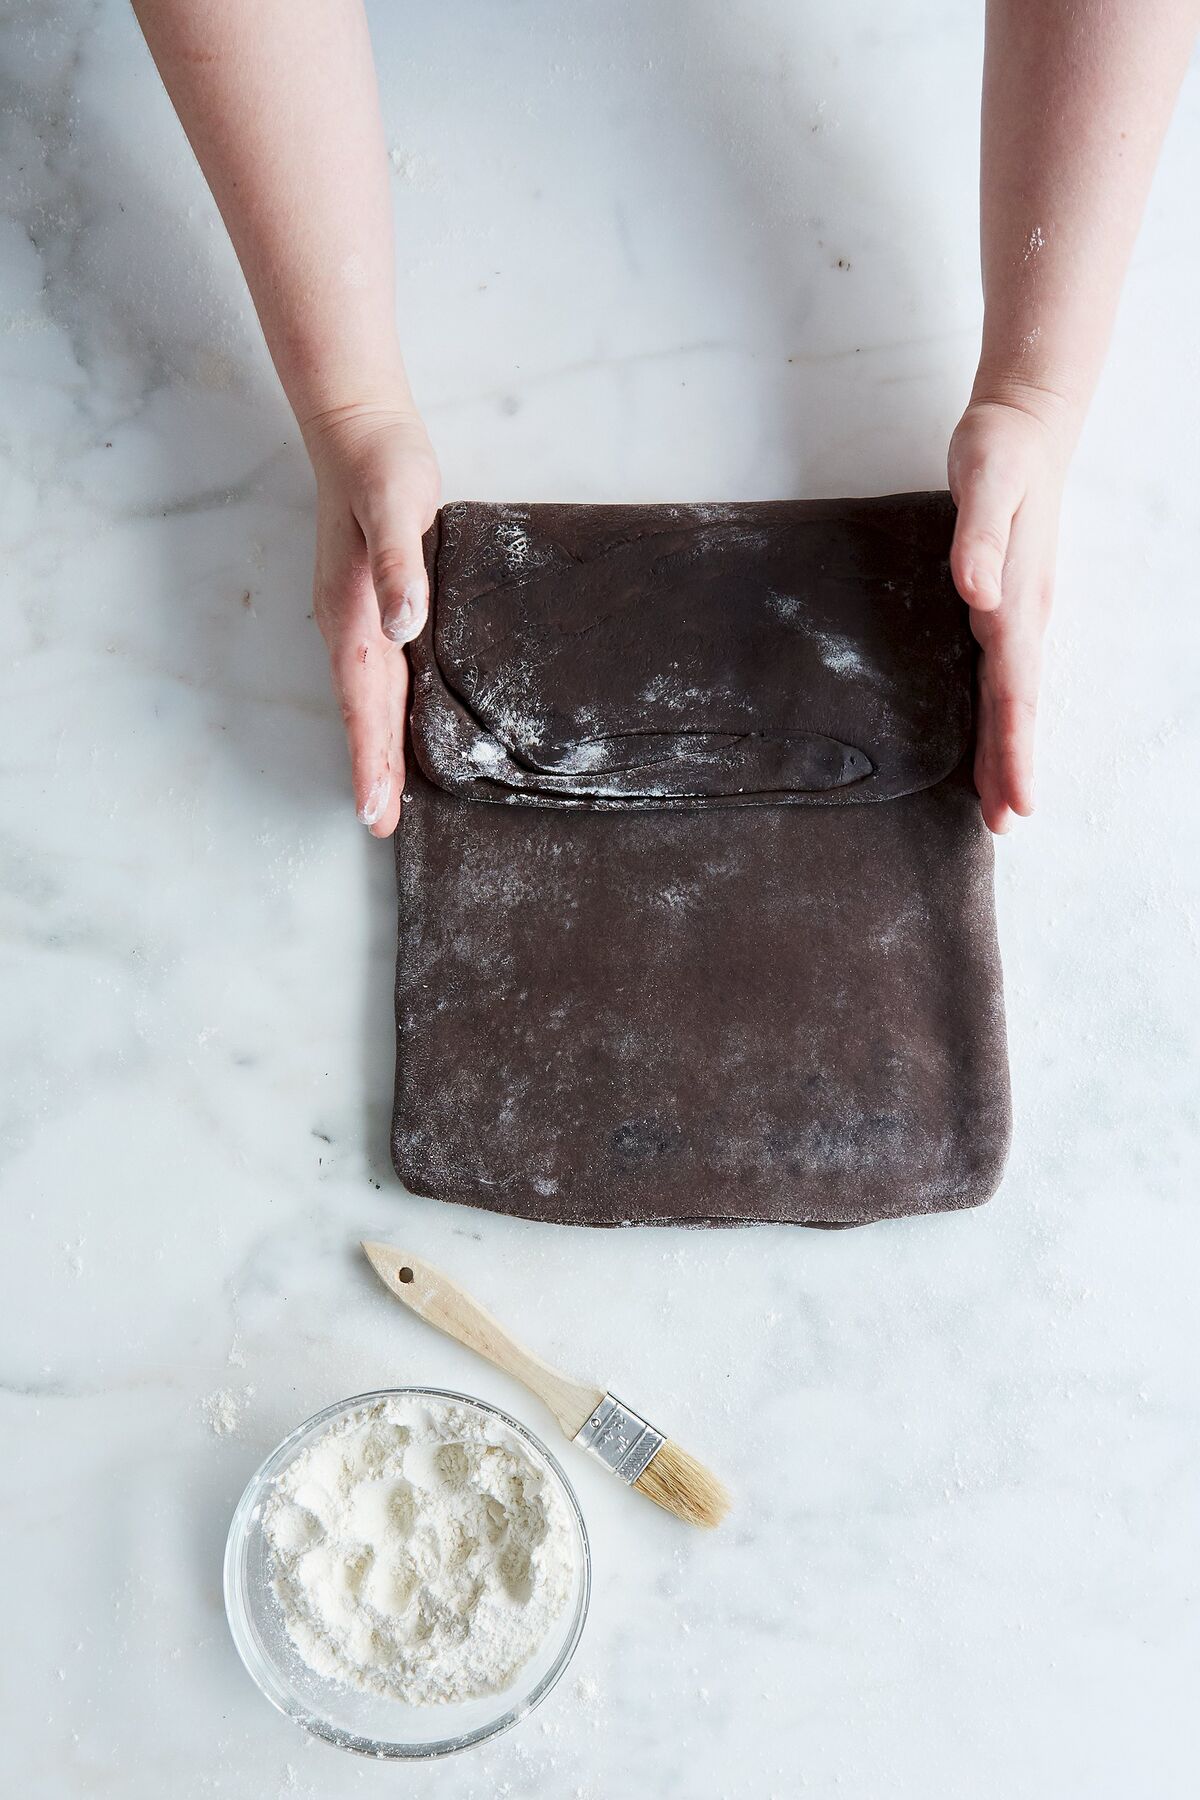
Fold the right edge one quarter of the way over the dough so it meets the left edge. The dough will now look somewhat like an open book with an off-center spine.
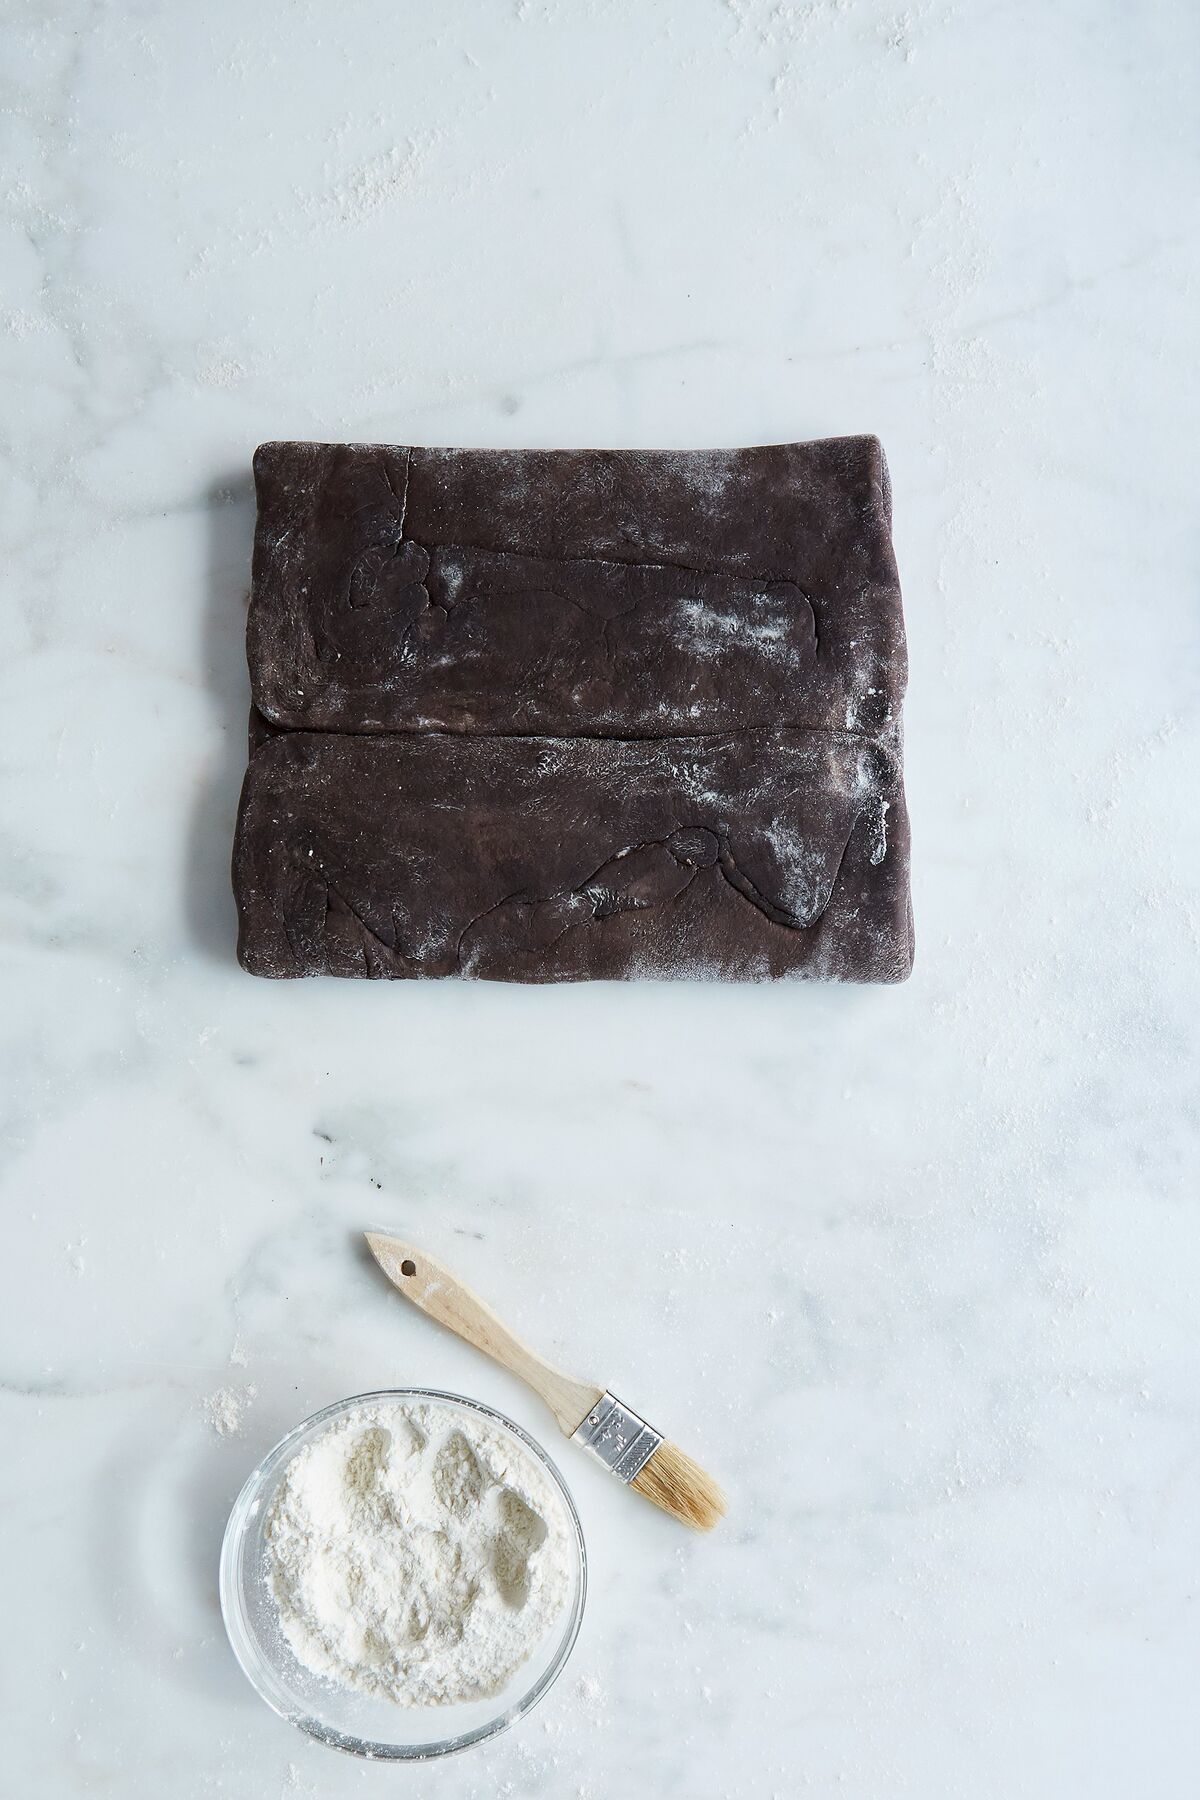
Then, fold the larger side over the shorter side. You will now have four layers of dough.
Transfer the dough to a parchment lined baking sheet, wrap tightly in plastic wrap and refrigerate for about 30 minutes to allow it to relax and come back to the ideal temperature for the next fold.
Fold B: 3-Fold
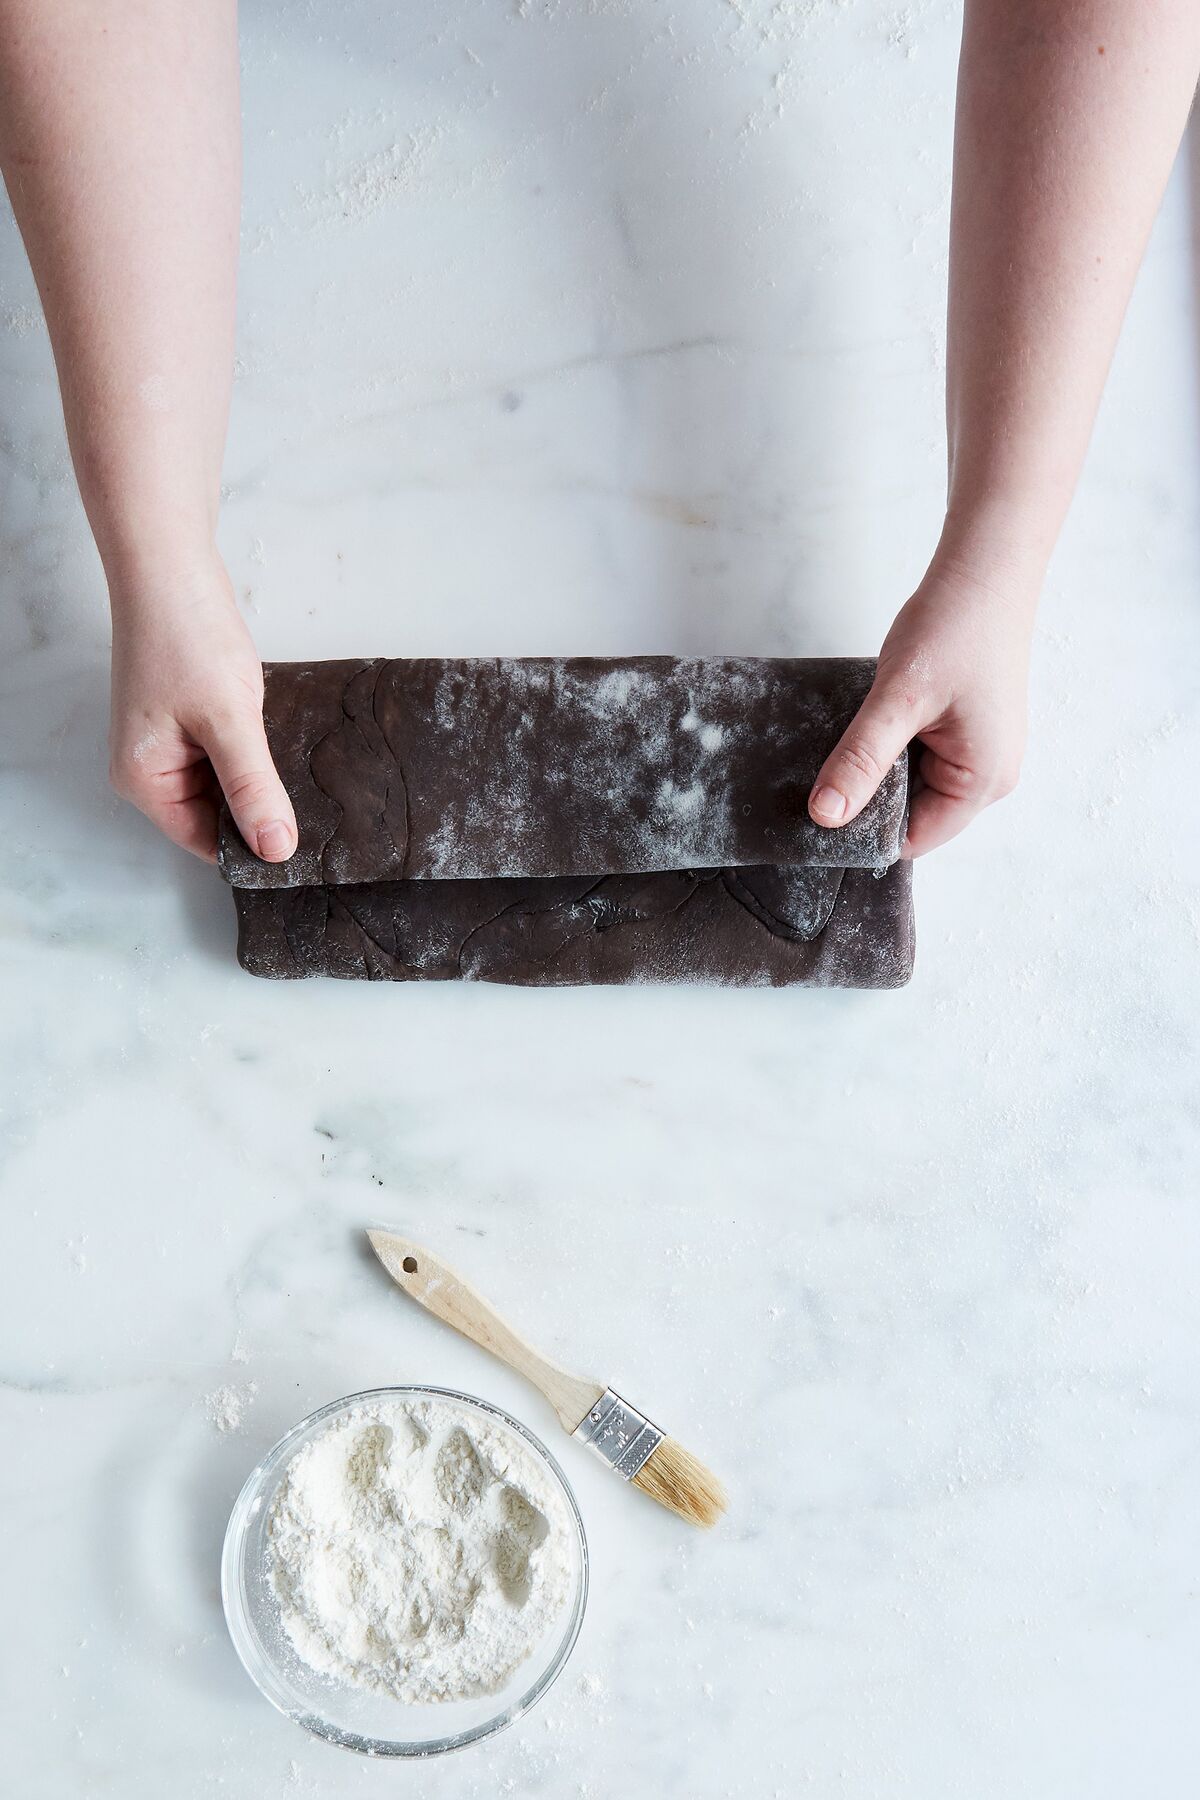
To perform the next fold, again roll out the dough into a rectangle about 13″x19″ and about 1/2″ thick. The same rules still apply for temperature concerns! Position the dough so that one of the long sides is facing you. Fold the left edge one third of the way over the dough.
 Then do the same with the right edge, folding it one third of the way over so that it rests on top of the piece you just folded. You will now have three layers of dough.
Transfer the dough to a parchment lined baking sheet, wrap tightly in plastic wrap and refrigerate for about 30 minutes to allow it to relax and come back to the ideal temperature for the next fold.
Fold C: Another 4-Fold
The next fold is the same as Fold A – it’s another 4-fold. Complete as directed above! After the fold, wrap in plastic and return to the refrigerator for about 30 minutes.
Fold D: Another 3-Fold
The next fold is the same as fold B – it’s another 3-fold. Complete as directed above! After the fold, wrap in plastic and return to the refrigerator for about 30 minutes. After it has chilled, you can divide the dough in half and use or wrap and store in the fridge (up to 3 days) or freezer (up to 3 months – thaw in the refrigerator overnight before using).
Chocolate Puff Pastry Palmiers
The hard part is over! To make the palmiers, work with one half of your puff pastry dough, and roll it out on a lightly floured surface into a rectangle that’s a little smaller than 10″x15″ and about 1/2″ thick.
Sprinkle your work surface with about 3 tablespoons (37 g) of granulated sugar and place the dough on top. Sprinkle the surface of the dough evenly with another 3 tablespoons (37 g) of granulated sugar. Continue to roll out the dough into a rectangle 10″x15″. Trim the edges with a bench knife or pastry wheel to make them straight and even.
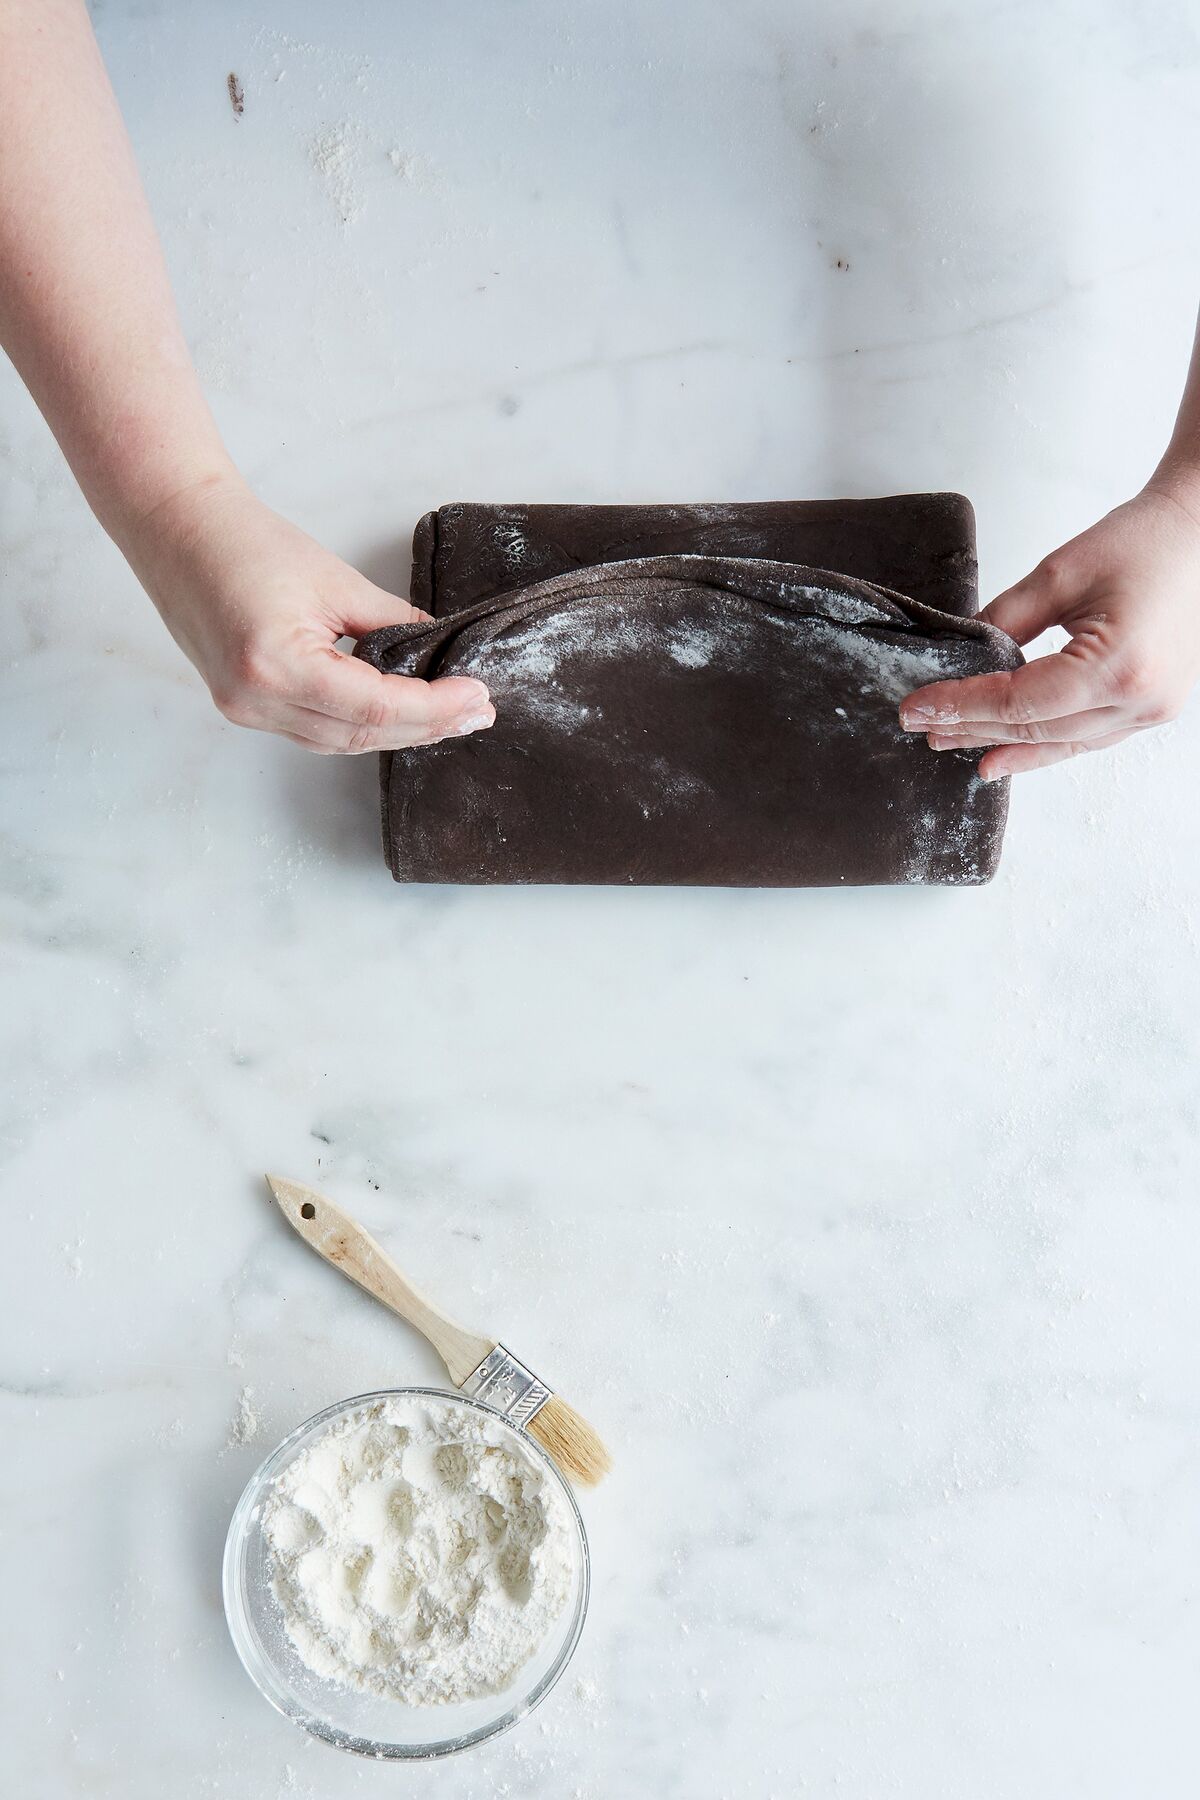
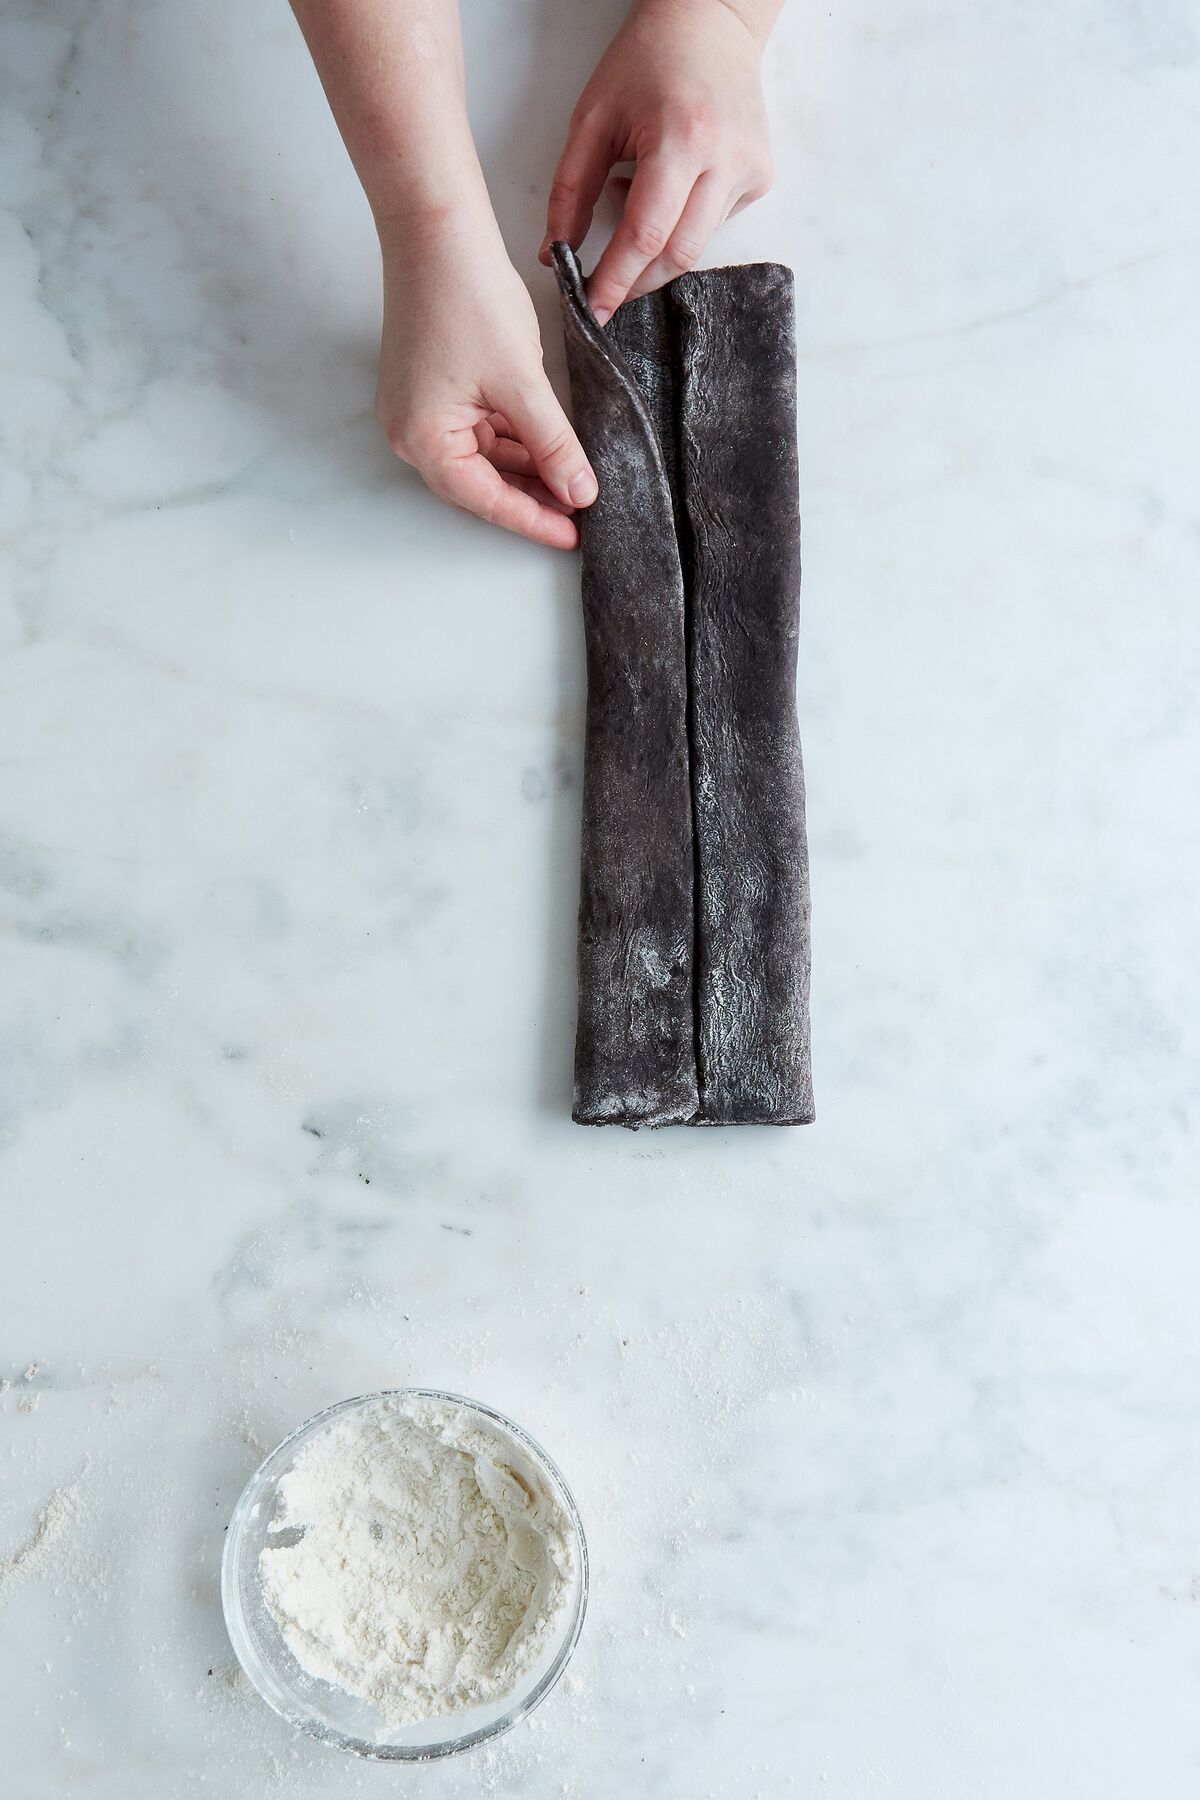
Fold the two long sides over to meet exactly in the center of the dough.
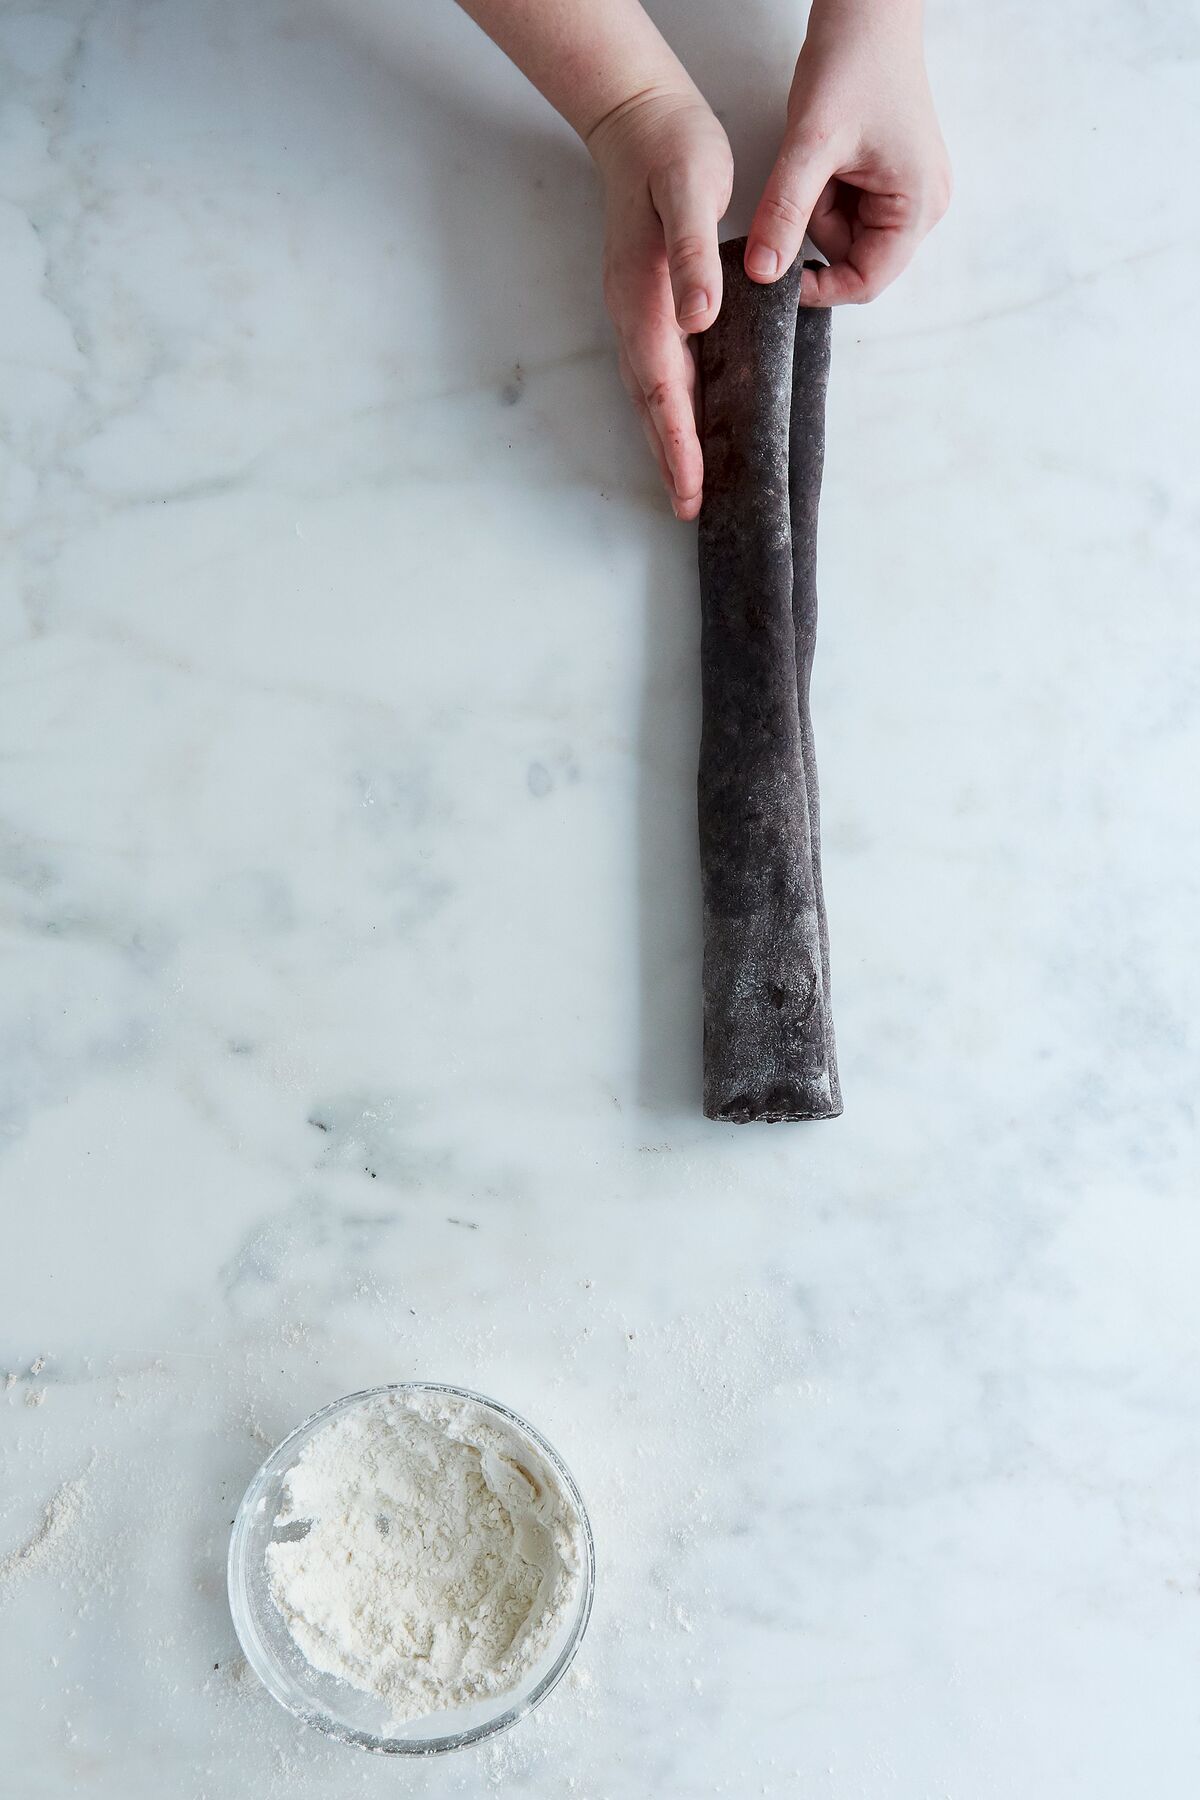
Then fold the dough in half along the center seam, forming a log.
Repeat with the second piece of dough. Spread the remaining sugar on a small plate or directly on your work surface. Use a sharp knife to slice the log of dough into 1/2″ thick pieces.
Dip both sides of each piece in sugar to coat, then transfer to parchment lined baking sheets, leaving about 1/2″ between them. (Friend, baker extraordinaire, and foreword writer Rose Levy Beranbaum had the brilliant idea to alternate the angle on the baking sheet in each row so that they have maximum space to expand while still fitting several on a baking sheet.)
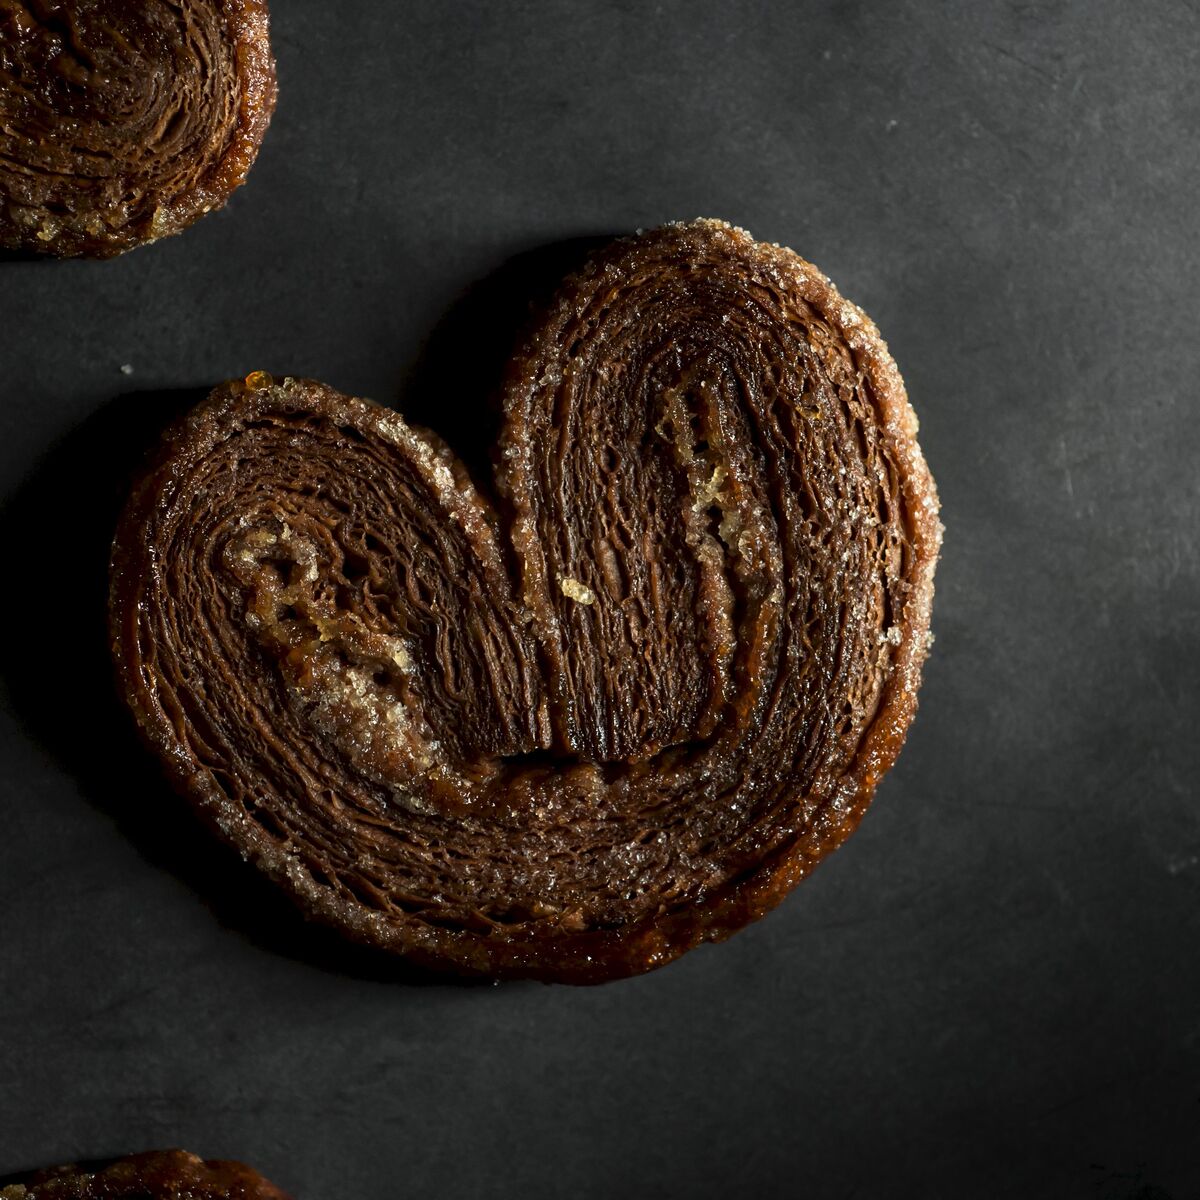
Bake the palmiers in a 400°F (204°C) oven for 10-12 minutes. Remove the trays from the oven and flip each palmier over. Bake for 10-12 minutes more, until both sides are caramelized and crisp. Take care not to burn, especially if you’re using the black cocoa – it can be hard to tell! Transfer to a wire rack to cool completely before serving!

Chocolate Puff Pastry
Ingredients
Butter Block Ingredients
- 1 pound unsalted butter room temperature
- 1/3 cup bread flour
- 1/2 cup cocoa powder preferably King Arthur’s Black Cocoa Powder
Dough Ingredients
- 3 1/3 cups bread flour
- 1 1/3 cups all-purpose flour
- 1/3 cup cocoa powder preferably King Arthur’s Black Cocoa Powder
- 1 1/2 teaspoons fine sea salt
- 8 tablespoons unsalted butter room temperature
- 1 cup water cool
- 3 tablespoons water cool
Palmiers Ingredients
- Prepared chocolate puff pastry chilled
- 3/4 cup granulated sugar
Instructions
Butter Block Instructions
- I use a baking sheet as a visual guide when I make puff pastry and roll the dough out to slightly larger than the baking sheet, so I don’t need to use a ruler. Cut a 13-by-18-inch piece of parchment paper and place it on your work surface with one of the short ends facing you.
- In a medium bowl, blend the butter, flour, and cocoa powder together with a wooden spoon or silicone spatula.
- Scoop the mixture onto the lower third of the parchment paper and use an offset spatula to spread it into a rectangle 6 by 9 inches and 1/2 inch thick. Use the blade of the spatula to help keep the edges squared off while you work.
- Fold the upper part of the parchment down over the butter block—you can use the paper to help you square off the edges.
- Transfer the wrapped butter block to the refrigerator.
Dough Instructions
- In the bowl of a stand mixer fitted with the dough hook, mix the bread flour, all-purpose flour, cocoa powder, and salt to combine.
- Add the butter and mix on low speed until it is fully incorporated and the mixture looks a little crumbly, about 1 minute.
- Add the water and mix until the dough comes together, 4 minutes.
- Increase the speed to high and mix for 1 to 2 minutes more, until the dough is smooth.
- Turn the dough out onto a large sheet of plastic wrap and use your hands to form it into a rough rectangular shape. Wrap tightly in the plastic and chill for 30 to 40 minutes. (This lets the dough rest and also allows it to come to a temperature and texture similar to the butter block.)
Locking the Butter Into the Dough Instructions
- When the dough and the butter block are both chilled but still flexible (60F to 70F / 16C to 21C), it’s time to lock the butter into the dough: On a lightly floured surface, roll the dough out to a rectangle 12 by 10 inches and ⅔ inch thick. If necessary, turn the rectangle so that one of the shorter ends is facing you.
- Peel the paper back from the top of the butter block, leaving it on the paper so that you can use it to help you to guide it onto the dough: Invert it onto the bottom half of the dough, positioning it so that there is a 1/2 to ¾ inch margin of dough around the sides and bottom of the butter block. Fold the top of the dough down over the butter block so that it meets the opposite edge of the dough. Press the edges of the dough together firmly all the way around to seal, then fold the excess dough at the bottom and edges under itself. You should now have a firm but pliable rectangular package of dough (about 6 by 10 inches) enveloping the butter block. If the dough and/or butter block are too soft to proceed with rolling and folding, cover the dough with plastic wrap, place it on a parchment-lined baking sheet, and chill it for about 30 minutes.
- Line a baking sheet with parchment paper. On a lightly floured surface, roll the dough out to a rectangle 13 by 19 inches and 1/2 inch thick. If you’re having a hard time rolling the dough, it’s probably too cold. Let stand at room temperature for 10 to 15 minutes. On the other hand, if bits of butter are breaking through the surface and getting all melty and squishy, it’s too warm; return it to the refrigerator to firm up.
- There are two kinds of folds used for making puff pastry: the 4-fold and the 3-fold. You will be making a 4-fold, a 3-fold, a 4-fold, and final 3-fold. (If this sounds confusing, it will all make sense soon!) To make the first 4-fold, position the dough so that one of the long sides is facing you. Fold the left edge about three quarters of the way over the dough. Fold the right edge one quarter of the way over the dough so it meets the left edge. The dough will now look somewhat like an open book with an off-center spine. Fold the larger side over the shorter side. You will now have 4 layers of dough. Transfer the dough to the parchment-lined baking sheet. Brush all loose flour off the surface of the dough. Cover the baking sheet with plastic wrap and refrigerate the dough for about 30 minutes—you want the dough to relax and return to the ideal temperature.
- Now make the first 3-fold: On a lightly floured surface, roll the chilled dough out again to a rectangle 13 by 19 inches and 1/2 inch thick. With one of the long sides facing you, fold the left edge one third of the way over the dough. Then do the same with the right edge, folding it one third of the way over so that it rests on top of the piece you just folded. You will now have 3 layers of dough. Brush away the excess flour. Return the dough to the baking sheet, cover, and refrigerate for another 30 minutes.
- Make another 4-fold. Return the dough to the baking sheet, cover, and refrigerate for about 30 minutes.
- You’re almost done! Make another 3-fold. Return the dough to the baking sheet, cover, and refrigerate for about 30 minutes.
- Once the dough has chilled, divide it into two even pieces. The dough can be used immediately, or wrapped tightly in plastic wrap. It can be refrigerated for up to 3 days or frozen for up to 3 months. Thaw in the refrigerator overnight before using.
Palmier Instructions
- Preheat the oven to 400F / 204C, with racks in the upper and lower thirds. Line two baking sheets with parchment paper.
- Cut the dough into 2 equal pieces. Keep one half refrigerated while you work with the other piece. On a lightly floured surface, roll out the dough out to a rectangle nearly—but not quite—15 by 10 inches and 1/2 inch thick.
- Sprinkle 37 g / 3 tablespoons of the sugar on your work surface and place the dough on top. Sprinkle another 37 g / 3 tablespoons sugar over the surface of the dough. Roll out to a rectangle 15 by 10 inches and 1/2 inch thick, squaring the dough off at the edges with a bench knife while you work to keep them sharp and straight. Then, if the edges are rough or wavy, trim them to even them.
- Fold the two long sides over to meet exactly in the center of the dough. Then fold in half along the center seam, forming a log. Repeat with the second piece of dough.
- Spread the remaining sugar on a small plate. Use a sharp knife to slice the log of dough into ½ -inch-thick pieces. Dip both sides of each piece into the sugar and transfer to the prepared baking sheets, leaving 1/2 inch between them.
- Bake the palmiers for 10 to 12 minutes. Remove the baking sheets from the oven and flip each palmier over. Bake for 10 to 12 minutes more, until both sides are caramelized and crisp. Transfer to a wire rack to cool.
Nutrition
Be FEARLESS! If making your own puff pastry is something that’s ever scared you away from trying, I hope you’ll take this detailed step-by-step guide as a way to conquer that fear! It isn’t the easiest recipe, and of course, practice makes perfect.
Erin Jeanne McDowell is a writer and an IACP-award winning food stylist based near New York City. Originally from Kansas, she studied at The Culinary Institute of America in New York’s Hudson Valley. She serves as Baking Consultant at Large for Food52.com and is Recipes Editor for PureWow.com. Her work has appeared in magazines such as Fine Cooking and Sift. Her first cookbook, The Fearless Baker, was published by Houghton Mifflin Harcourt in October, 2017.
Follow Erin at @emcdowell on Instagram for more looks into her book and kitchen!
All process photos (on white marble) are by Liz Andrews. Palmier photos are by Jennifer May.
Loading comments...