Saturday, March 27, 2010

peekfrostings

Goldbunny Crackers for Easter


There is no reason that your homemade goldfish crackers have to be fish. Why not surprise your egg hunters with some adorable goldbunnies?

Are you thinking goldturkeys for Thanksgiving and goldsantas for Christmas? I sure am!

Tips:

Wednesday, March 24, 2010

peekfrostings

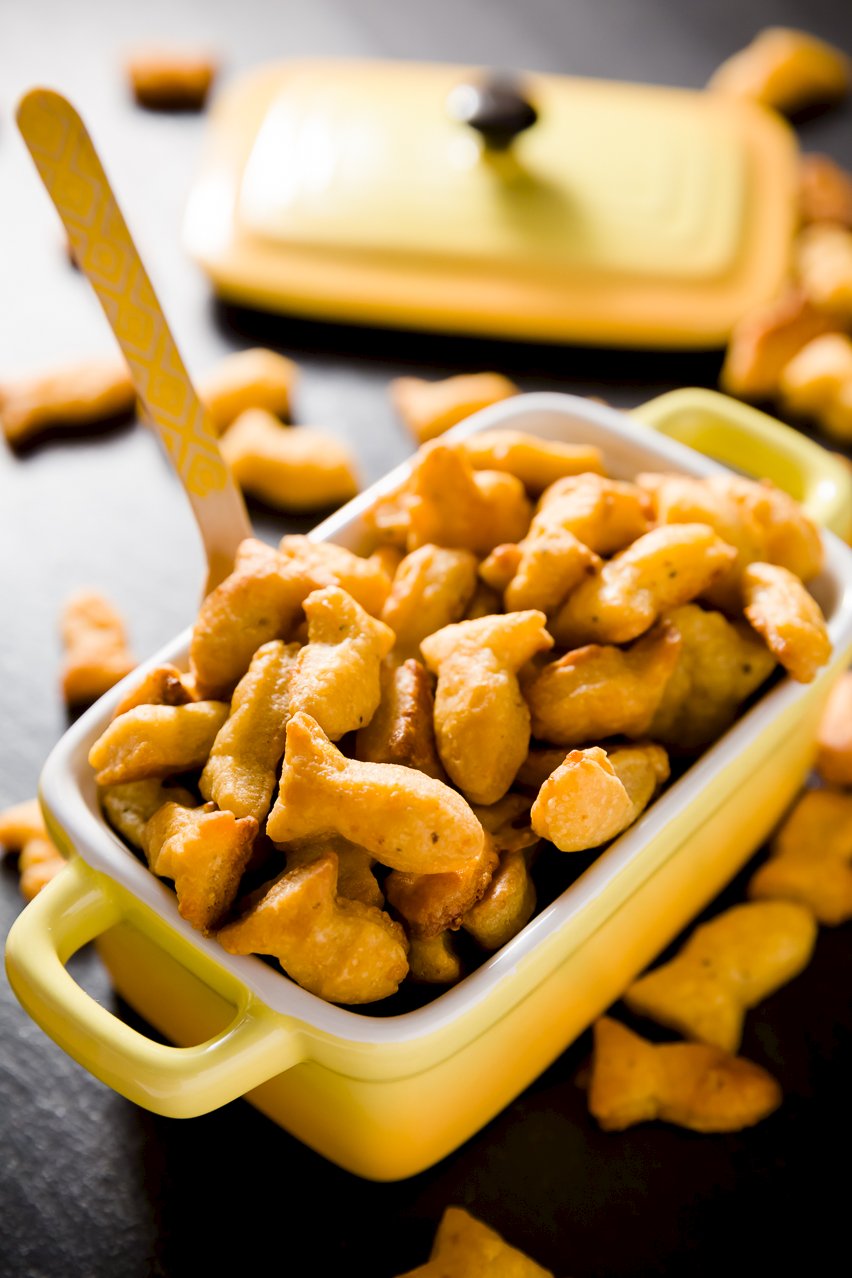
Goldfish Crackers Made From Scratch


Goldfish crackers seem to be present wherever toddlers are found. The little goldfish crackers seem to be the perfect mate for little fingers. Myles is not quite toddling yet, but just as I've done advance reading to know what to expect, I also thought some advanced baking might be in order to learn the secret behind the goldfish goldmine. Are goldfish crackers something that I could easily make myself using a cheddar of my choosing? YES!

The hardest part of making goldfish crackers, as it turns out, is the time it takes to cut them out. Because the goldfish crackers are so tiny, a little dough goes a long way and you'll feel like the cookie cutter stage is never-ending. That being said, nothing is stopping you from making giant goldfish crackers if you so choose!

I found the goldfish cracker recipe on YumSugar and they got the recipe from Country Living.
  • 1 C all-purpose flour
  • 4 T cold unsalted butter, cut into small pieces
  • 8 oz cheddar cheese (This is the fun part! Pick out whatever type of cheddar that you like! I used orange cheddar for half of the fish, as shown above, and white cheddar for the other half, as shown below. Both cheddars that I used were extra sharp because that's how I like it!)
  • 1/2 t salt
  • 1/2 t fresh-ground pepper
  • A fish cookie cutter. I got mine from CopperGifts.
  1. Pulse the flour, butter, cheese, salt, and pepper together using a food processor until the mixture resembles coarse meal.
  2. Pulse in 3 to 4 tablespoons of water, one tablespoon at a time, and only enough so that the dough forms a ball and rides the blade.
  3. Remove, wrap in plastic, and chill for 20 minutes or up to 24 hours.
  4. Line 2 baking pans with parchment paper and set aside.
  5. Roll the dough out to 1/8-inch thickness. (If you roll it thicker, it will still work, but the crackers won't be quite as crunchy. This dough rolled out so easily; you'll wish that you always worked with cheddar!)
  6. Cut out as many crackers as possible.
  7. Place them 1 inch apart on the prepared baking pans.
  8. Bake at 350 F until golden and crisp - 15 to 20 minutes.
And, yes, these fishies are going to go in a cupcake!

Sunday, March 21, 2010

peekfrostings

Cupcakes Wellington - The Dessert of Your Dreams


Take a baked and frosted cupcake, wrap it in puff pastry, bake it again, and you've got Cupcakes Wellington (a Cupcake Project original creation). Imagine a steaming hot, flaky croissant with a soft, warm, frosted buttery cake waiting for you inside. Bride 1.0 best described the joy of this eating experience with the following quote: "Every cupcake should be wrapped in puff pastry!"

Baking Cupcakes Wellington couldn't be easier. Watch, learn, and go try this yourself today. Do not wait!

First, unwrap a cupcake and plop it, frosting side down, on a piece of puff pastry atop a baking sheet. Enjoy the moment. You don't often get the opportunity to turn a cupcake upside down.

For the detail oriented:

What kind of cupcake should I use?

It's entirely up to you. Any cupcake would work. However, some frostings work better than others. I used a mango cupcake with dulce de leche frosting and the dulce de leche absorbed a bit into both the cupcake and the inner side of the puff pastry, adding a delicate sweetness to the dessert.

I plan to make Cupcakes Wellington again with a cupcake that has a chocolate ganache frosting - like my Better Than Sex Chocolate Cupcakes (if I wrapped those bad boys in puff pastry, I'd have to call them Better Than Better Than Sex Cupcakes).

I do not recommend using a cupcake with a buttercream frosting, but feel free to experiment.

How much puff pastry should I use?

I used a 5" x 5" square of puff pastry for each cupcake. But, trust me, there is no need to break out your ruler. Use as much or as little puff pastry as you'd like - just make sure that you have enough to wrap it completely around the cupcake.

What kind of puff pastry should I use?

I used the same brand that I used in my Beef Wellington, Dufour. But, use whatever brand you prefer, or make puff pastry from scratch.

Wrap the puff pastry tightly around the cupcake. Squeeze the edges shut and try to minimize any dough overlap.

Turn the cupcake right side up, brush with egg yolk, and draw a few lines (or whatever shape you'd like) in the dough with a knife (be really gentle so you don't cut through to the cupcake layer).

Bake at 400 F for 25 minutes.

At first, I worried that baking the cupcake a second time would dry it out. But, au contraire, the second baking made the cupcakes extra moist.

Cut the Cupcakes Wellington into slices and eat them while they're hot!!

Credits

I'd like to send a special shout out to Free Range Cookie for the idea!

Thursday, March 18, 2010

peekfrostings

Mango Cupcakes - I Learned The Secret


These moist mango cupcakes topped with decadent, drippy dulce de leche are the mango cupcakes that I've been wanting to create, but until now, hadn't. Don't you want to lick the dulce de leche right off the side of the mango cupcake wrappers? Confession: I loved that the mango cupcakes were messy because every time I handed someone a mango cupcake, I got to sneak a little taste of it off of my fingers.

The Secret to Mango Cupcakes

My last mango cupcakes didn't taste mango-ey at all and the mango cupcakes before those tasted like corn muffins. I turned to you, my incredibly creative readers, for suggestions on how to give the cupcakes more mango flavor. You had some fantastic ideas (go read the comments on my last mango attempt if you haven't). While I'd love to try all of them, the one that stuck out for me was using mango extract (one of my friends on Facebook suggested it and SilverMoon Dragon and Sommer had similar suggestions of using mango essence and mango flavoring oil).

I found natural mango extract on Amazon and as soon as I opened the bottle, I knew that I had found the mango prize! It smelled like mango - not fake, candy mango, but like the fresh mango that I eat over the sink because it's so juicy. Just like vanilla extract is necessary for a heavenly vanilla cake experience, it seems that mango extract is needed for a noticeable mango flavor.

Mango Cupcake Recipe

Yield: 12 cupcakes
  • 2 C flour
  • 1 1/2 t baking powder
  • 1/2 t baking soda
  • 3/4 C butter, room temperature
  • 2/3 C sugar
  • 2 eggs
  • 2/3 C plain yogurt
  • 2 t mango extract
  • 1 C mango juice (Check the label on your juice. It's hard to find 100% mango juice. If you can, that is best. But, if not, a mango juice blend would also work.)
  • Dulce de leche, to taste (see my post on how to make dulce de leche)
  1. Whisk flour, baking powder, and baking soda in a bowl.
  2. Beat butter and sugar until light and fluffy.
  3. Beat in eggs, yogurt, and mango extract until blended.
  4. Alternately fold in flour mixture and mango juice, beginning and ending with the flour.
  5. Fill cupcake liners 3/4 full.
  6. Bake at 350 F for about 25 minutes or until a toothpick comes out of the cupcake clean.
  7. Top with dulce de leche and either:
    1. Eat fast, using your tongue to keep up with anything that drips down the side.
    2. Save them to turn into Cupcakes Wellington.

Wednesday, March 17, 2010

peekfrostings

The Best Man


The Chocolate Liqueur Cup Winner

No... it couldn't be. But, it was.


When I first started this blog, all of my readers were friends and family - people who read the blog because they knew me, not because they loved cupcakes. Now, my readers are mostly people I don't know - a cupcake community from all over the world. You truly wowed me with your suggestions of what to do with the chocolate liqueur cups. If you entered, but didn't read the others' comments, I would highly encourage you to go back and read through some of the suggestions.

So, whose amazing-sounding creation did I randomly draw out of the 108 comments?


And who is this Gil?

Photo by Alisha Clark

The best man at our wedding! Although he said that he would simply eat the chocolate cups, I propose that when Jonathan and I come to visit him in NY, he should fill them with champagne and make another toast to us. Am I asking too much?

Tuesday, March 16, 2010

peekfrostings

Dulce De Leche in a Crock Pot


Dulce de leche directions:

Dulce De Leche Step 1: Take one or two cans of sweetened condensed milk, remove the labels, and put them in your crock pot.
Dulce De Leche Step 2: Completely submerge the can(s) in water.
Dulce De Leche Step 3: Set to low and wait eight hours.
Dulce De Leche Step 4: Wait for the cans to come to room temperature and open the cans.

The Dulce De Leche Backstory

When I last made dulce de leche, I boiled milk and sugar on the stove top. You, my readers, flooded me with suggestions on alternate ways of making dulce de leche. Many of you suggested that I use a pressure cooker to make dulce de leche. That's a great idea, but I don't own one (it's one of the few kitchen gadgets that I don't own).

Rosie
suggested that I use a slow cooker:

I happen to have a slow cooker so I decided to give that a go. But, I didn't quite use her method. I turned to the expert on all things slow cooker related, Steph at A Year of Slow Cooking.

Instead of slow cooking the dulce de leche on high for 4-6 hours, she makes dulce de leche on low for 8 hours - allowing you to go to bed and wake up to dulce de leche (arguably better than waking up to coffee).

Instead of opening the can, Steph leaves the can intact. As long as the can remains fully submerged, it shouldn't explode (I say this with some confidence after reading her post - including all of its comments - and trying it myself).

The downside, as you can see, is that the cans rust and get rust on the crock pot. You can easily remove the rust from the crock pot with a little Bar Keepers Friend.

The stovetop milk plus sugar dulce de leche tasted slightly better than the crock pot version, but the ease of the crock pot far outweighs any taste differences. I'll be using this method from now on.

Sunday, March 14, 2010

peekfrostings

Beef Wellington - It's Not So Hard After All


Beef Wellington, as often is the case with my creations, started with a tweet.

The Beef Wellington inspirational tweet came from @freerangecookie. "Hey, Cupcakes Wellington might be fun. Just a random 'thought'." Random and genius, I say!

I couldn't make Cupcakes Wellington without first familiarizing myself with the ins and outs of the classic Beef Wellington.

I turned to Simply Recipes for the Beef Wellington Recipe and I was not disappointed. It was surprisingly easy to make - and the juicy meat, plus the salty prosciutto, earthy mushrooms, and flaky, buttery pastry would be sure to impress any guest.

Beef Wellington Recipe

I am reprinting the Beef Wellington recipe from Simply Recipes with my notes.

Yield: The Beef Wellington recipe claimed that it served four. This would be true if you had side items. But, if you are like me and can only manage to make one course for dinner, it will probably just feed two people.
  • 1 lb beef tenderloin fillet (Get the best you can afford. I got a grass-fed fillet from Whole Foods.)
  • Salt and pepper (You'll use these to taste, but be careful not to over-salt. The prosciutto adds a lot of salt and my only complaint about the dish was that it was a bit too salty.)
  • 2-3 T Canola, grapeseed, or olive oil (I used olive.)
  • 1 lb mushrooms (I used a gourmet mushroom blend, but I think you could go cheap on this one and it would still be good.)
  • 4 thin slices ham (Parma ham if you can get it) or prosciutto (I used prosciutto.)
  • 2 T yellow mustard (I used whole-grain mustard.)
  • 7 oz puff pastry (needs 3 hours to defrost in refrigerator if using frozen) (I used Dufour on Strawberry Toast's recommendation and it puffed to perfection! I debated making my puff pastry from scratch, but got scared when I read that it was an activity particularly suited to anal-retentive chefs - so not me!)
  • 2 egg yolks, beaten
  1. Sear the beef
  • Heat a tablespoon or two of oil in a large pan on high heat.
  • Season the fillet generously with salt and pepper.
  • Sear the fillet in the pan on all sides until well browned (hint: do not move the fillet until it has had a chance to brown).
  • Remove the fillet from the pan and let cool.
  • Once cooled, brush the fillet on all sides with mustard.
  1. Prepare the mushrooms.
  • Chop the mushrooms and put them into a food processor to purĂ©e.
  • Heat a large sautĂ© pan on medium high heat.
  • Scrape the mushroom purĂ©e into the pan and let cook down, allowing the mushrooms to release their moisture.
  • When the moisture released by the mushrooms has boiled away, set aside the mushrooms to cool.
  1. Lay out the beef, mushrooms, and ham or prosciutto.
  • Roll out a large piece of plastic wrap.
  • Lay out the slices of ham on the plastic wrap so that they overlap.
  • Spread the mushroom mixture over the ham.
  • Place the mustard-covered beef fillet in the middle.
  1. Roll it up!
Yup, that's Myles in the background. He's 7 months now!
We roll him up in his high chair to get a closer look at us cooking.
I'll be sharing a non-blurry picture of him soon!

  • Roll the mushroom and ham over the fillet, using the plastic wrap so that you do this tightly.
  • Wrap up the beef fillet into a tight barrel shape, twisting the ends of the plastic wrap to secure.
  • Refrigerate for 20 minutes.
  1. Wrap in puff pastry and bake.
  • On a lightly floured surface, roll out the puff pastry sheet to a size that will wrap around the beef fillet.
  • Unwrap the fillet from the plastic wrap and place in the middle of the pastry dough.
  • Brush the edges of the pastry with the beaten eggs.
  • Fold the pastry around the fillet, cutting off any excess at the ends (pastry that is more than 2 layers thick will not cook all the way, so try to limit the overlap).
  • Place on a small plate, seam side down, and brush beaten egg yolks all over the top.
  • Chill for 5-10 minutes.
  • Place the pastry-wrapped fillet on a baking pan.
  • Brush the exposed surface again with beaten eggs.
  • Score the top of the pastry with a sharp knife, not going all the way through the pastry. Sprinkle the top with coarse salt.
  • Bake at 400 F for 25-35 minutes.
  • The pastry should be nicely golden when done. (To ensure that your roast is medium rare, test with an instant read meat thermometer. Pull out at 125-130°F for medium rare.) (I didn't have an instant read thermometer. I used a normal one and it worked just fine.)
  • Remove from oven and let rest for 10 minutes before slicing.
  • Slice in 1-inch thick slices.
  1. Admire your work and eat!

Check back soon for Cupcakes Wellington!

Wednesday, March 10, 2010

peekfrostings

Chocolate Liqueur Cups Giveaway


What would you do with 12 chocolate liqueur cups from Astor Chocolate? Tell me in the comments for a chance to win them!

I'll randomly pick a winner at 12:01 AM CST on Wednesday, March 17th.

Small Print: You must leave your email address to qualify and only US residents are eligible.

Here are some ideas to get you started:
Good luck!

Sunday, March 7, 2010

peekfrostings

The Ultimate St. Patrick's Day Cupcakes


Q. What makes these cupcakes the ultimate St. Patrick's Day cupcakes?

A. Lots of green and lots of booze!

They are green velvet cupcakes with Irish whiskey cream cheese frosting and a built-in chocolate cup filled with green beer.

Believe or not, prior to making these cupcakes, I had never made velvet cupcakes (red or otherwise). I don't get the appeal - especially given that most of the time the color comes from gobs of food coloring (with the rare exception of people who use beets for the red color). However, since Bride and Groom 3.0 requested red velvet as a possible wedding flavor, I decided to break down and try the elusive velvet cupcake (but, I had to be different and go for green).

How to Make the Ultimate St. Patrick's Day Cupcakes

1. Make the Green Velvet Cupcakes

Because of my distaste for food coloring, I first tried to make my green velvet cupcakes with all-natural food colors. Sadly, after using two whole packages of all-natural yellow and blue coloring, the cupcakes still looked brown. The only way to make the cupcakes bright green was to break down and use Fakey McFake colors (at least St. Patrick's Day is only once a year).

Credits:
I got the recipe from Sarah of Daily Nibbles. Sarah tried three different red velvet recipes and decided that this one was the best.
Sarah got the recipe from The Way The Cookie Crumbles,
Who got it from Apple A Day,
Who adapted from Saveur,
Who got it from Cake Man Raven.

Yield: About 15 cupcakes
  • 2 1/2 C cake flour
  • 1 1/2 C sugar
  • 1 t baking soda
  • 1 T cocoa powder
  • 1 t salt
  • 2 eggs
  • 1 1/2 C vegetable oil
  • 1 C buttermilk
  • 2 T (1 oz.) green food coloring
  • 1 t vanilla extract
  • 1 t white distilled vinegar
  1. Sift together flour, sugar, baking soda, cocoa, and salt into a medium bowl.
  2. Beat eggs, oil, buttermilk, food coloring, vanilla, and vinegar in a large bowl with an electric mixer until well combined.
  3. Add dry ingredients and beat until smooth, about 2 minutes.
  4. Fill cupcake liners 3/4 full with cupcake batter.
  5. Bake at 350 F for 20 minutes or until cupcake bounces back when touched.
2. Fill the Cupcakes with the Chocolate Liqueur Cups

Wait for the cupcakes to cool completely (you don't want to melt the chocolate). Then, using a small paring knife, cut a chunk out of the top of the cupcake and slide the chocolate liqueur cup in.

These chocolate liqueur cups were compliments of Astor Chocolate. Check back soon for a chance to win some!

3. Frost With Irish Whiskey Cream Cheese Frosting
  • 8 oz cream cheese, room temperature
  • 1/4 C unsalted butter, room temperature
  • 3 C powdered sugar, sifted
  • 2 T Irish whiskey
  1. Mix cream cheese and butter until light and fluffy.
  2. Mix in powdered sugar one cup at a time.
  3. Mix in whiskey.
4. Fill the Liqueur Cups With Green Beer

I recommend that you fill the liqueur cups with beer tableside. The easiest way to do this is to use a funnel or a turkey baster. Be careful not to overflow the beer onto the cupcake (although, if you do, your St. Patty's day revelers are not likely to notice or care).

Thursday, March 4, 2010

peekfrostings

Rocky Road Ice Cream


I lost the memory of rocky road ice cream somewhere. I rediscovered it in an old, yellowed notebook where my mom had written Stefani's favorite things at age 5: "Favorite ice cream flavor: rocky road ice cream."

How could rocky road ice cream have been my favorite flavor when I don't like marshmallows - one of rocky road ice cream's three key mix-ins (along with almonds and chocolate chips)? When did I decide that I didn't like marshmallows, and why? Maybe I would still like them in rocky road ice cream.

I took my entire container of homemade chocolate buttermilk ice cream and converted it to rocky road ice cream. You can do this with your favorite chocolate ice cream by letting it melt slightly and mixing in chocolate chips, chopped almonds, and marshmallows and then re-freezing it (or you can add the mix-ins right in your ice cream maker if you are making the ice cream from scratch and your model allows it).

What did my bowl of rocky road ice cream look like when I was done eating it?

Speaking of Rocky Road

Go check out the rocky road cupcakes that I made for Paula Deen. They're chocolate cupcakes with chocolate chips, marshmallows, and almonds mixed in, topped with a toasted chocolate meringue frosting.

Tuesday, March 2, 2010

peekfrostings

Chocolate Buttermilk Ice Cream - What to Do with Leftover Buttermilk


Chocolate buttermilk ice cream is not for everyone. Do you like tart frozen yogurts (Pinkberry-style)? If so, you may enjoy the same sour flavor in a rich, decadent chocolate ice cream. I find that the tartness of chocolate buttermilk ice cream is a refreshing twist on standard chocolate ice cream. But, it would be dishonest of me to not share that my father was grossed out by it: "It tastes like it's gone bad."

Continue Reading Only if You Like Sweet and Sour Combos

Hello, fans of that slight tongue-puckering sensation. Clearly, we have something in common. That being the case, you may also share my problem of having leftover buttermilk in your refrigerator from cupcakes or pancakes (bonus similarity points for you if you also have leftover egg yolks from making meringue). This easy chocolate buttermilk ice cream is a great way to keep your leftovers out of the trash and transform them into something that you and other sour-seekers will savor.

Chocolate Buttermilk Ice Cream Recipe

I got the chocolate buttermilk ice cream recipe by adding chocolate to the buttermilk ice cream recipe on Smitten Kitchen. She adapted it from Claudia Fleming’s The Last Course. I am reprinting it below with my adaptation to make it chocolate ice cream.
  • 2 C heavy cream
  • 1 1/4 C sugar
  • 12 large egg yolks (I only used 7 and it was plenty rich)
  • 8 oz dark chocolate, chopped into small pieces
  • 2 C buttermilk
  • 2 t vanilla (or half a vanilla bean, scraped and simmered with the cream)
  • Pinch of salt
  1. In a large, heavy saucepan, combine the heavy cream and one cup of sugar and bring to a simmer over medium heat.
  2. In a large bowl, whisk egg yolks and remaining 1/4 cup of sugar.
  3. Remove the cream mixture from the heat and drizzle a small amount into the yolks, slowly, and whisking constantly to keep the eggs from curdling. Do this a few more times to warm up the yolks before pouring the yolk mixture back into the cream, whisking constantly.
  4. Cook over low heat until the mixture is thick enough to coat the back of a spoon.
  5. Mix in the chocolate and stir until melted.
  6. Remove from heat.
  7. Strain the mixture and whisk in the buttermilk, vanilla, and salt.
  8. Cool completely and freeze in your ice cream maker. (I found that this ice cream was still too soft after the ice cream was done. I transferred it to another container and froze it for another few hours and it was perfect!)

Real Time Web Analytics