
Complete Guide to Making Perfect Cupcakes
Learn how to make cupcakes from scratch for birthdays, parties, or any day – and get great cupcake-making tips and help with cupcake baking problems. This guide to baking cupcakes covers the basics of how to make cupcakes and also answers some frequently asked questions.
Anyone can make cupcakes – even if you have never baked before!
What Supplies Do You Need to Make Cupcakes?
To make cupcakes, you’ll need a muffin tin and cupcake liners. Muffin tins typically hold 12 cupcake liners.
Even if you are not a professional baker, I highly recommend buying cupcake liners in bulk. You will save a lot of money. You can buy 500 standard-sized white liners for around $13 [paid link], 100 mini liners for around $3 [paid link], and 500 jumbo liners for about $25 [paid link].
You can also use baking cups [paid link] which stand up on their own. If you use baking cups, you’ll need a cookie sheet instead of a muffin tin.
It’s also important to also have the following when baking cupcakes:
- Mixing bowls (If you don’t have a set of mixing bowls, you can use any large bowl.)
- Measuring cups and spoons or a food scale. Most American recipes are written using measuring cups and spoons, but if you are following a recipe written outside of the United States, you’ll need a scale.
It’s really nice to have an electric mixer, especially if you plan to make homemade frosting for your cupcakes. Stand mixers like those made by KitchenAid [paid link] are the easiest to use, but you can buy an electric hand mixer [paid link] for about thirty dollars if you are a beginner baker.
Finally, you will need an oven.
If you are just getting started with baking, see my post on baking tools for the short list of what I consider to be the essentials for a new baker.
How to Make Cupcakes
To make cupcakes, you can either use a cake mix or make cupcakes from scratch. I always recommend baking from scratch for the best results.
First, look through the recipe and gather the ingredients you need. Measure them all out in advance to make sure that you have everything you need. This is called mise en place.
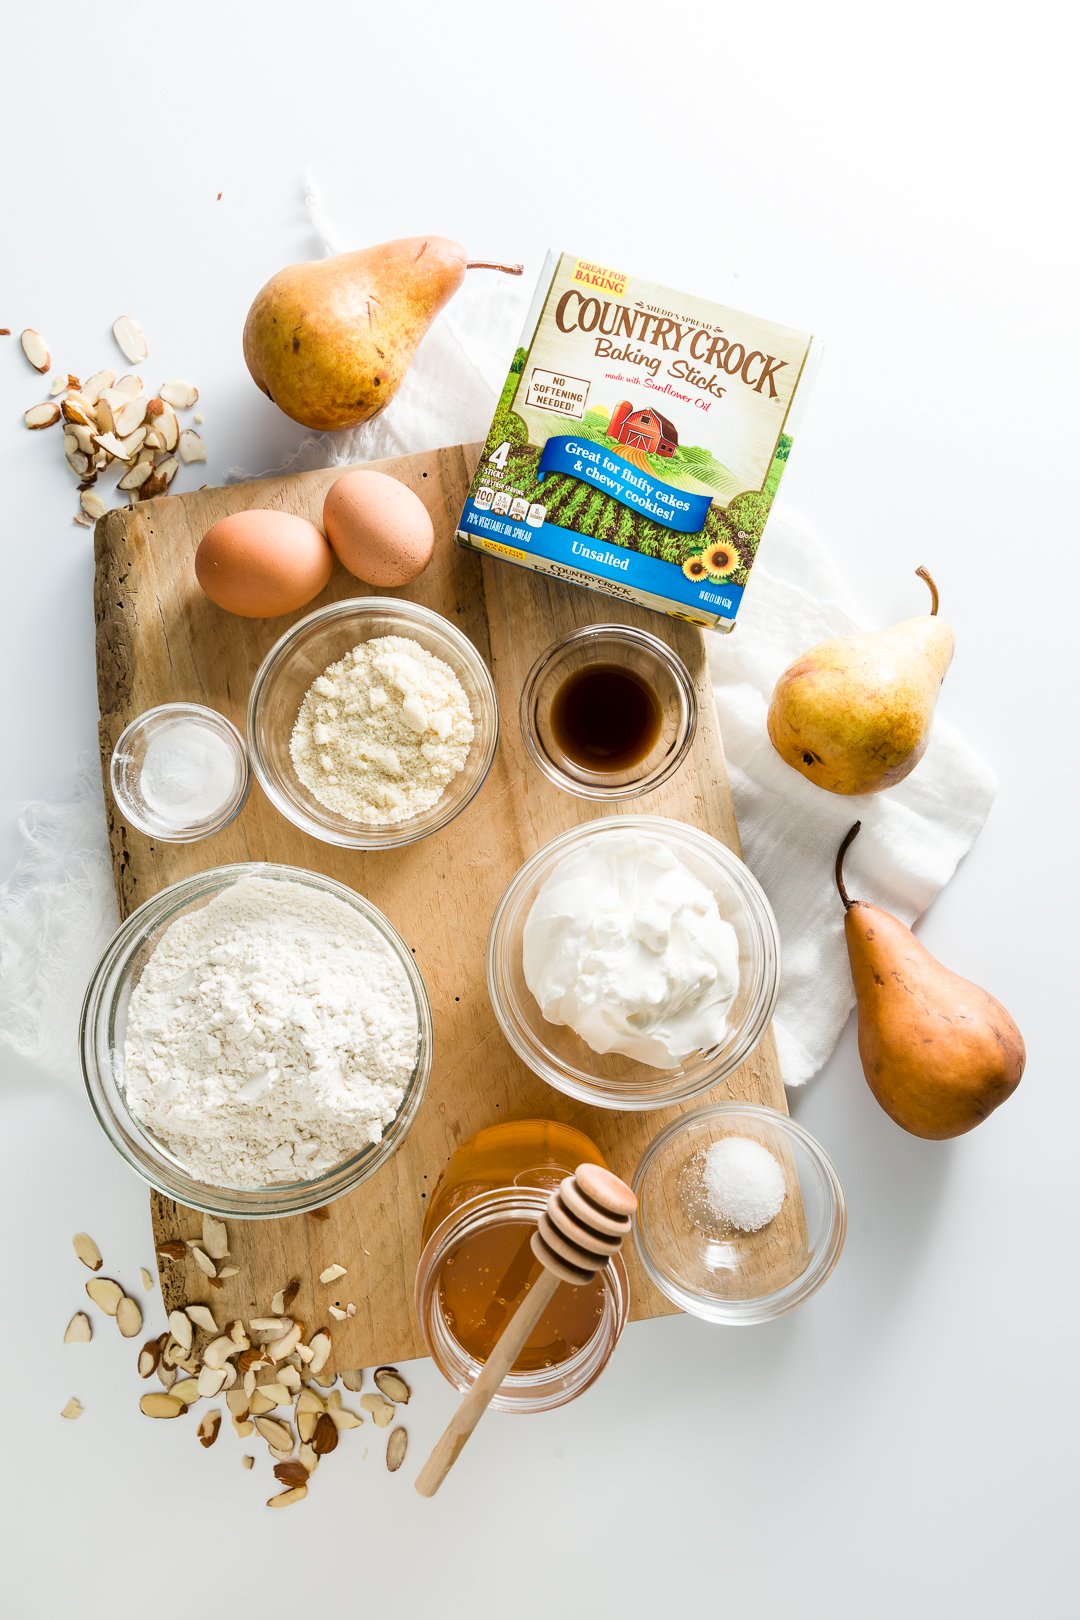
Typically, recipes call for all ingredients to be at room temperature, so make sure to plan a little bit in advance to give your butter, eggs, and and dairy in the recipe time to warm up. (Tip: If you forget to warm the butter in advance, you can warm it in the microwave for about ten seconds until your finger can easily make a dent in it but it isn’t mushy.)
Follow the recipe instructions exactly for the best results. Once you get better at making cupcakes, you can experiment with making small changes. That said, it’s generally acceptable to substitute yogurt for sour cream in recipes.
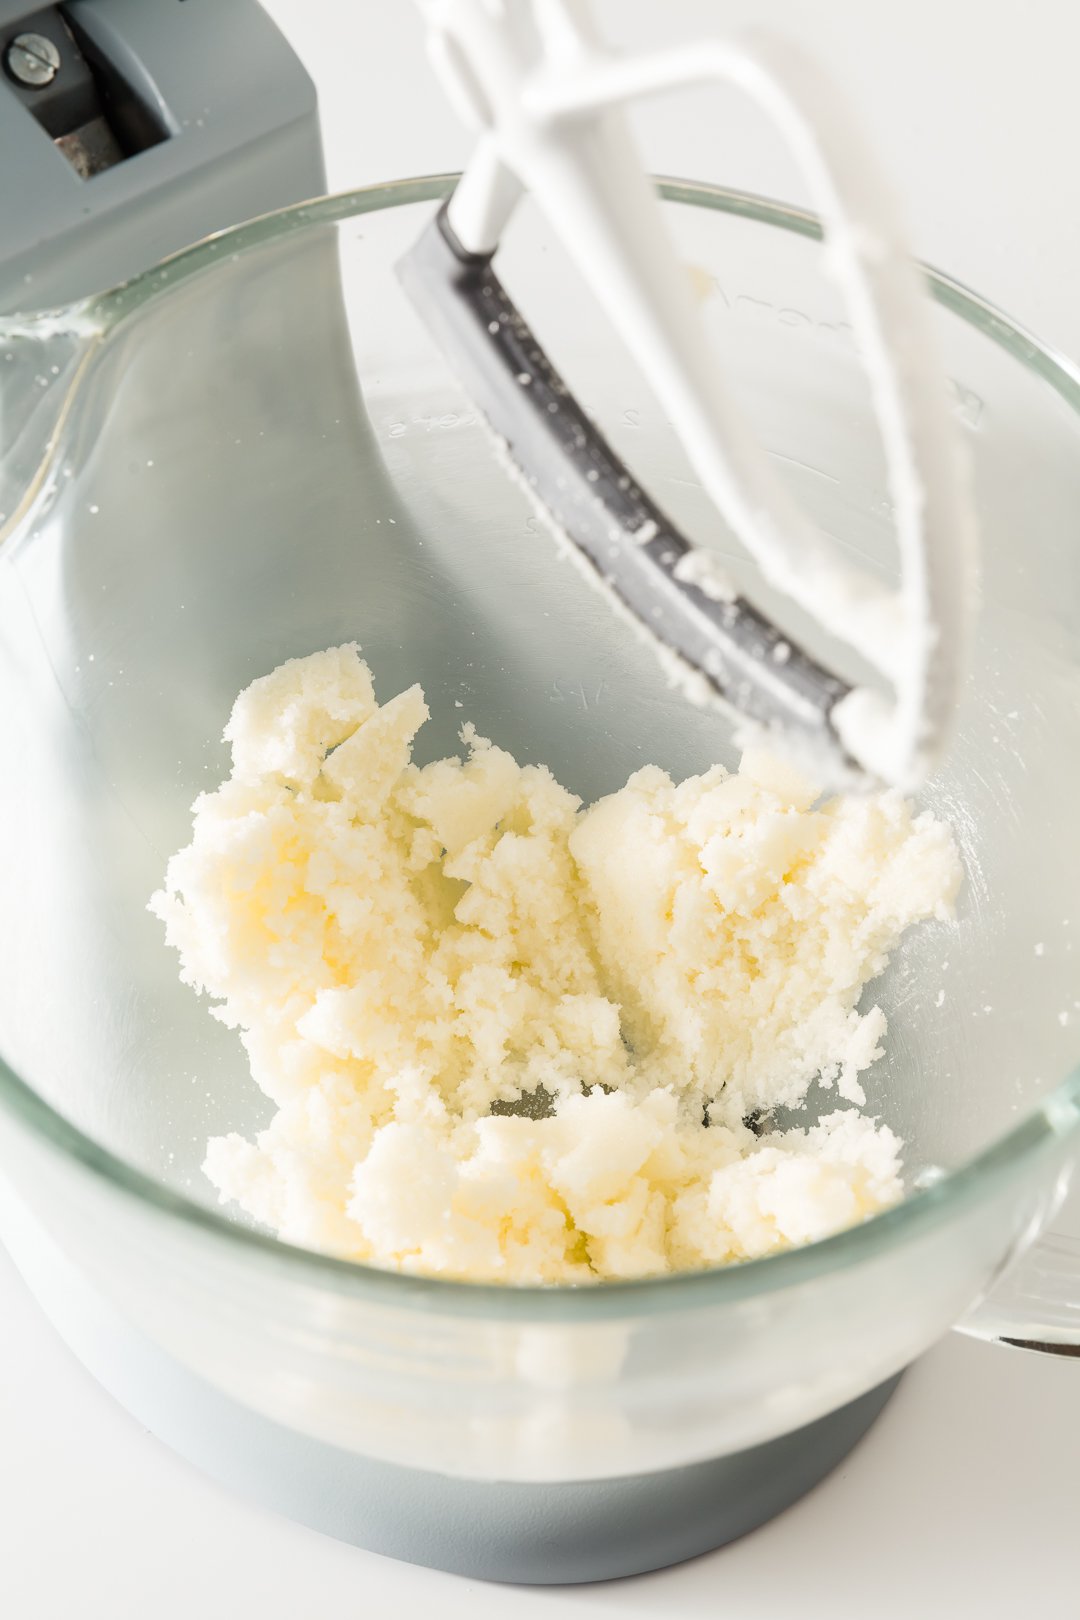
Important Cupcake Baking Terms and What They Mean
- Cream the butter and sugar – This means to mix the butter and sugar together until they become light and fluffy. If you are using an electric mixer, do this on high speed for about three minutes.
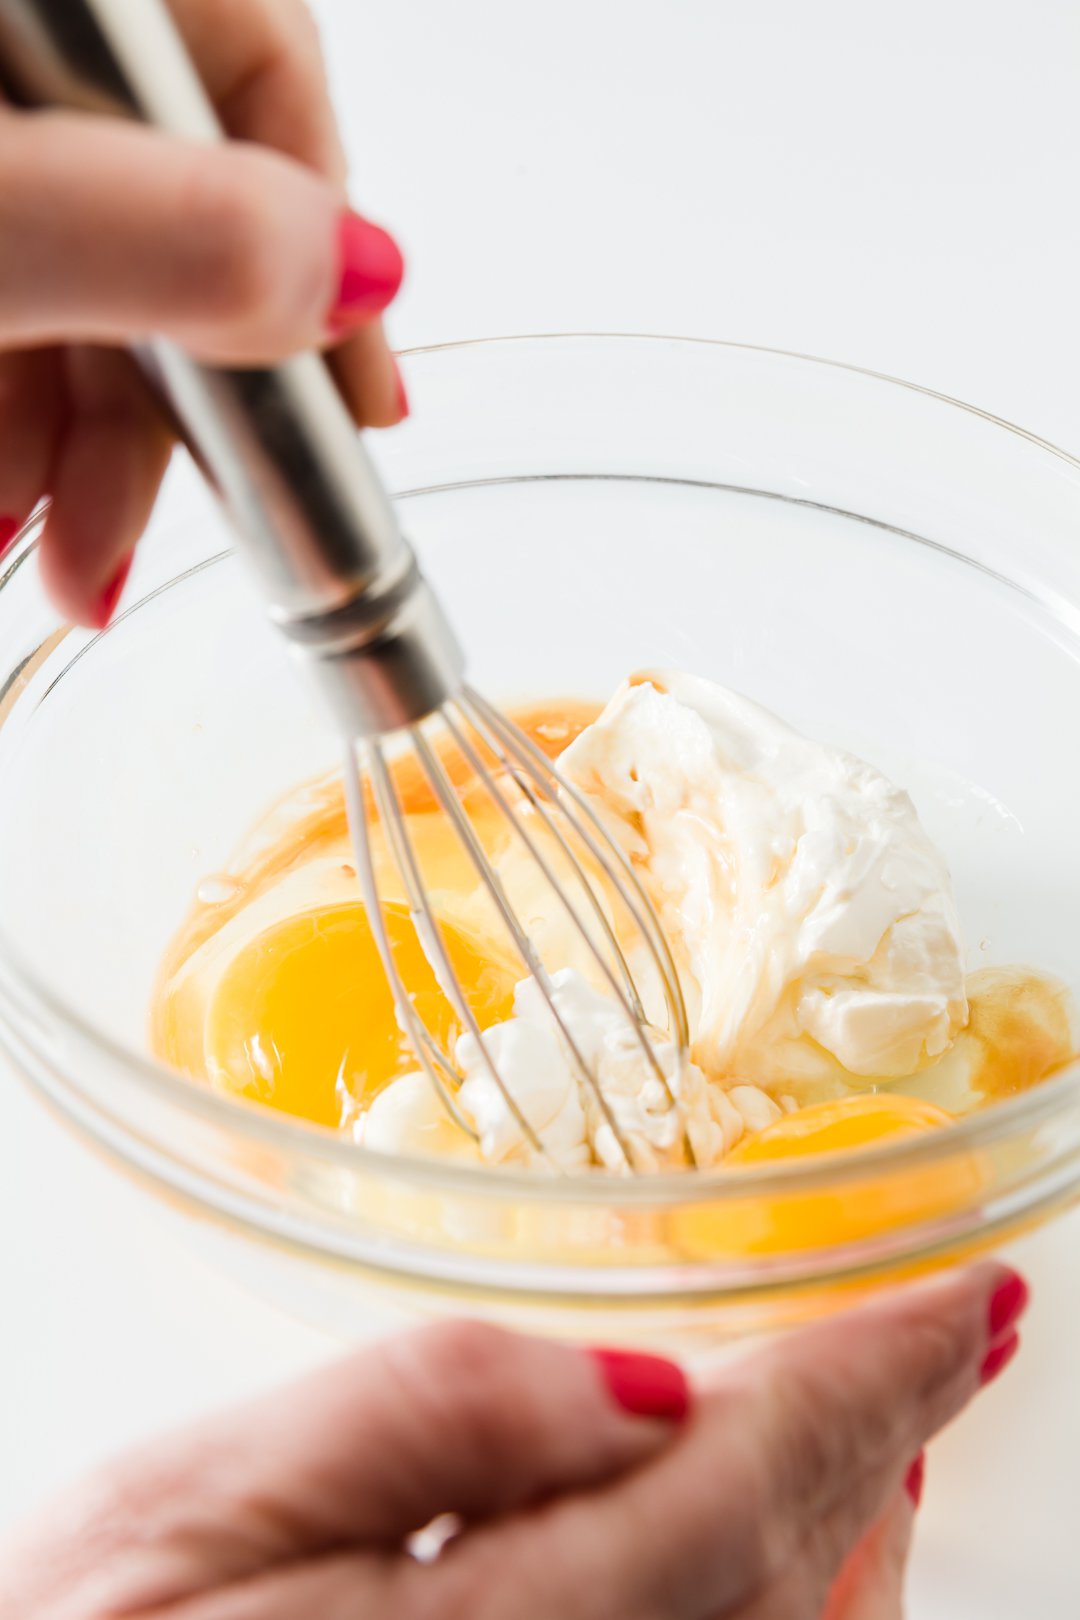
- Whisk together – This means to use the whisk attachment on your electric mixer or to simply use a whisk. If you don’t own a whisk, you can also use a fork to whisk. The goal of whisking wet ingredients like eggs is to incorporate air into them. For mixtures of wet and/or dry ingredients, whisking makes sure they are fully combined and evenly distributed.
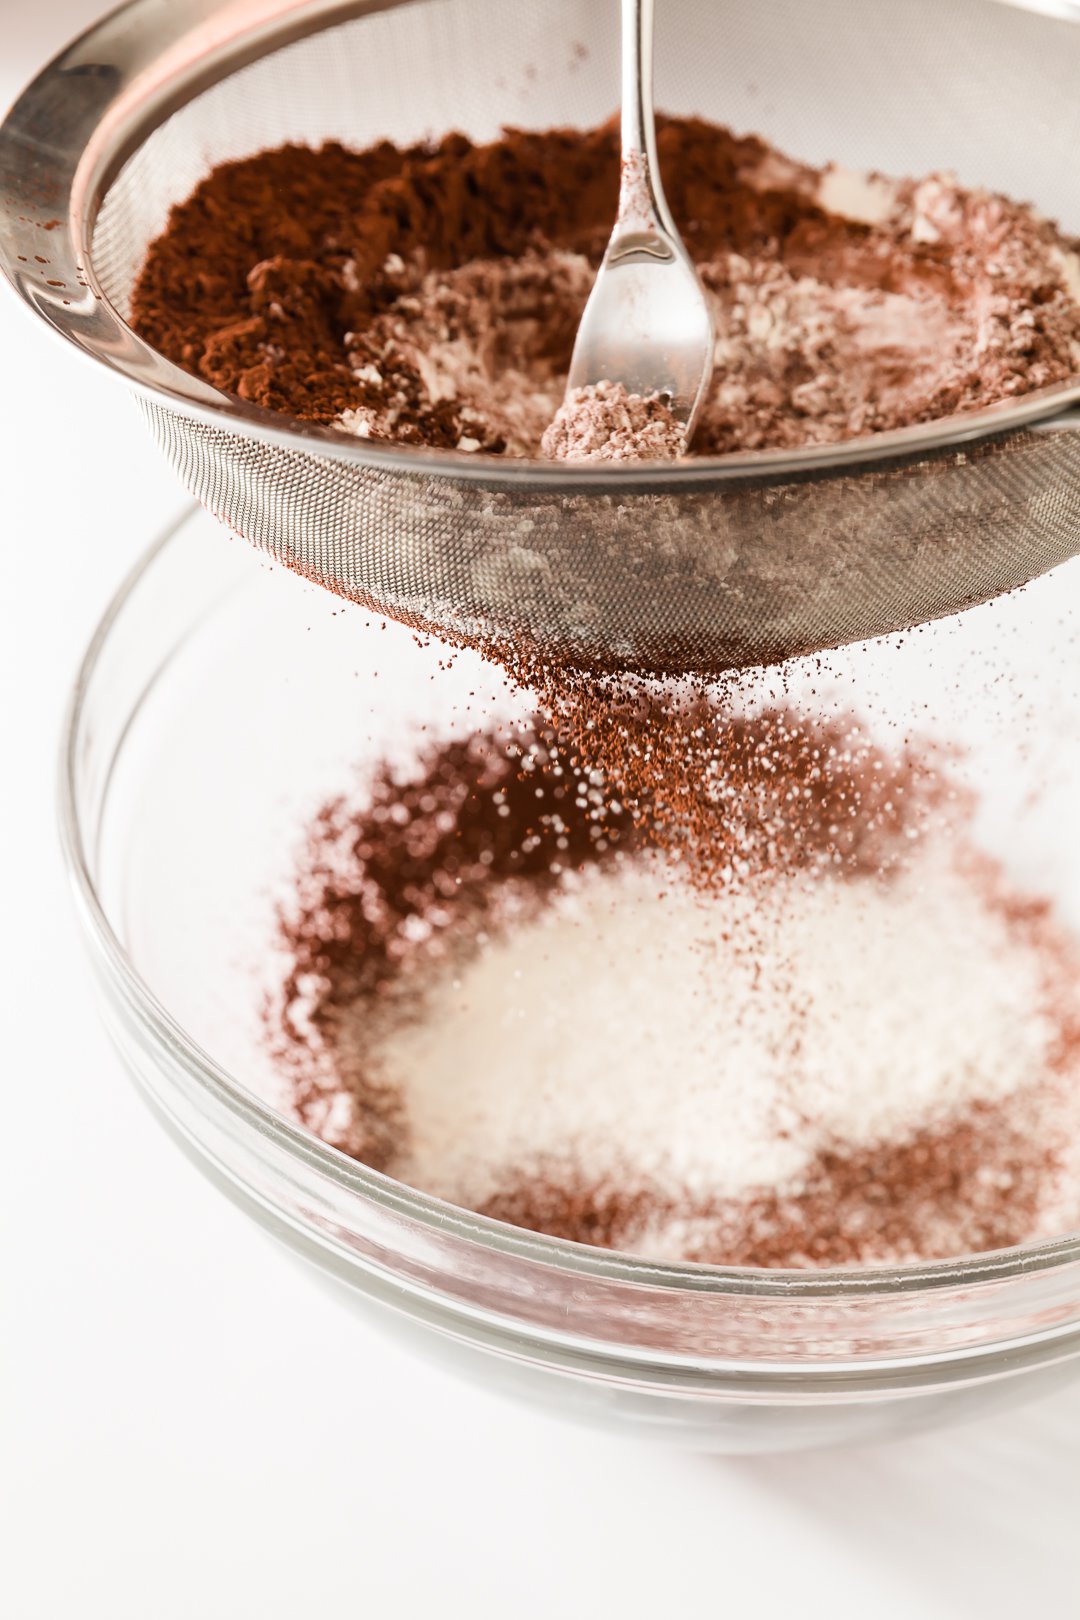
- Sift together – To sift ingredients, you can either use a sifter or a sieve. The goal of sifting is to remove any clumps in your dry ingredients. If your ingredients are nice and smooth, you may be able to skip this step in a recipe.
- Mix until just combined – If the recipe says to mix until just combined, do exactly as it says. Overmixing the batter can cause the cupcakes to come out rubbery.
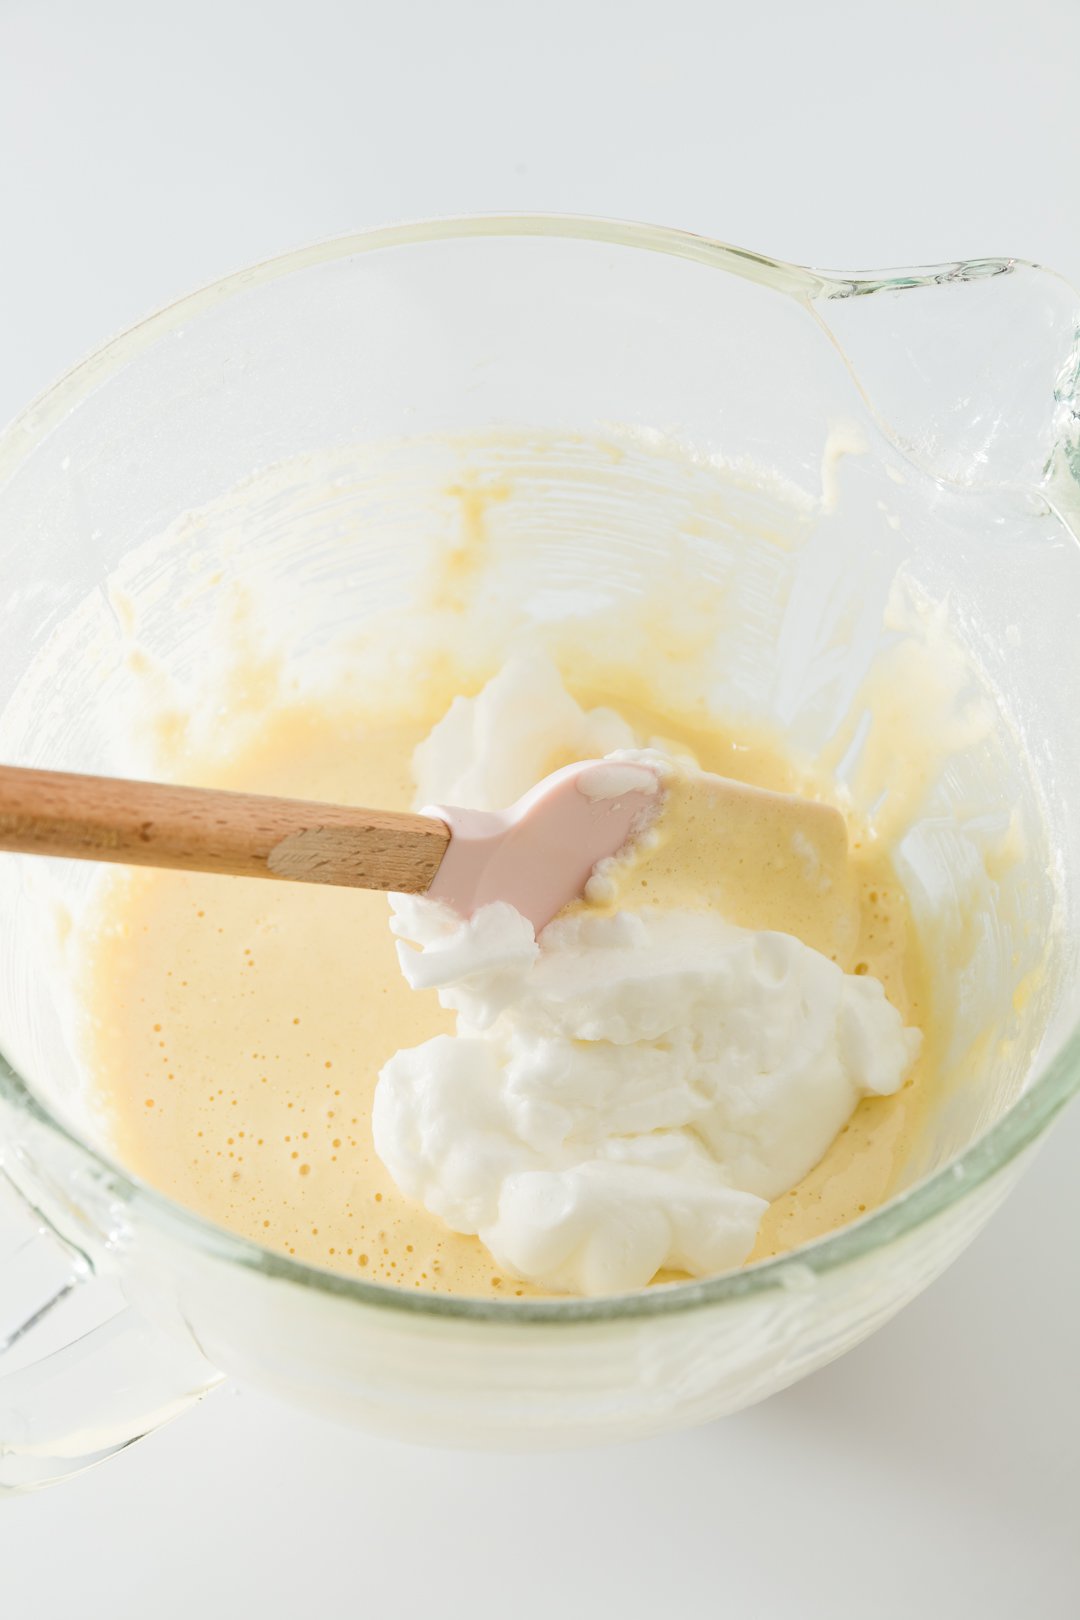
- Fold in – When a recipe says to fold in ingredients, carefully dump the ingredients on top of your batter. Then, reach your spatula under the batter and fold it gently over the ingredients on top. Repeat until the new ingredients are fully integrated into the batter.
Abbreviations Sometimes Used in Recipes
You may see the following abbreviations used when looking at a cupcake recipe:
- t or tsp = teaspoon
- T or tbsp = tablespoon
- C = cup
- oz = ounce
- lb = pound
How to Make Mini Cupcakes
If you’re interested in making minis, I have a whole tutorial on how to make mini cupcakes. You’ll need some different supplies, techniques, and ingredient amounts, so be sure to check that page out if you’re downsizing your desserts.
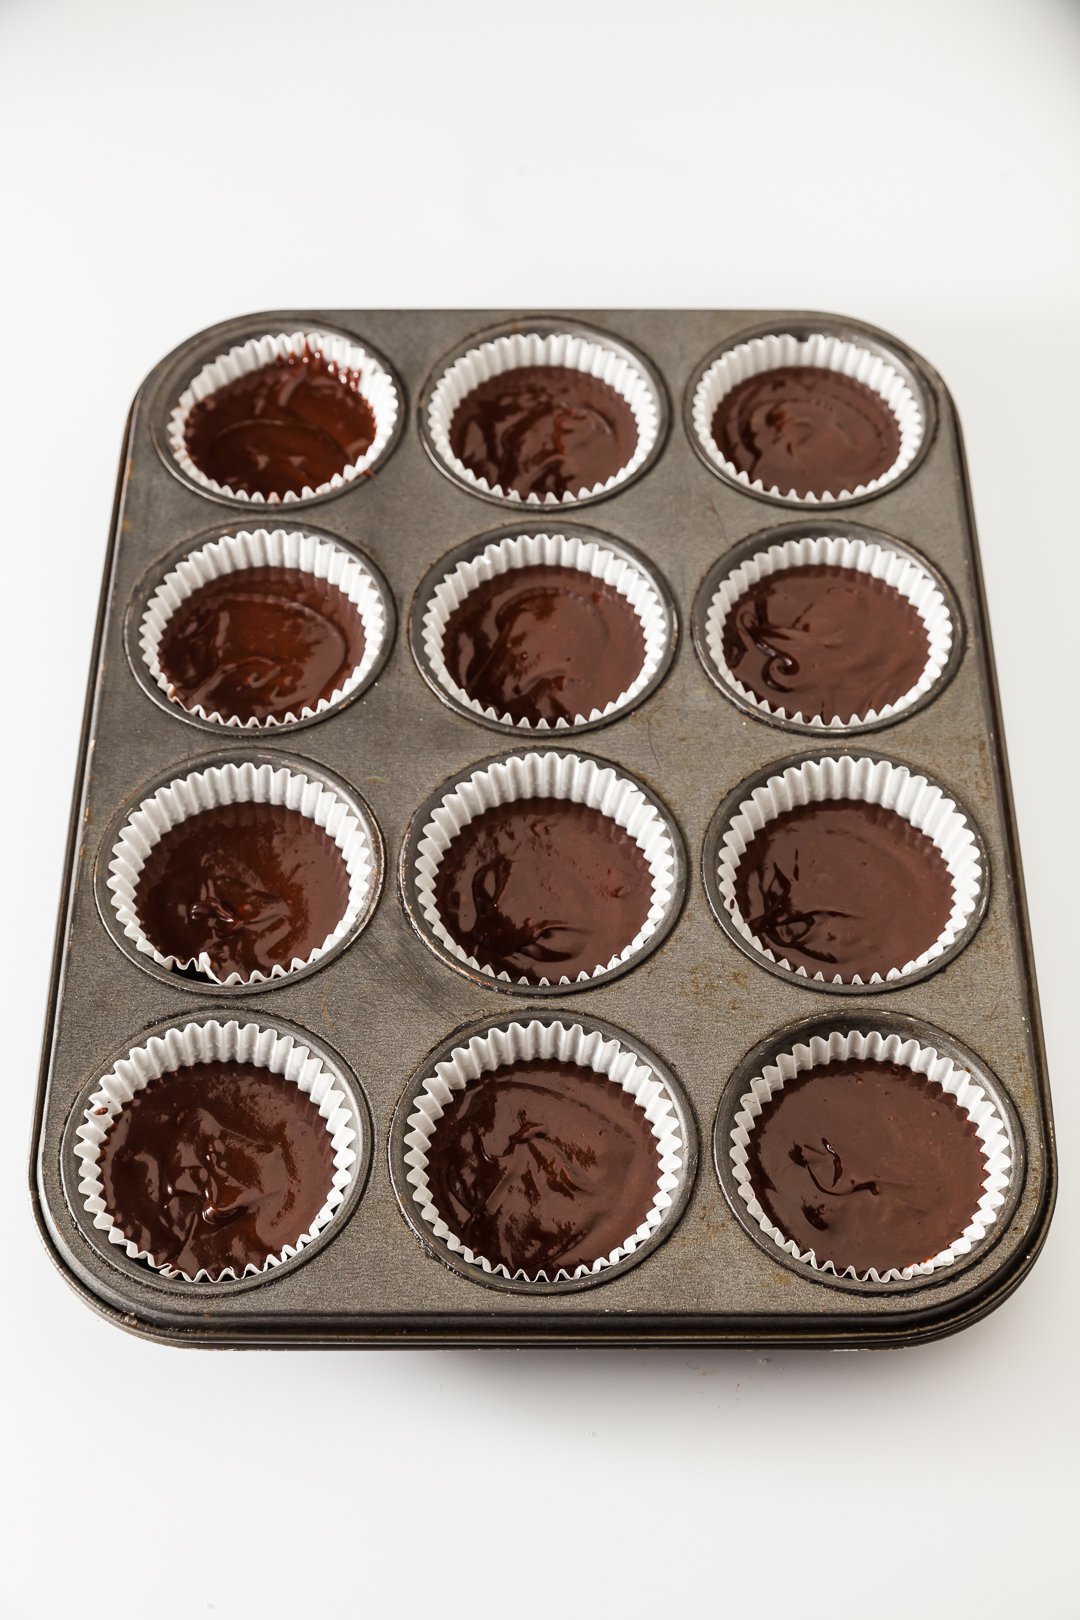
How to Fill Cupcake Liners
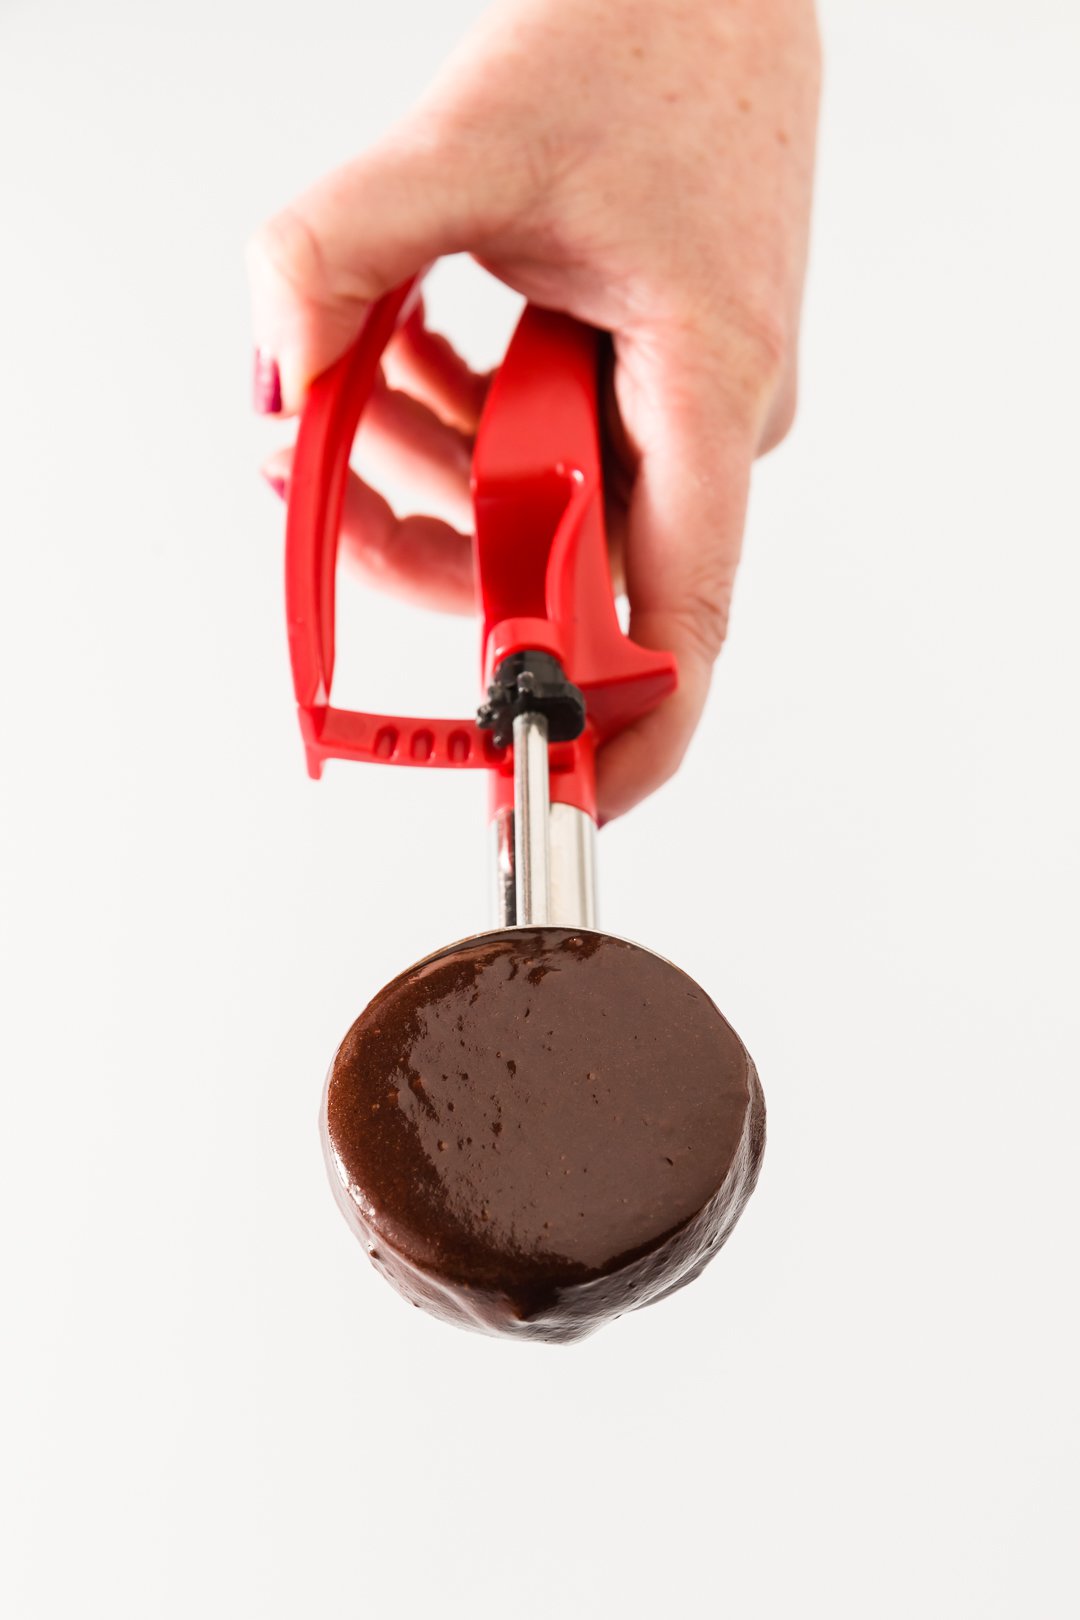
The best way to fill cupcake liners is to use an ice cream scoop (known in the food service industry as a disher). Using a disher makes dispensing batter easy, and it can also help you fill liners with consistency. You’ll need a different size disher if you’re making standard cupcakes, jumbo cupcakes, or mini cupcakes.
Which Scoop Size Should You Use to Fill Standard Cupcake Liners?
For standard cupcake liners, I use disher size 24 [paid link], which holds about 1.33 ounces of batter.
Filling this disher with batter will fill the liner about 3/4 full. If you are using a recipe that requires filling the liner 2/3 or just halfway, you can still use this disher – simply don’t fill the entire disher with batter.
Which Scoop Size Should You Use to Fill Jumbo Cupcake Liners?
For jumbo cupcake liners, I use disher size 8 [paid link], which holds about four ounces of batter.
Which Scoop Size Should You Use to Fill Mini Cupcake Liners?

For mini cupcake liners, I use disher size 50 [paid link], which holds about .65 ounces.
How High to Fill Cupcake Liners
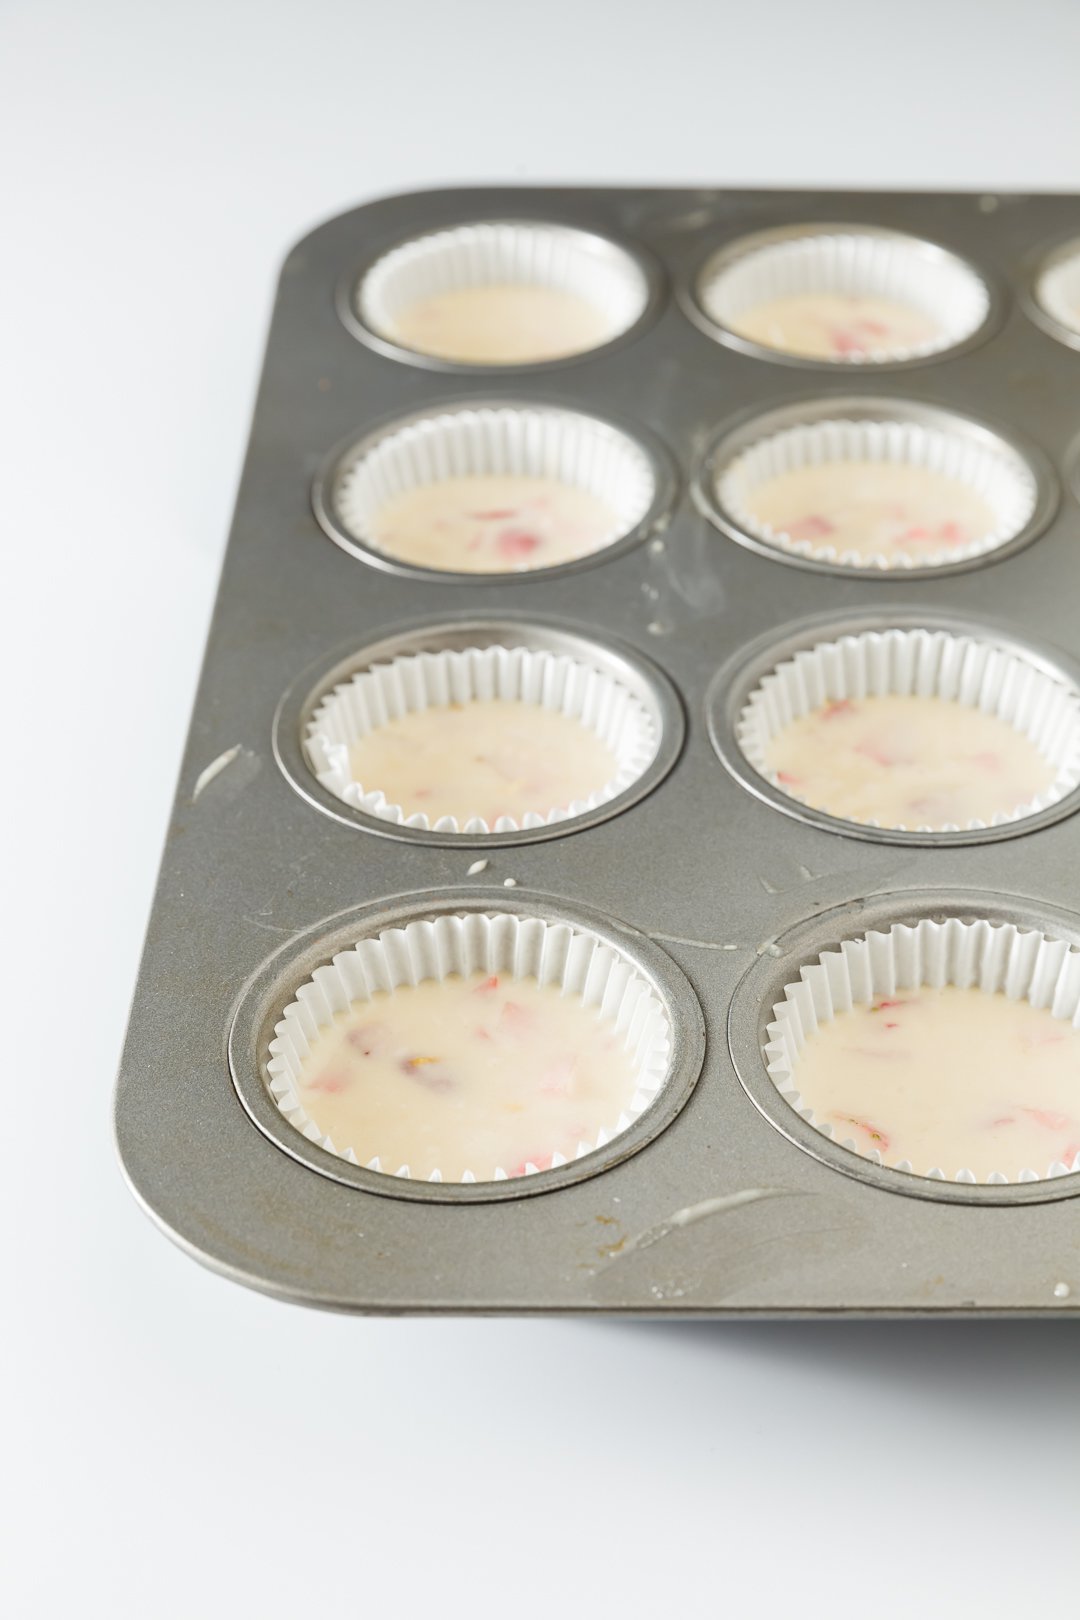
The height you should fill a cupcake liner varies by cupcake recipe. I STRONGLY recommend baking a test cupcake if you are trying a new recipe:
- Fill one cupcake liner halfway and bake according to the recipe.
- See how high the cupcake rises. Some cupcake recipes don’t rise at all, while others will double in size.
- Use the test cupcake’s height to determine whether you should fill the remaining cupcakes more or less than halfway.
As a bonus, you get to eat the test cupcake!
How to Tell When Cupcakes Are Done
There are two main ways to test cupcakes for doneness. One is the toothpick test. Stick a toothpick into a cupcake. If it comes out dry, the cupcake is done. If it is still wet, return the cupcake tin to the oven for another five minutes and test again.
The second way to tell is simply to touch a cupcake and see if it springs back.
Once the the cupcakes are done, remove them from the cupcake tins as soon as you can touch them and let them cool on a cooling rack or on your counter.
Best Cupcake Recipes
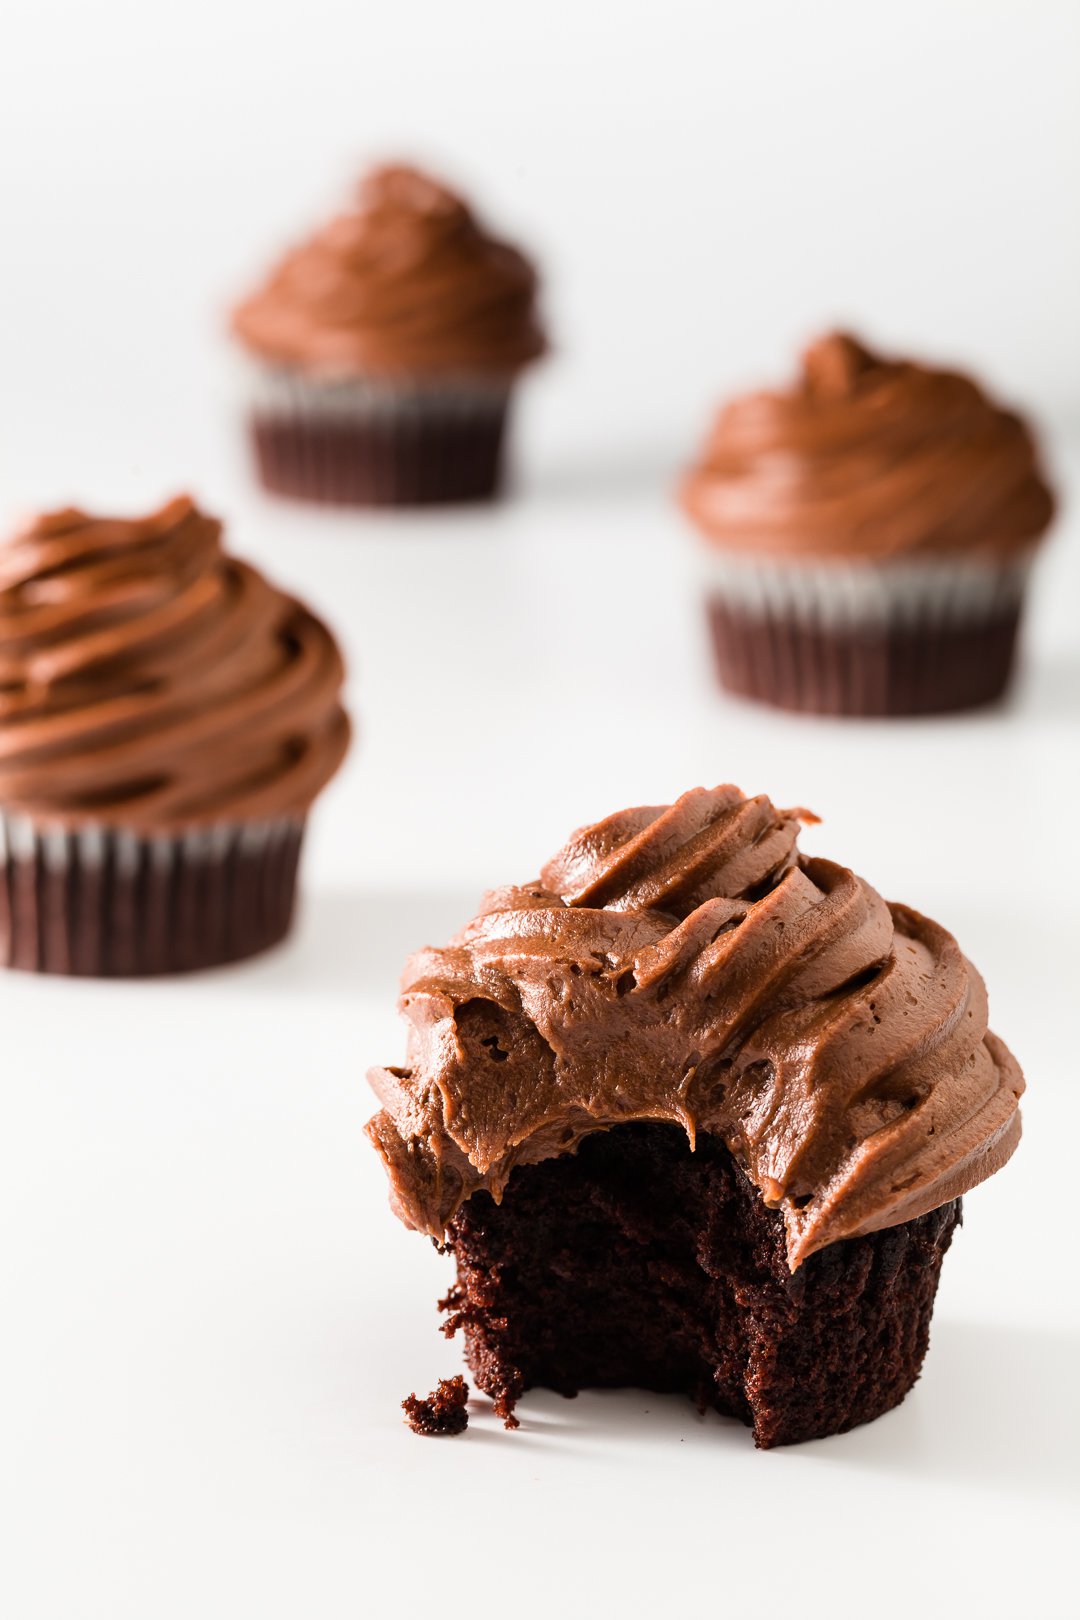
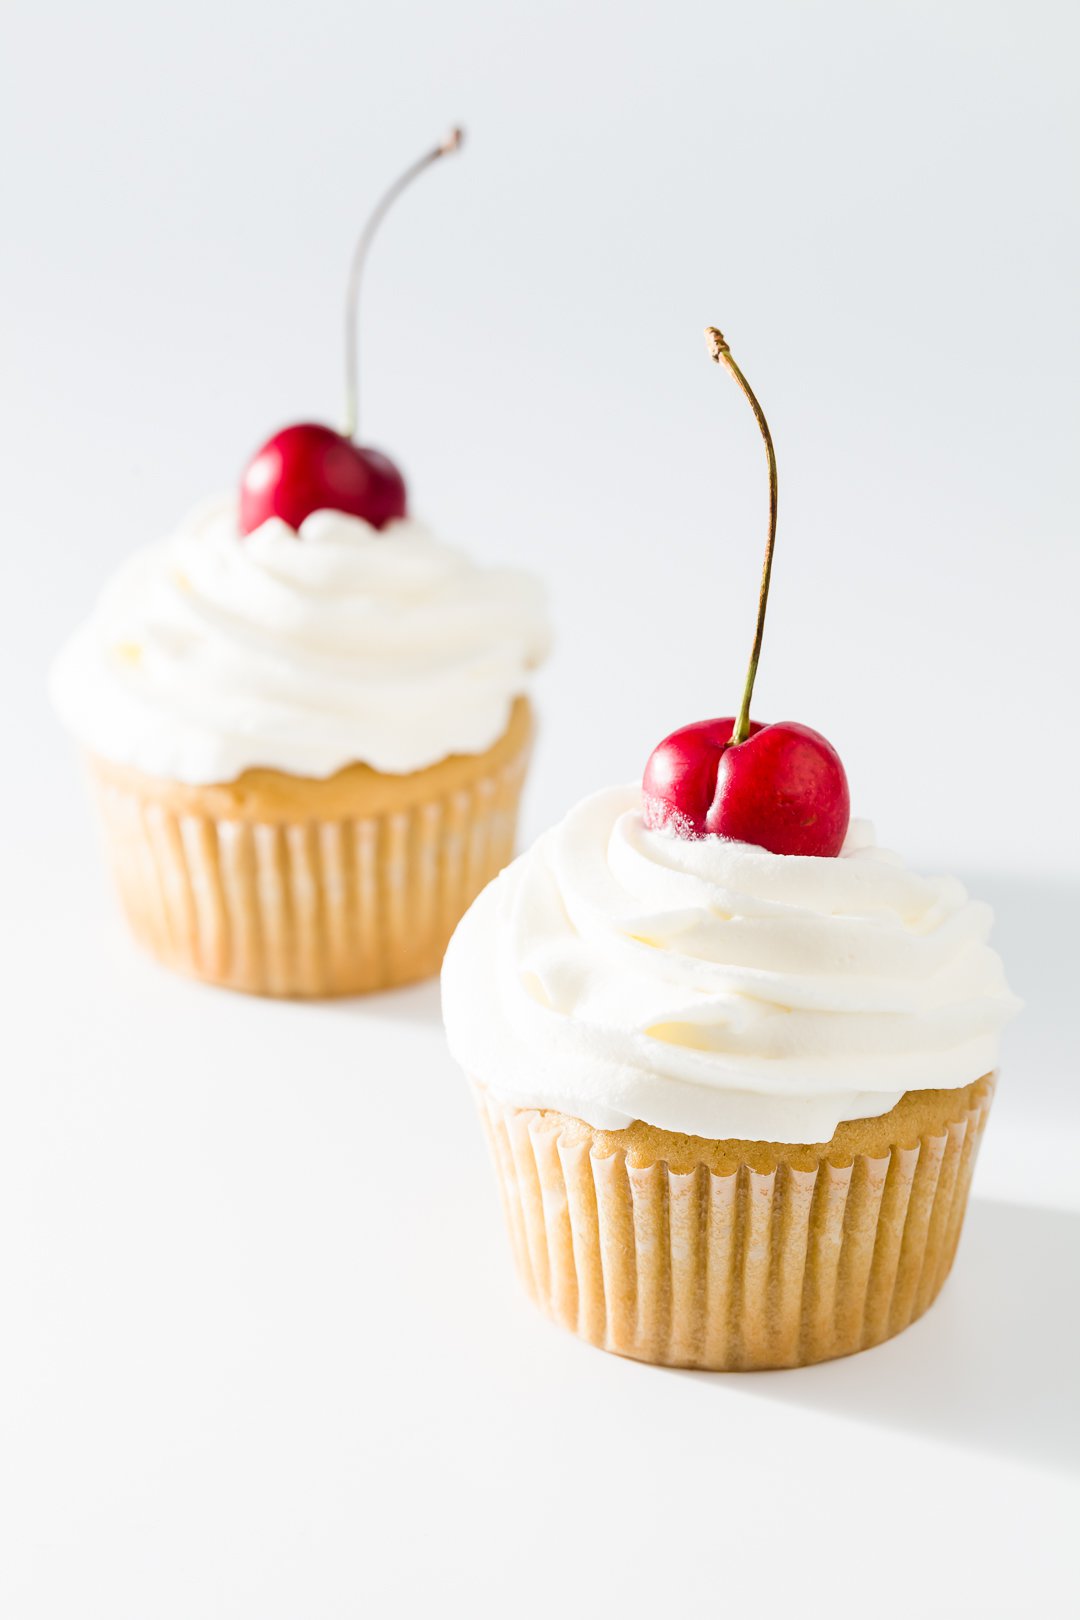
My best cupcake recipes are my vanilla cupcakes and chocolate cupcakes – both have been extensively tested and are used by bakers and bakeries all over the world. My popular birthday cupcakes are a variation of my vanilla cupcakes.
That said, the sky is the limit when in comes to cupcake flavors! Try carrot cake cupcakes, strawberry cupcakes, banana cupcakes, or angel food cupcakes for some delicious varieties. Or, bake seasonally-appropriate cupcakes off of my list of top fall cupcakes.
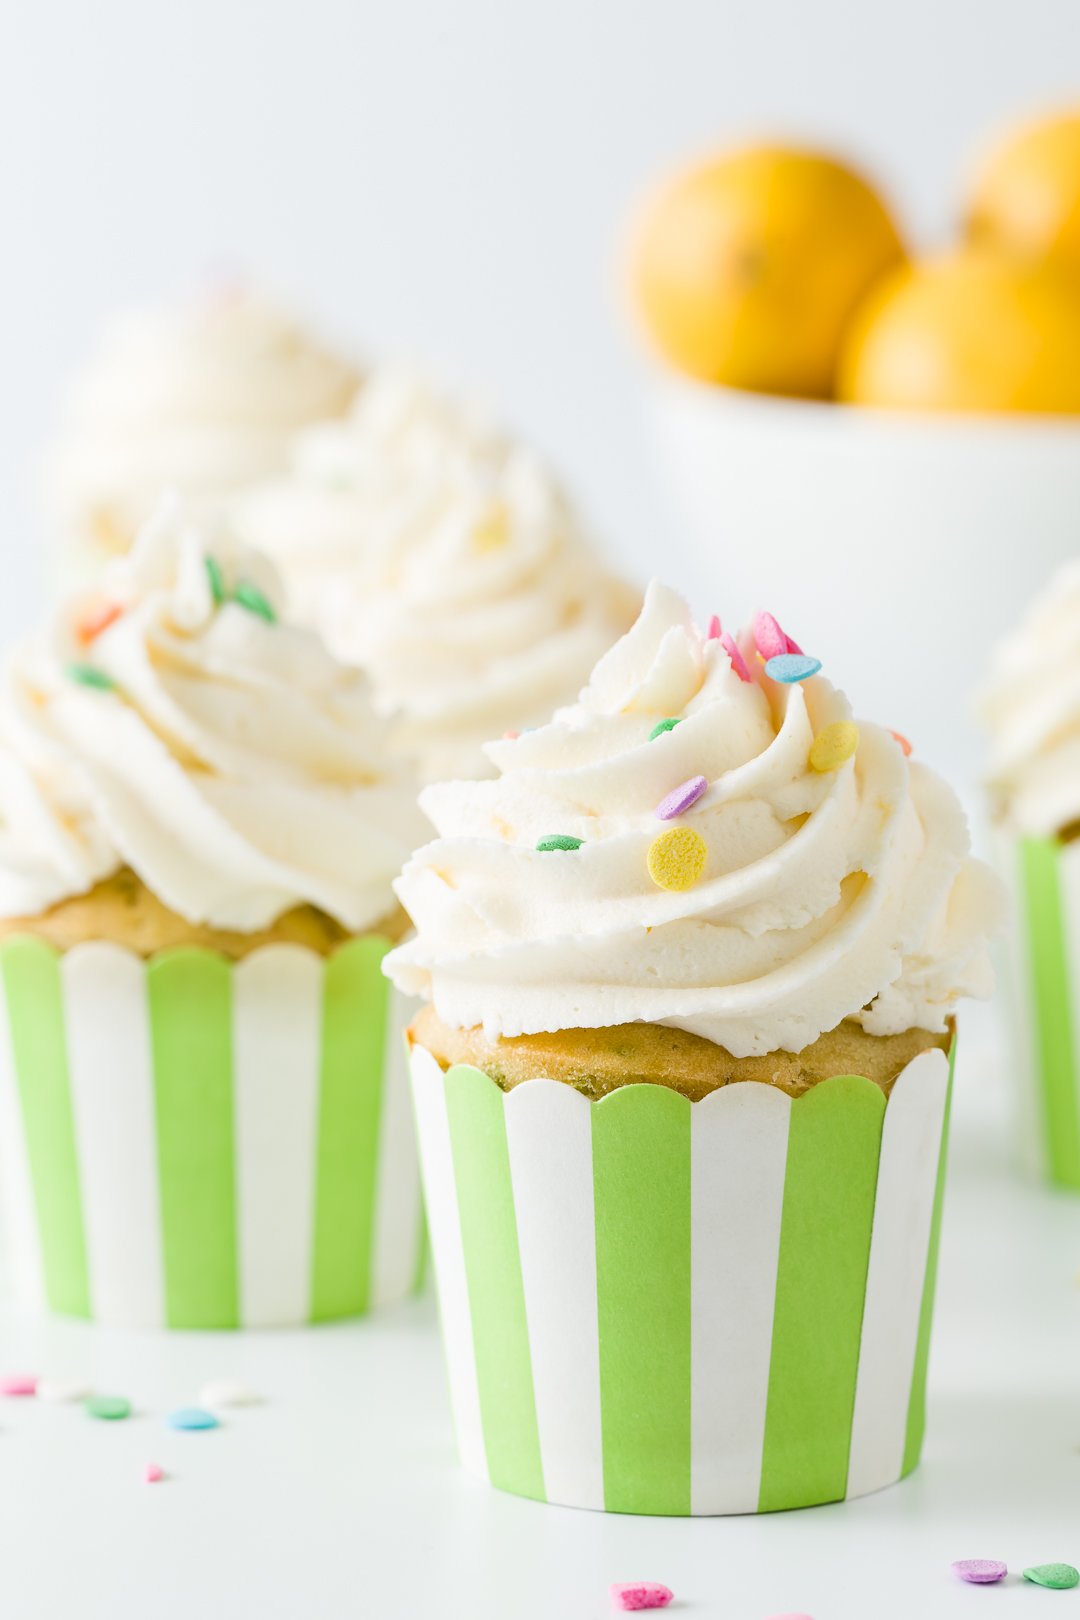
Frosting for Cupcakes
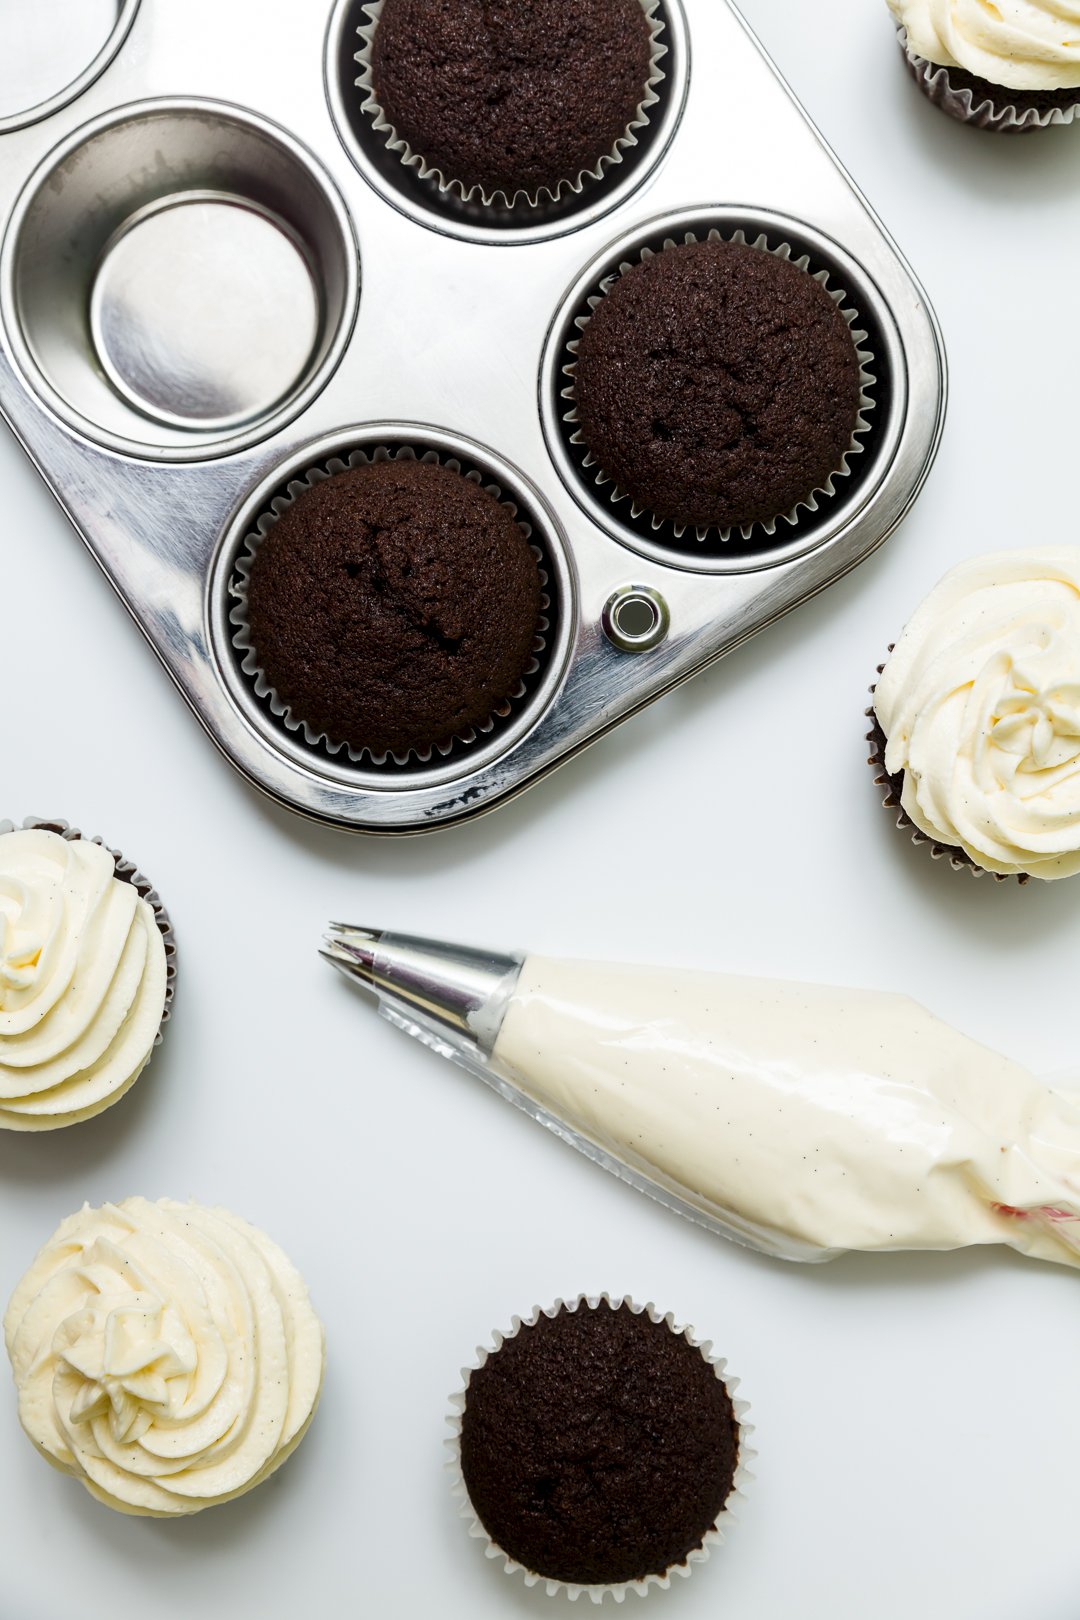
The classic way to decorate cupcakes is with a frosting swirl. (You won’t find frosting on muffins; this is one of the differences between cupcakes and muffins.)
The most common frosting flavors are vanilla frosting and chocolate frosting. In the United States, most people make American buttercream frosting. American buttercream is the easiest to make and uses just butter, powdered sugar, and flavoring.
If you like a fluffy, less buttery frosting and are willing to put in a little more effort, try a Swiss, French, or Italian buttercream frosting.
It is also totally acceptable to top cupcakes with ganache (a chocolate glaze) or whipped cream.
Another decorating technique from the UK is to turn cupcakes into fairy cakes (also called butterfly cakes) – making the cupcakes look like they have sprouted wings.
Cupcake Topping Ideas
You can make cute cupcakes without piping, though! You can always spread frosting on a cupcake and then use a cute topping to make it look nice. Try decorating with:
- sprinkles
- berries
- nuts
- chocolate chips
- big pieces of candy
- small cookies
- melon balls
Filled Cupcakes
To get even more flavor combinations with your cupcakes, try adding some fillings like I do in my German chocolate cupcakes. I love filling with chantilly cream and chocolate ganache. See my post on filled cupcakes for details on how to fill cupcakes on more cupcake filling ideas.
How Long Do Cupcakes Last?
Cupcakes are usually all eaten before they go bad! But, if you can’t eat all of them in one sitting, cupcakes last about 3 days on the counter, up to a week in the refrigerator, and several months in the freezer.
If your cupcakes need to last more than 3 days, freeze them.
How to Store Cupcakes
Storing Cupcakes at Room Temperature or in the Refrigerator
After cupcakes have cooled, I keep them in large, airtight, Tupperware-style containers.
For food safety reasons, cupcakes frosted with whipped cream, buttercream, cream cheese, or ganache frostings should be stored in the refrigerator and brought to room temperature before serving. I always keep whipped cream and ganache in the fridge, but I often keep my buttercream- and cream cheese-frosted cupcakes in a sealed container on the counter – and I haven’t gotten sick yet; do this at your own risk!
Always bring refrigerated cupcakes to room temperature before eating.
Storing Cupcakes in the Freezer
While I don’t often freeze cupcakes, I’ve had great success when I’ve done so. The cupcakes that emerge from the freezer aren’t quite as good as they were fresh, but they are pretty close.
To freeze cupcakes, wait for them to cool and transfer to an airtight container. Then, put the entire container in your freezer.
Many types of frosting can be frozen right on the cupcakes, so it’s fine to frost your cupcakes first before freezing. However, if you are freezing cupcakes with whipped cream frosting, do not frost them until after removing from the freezer.
Always bring frozen cupcakes to room temperature before eating.
How to Ship Cupcakes
It is notoriously hard to ship cupcakes. When trying to ship cupcakes, there is that pesky problem of keeping the cupcakes from turning upside-down and the gift arriving as a frosted box rather than frosted cupcakes.
So how do you ship cupcakes?
Shipping Frosted Cupcakes
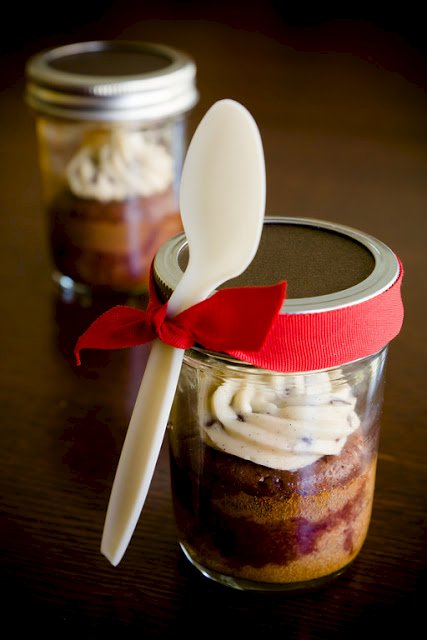
One way to ship frosted cupcakes is to use half pint mason jars [paid link] as your cups! The mason jars are oven safe – you can bake your cupcakes directly in the jars.
To ship cupcakes in jars:
- Put 1/4 cup of batter in the mason jar – leaving room for plenty of frosting – and place the jar directly onto your oven rack. Do not put the lids on your mason jars! Bake just as you would your regular cupcakes.
- When the cupcakes are out of the oven, wait for them to cool completely and then frost them with a buttercream frosting.
- Seal the jars and freeze them.
- Once they are frozen solid, decorate the jars however you like (ribbons and gift tags work well), pack them well in an insulated container (broken glass is worse than smooshed frosting), and ship them via next day air. If you are shipping them somewhere warm, you might also want to include an ice pack in the box to ensure that they stay cool during their travels.
Shipping Unfrosted Cupcakes
Since the most common issue with shipping cupcakes is frosting ending up everywhere, you can deconstruct cupcakes for shipping, sending them unfrosted:
- Make cupcake batter and bake according to the recipe of your choice, but leave the finished cupcakes unfrosted.
- When the cupcakes are out of the oven, wait for them to cool completely and freeze them in an airtight container.
- Make a buttercream frosting, put into an airtight container (one that you won’t mind sending to your destination), and freeze.
- Once everything is completely frozen, pack the frozen cupcakes and the container of frosting into an insulated container and ship the container via next day air. If you are shipping them somewhere warm, you might also want to include an ice pack in the box to ensure that they stay cool during their travels.
Instruct your recipient to give your frosting a quick stir before piping or spreading it. To make this gift extra special, include a piping bag, tip, and sprinkles along with your note!
How to Convert a Cake Recipe to a Cupcake Recipe
You don’t need a cupcake recipe to bake cupcakes. In fact, most cake recipes can be easily converted to cupcake recipes.
Typically, cupcakes bake for 20 minutes at 350 degrees Fahrenheit. However, if you are not sure, you should monitor your bake closely and/or try making a test cupcake:
- Make the cake batter as directed in the recipe.
- Fill one cupcake liner halfway with the batter.
- Bake at the temperature called for in the cake recipe, but check for doneness starting at 20 minutes.
- If the cupcake is not done, check on it at five-minute intervals until it is fully baked. Note how long baking took.
See how high the cupcake rose. Some recipes don’t rise at all, while others will double in size. - Use the cupcake’s height to determine whether you should fill the remaining cupcake liners more or less than halfway.
- Bake the remainder of the cupcakes for the time that you determined in steps 3 and 4. You may need to add a few minutes to account for a full cupcake tin.
How to Bake Cupcakes for a Large Event
Since I have baked cupcakes for several weddings, I am often asked for advice on how to bake large quantities of cupcakes from a home kitchen. While there are many ways to do it, I suggest:
- 4 days before the event, shop. Plan for 1.5 cupcakes per guest.
- 3 days before the event, bake. Bake half of the cupcakes and store them in bakery boxes with cupcake inserts. Do not frost them yet. (I use two mixers to speed up the process of making so many cupcakes; if you only have one, borrow one from a friend).
- 2 days before the event, bake. Bake the second half of the cupcakes and store them in bakery boxes. Do not frost this batch, either.
- 1 day before the event, decorate. Frost and decorate all of the cupcakes, preferably as late in the day as possible.
- The day of the event, transport. VERY carefully transport the cupcakes to the event site. If the event is in the summer (or if you live somewhere where it is always hot), be sure to cool the vehicle you’re transporting the cupcakes in before loading them up so the frosting does not melt.
If you are baking for an evening event, you can start the process one day later and frost the cupcakes on the day of the event.
Vanilla Cupcake Recipe
To get you started on your cupcake journey, try my very best cupcake recipe! This recipe makes a classic vanilla cupcake and has been made by beginner cupcake makers around the world. You’ve got this!
Troubleshooting Cupcake Problems
Cupcakes Are Pulling Away from Their Liners
The most asked question I’m asked is, “How do I prevent cupcakes from pulling away from their liners?” Here are some things that I have found that can cause this to happen and some suggestions to help prevent it:
- This may be happening because of the type of liner that you are using. While I love the idea of using bleach-free liners [paid link], I’ve found that those pull apart from the cupcakes more than other liners. I’ve been very happy with the liners from Fancy Flours.
- Cupcakes that are very moist are more likely to pull away. Cupcakes that contain fruit are major culprits; cutting fruit into smaller pieces so that there are no big, wet fruity chunks pressed against the liners may help with this problem.
- What you do with the cupcake after it comes out of the oven can also affect pulling away. As soon as the cupcakes come out of the oven, take them out of the baking tins and cool on the counter or using a cooling rack. If you let cupcakes sit in the tins, steam builds up and you get that moisture problem I just mentioned.
- I’ve also heard that baking at an incorrect oven temperature can cause problems. I have no personal experience with this, but do make sure that your oven is correctly calibrated [paid link].
If your cupcakes pull away from their liners, the best thing to do is to cover them up with decorative cupcake wrappers [paid link]. That way, no one will know!
Cupcakes Sink After Baking
Why do cupcakes sink? Unfortunately, answering that question and keeping cupcakes from collapsing is not straightforward. Based on my research into the subject and my personal experience, there are many reasons that cupcakes sink:
- Your liners could be overfilled. If your cupcakes sink instead of doming, the recipe may be at fault. With some recipes, the cupcakes rise and then collapse in the center because the cake can’t hold up its own weight. To correct for this, you simply need to fill the liners less. If you are not sure how high to fill the liners, look elsewhere in this post to learn about filling cupcake liners.
- Your oven temperature could be off. Buy an oven thermometer [paid link] and check to make sure that you are baking at the correct temperature.
- You are rushing the baking process. I know it’s hard to not peek at your beauties while they are baking, but try to avoid opening the oven. Every time you open the oven door, it affects the oven temperature – which affects the end result of your baked goods.
- You overmixed the batter. Unless the recipe states otherwise, mix only until the ingredients are just combined. In addition to causing the cupcakes to sink, overmixing can also make them taste gummy.
- You are baking at a high altitude. If you live in a high-altitude location, you may need to adjust your recipe to accommodate. You can refer to the King Arthur Flour guide to high-altitude baking for more information.
- You are scared of burning the cupcakes. It’s important to not over-bake your cupcakes, but don’t under-bake them either. Make sure that your cupcakes are actually done (covered elsewhere on this page) before removing them from the oven. Cupcakes removed too soon may sink.
Don’t worry if your cupcakes have sunk. No one will ever know if you cover the indentation with frosting!
Cupcakes Didn’t Rise Properly
If your cupcakes didn’t get the perfect dome, this can be caused by a few different issues:
- Expired baking powder – Baking powder is activated by moisture. You can test it by mixing hot water with a little baking powder. If you see the baking powder react – look for bubbles – then it’s still good. Baking powder typically lasts up to a year.
- Expired baking soda – Baking soda is activated by acidity. You can test it by mixing water and vinegar and adding a little baking soda. If you see the baking soda react – causing vigorous bubbling action – then it’s still good. Baking soda typically works well up to six months after the package has been opened.
- Oven temperature – As with sunk cupcakes, your oven temperature may be off. Buy an oven thermometer [paid link], test your oven, and adjust your baking temperature if you find that it doesn’t match the expected temperature.
Cupcakes Have a Gummy Texture
If your cupcakes have a gummy texture, and you followed a tested recipe, it’s likely that you overmixed the batter.
Unless the recipe states otherwise, mix only until the ingredients are just combined. Overmixing batter can make cupcakes have a gummy texture. The same applies for most cake recipes as well; you don’t want to knead the batter and end up with long gluten strands.
Loading comments...